
Creative web design and secure payment gateways stand at the heart of today’s eCommerce world. Luckily for you, there’s a solution to work around for both these aspects.
We’ve previously talked about everything there is to know about WooCommerce payment gateways, so if you’re entirely new to this subject, feel free to give it a try first.
We also mentioned integrating WooCommerce with PayPal and Stripe, both excellent payment gateway solutions for your online store.
Today, however, we’re here talking about Square. You can achieve safe and fast payment gateway solutions with the help of a WooCommerce-Square integration.
So, let’s get straight to it, shall we?
What’s Square?
Square Inc. provides financial and digital payment services in the United States, Canada, Australia, Japan, the United Kingdom, and Ireland. Former Twitter CEO Jack Dorsey founded the company in 2009 with Jim McKelvey.
In a nutshell, the company creates ‘point-of-sale’ software that enables businesses to conduct secure, dependable online transactions. Here are three compelling reasons to integrate Square with WooCommerce:
- Fast payment gateway: Square has the most potent payment processor, so payments are quickly processed. In addition, Square accepts all major credit cards, and it’s hassle-free for businesses.
- Improve inventory management: Ecommerce businesses can use the Square for Retail app, an extension of Square’s offering, to provide your inventory team with a comprehensive view of inventory. In addition, the app creates tracks, transfers stock location data, manages purchase orders, and receives notifications. As a result, it can help businesses make faster decisions and run more smoothly.
- Smooth customer relationship management: Customer relationship management is made easier with the Square POS app, which automatically creates customer profiles while processing payments. With enough data, businesses can track customer behavior and engage with contextual intent based on purchasing history.
A little side note about Square:
Unlike its two cousins, Stripe and PayPal, which require an internet connection or wifi to process a payment, Square has a feature called Offline Mode, which enables payment processing offline, which means you don’t need to be connected to the internet.
With Offline Mode, you can accept card payments when your Internet service is temporarily down. Offline payments are automatically processed when you reconnect your device to the internet, and they may be declined if not processed within 24 hours.
Furthermore, Offline Mode will be activated whenever your Internet connection is unavailable. An orange banner will appear at the top of your Terminal’s screen, indicating that the app has automatically entered Offline Mode.
Now let’s get a bit technical, shall we?
How to Integrate Square into WooCommerce
You must have a few things in place before starting the integration process.
These include:
- Setting up a Square account.
- Downloading and activating the Square extension for WooCommerce.
Don’t worry, we’ll walk you through each of these steps.
Step #1: Set up a Square account
Here are the basic steps for creating your free Square account:
- Create your login & password;
- Choose your business type;
- Select where you’ll be conducting your business;
- Fill in remaining personal information;
- Set up deposits;
- Choose your reader.
To begin, go to Square’s signup page and click the “Get started” button. You’ll be greeted with the following:
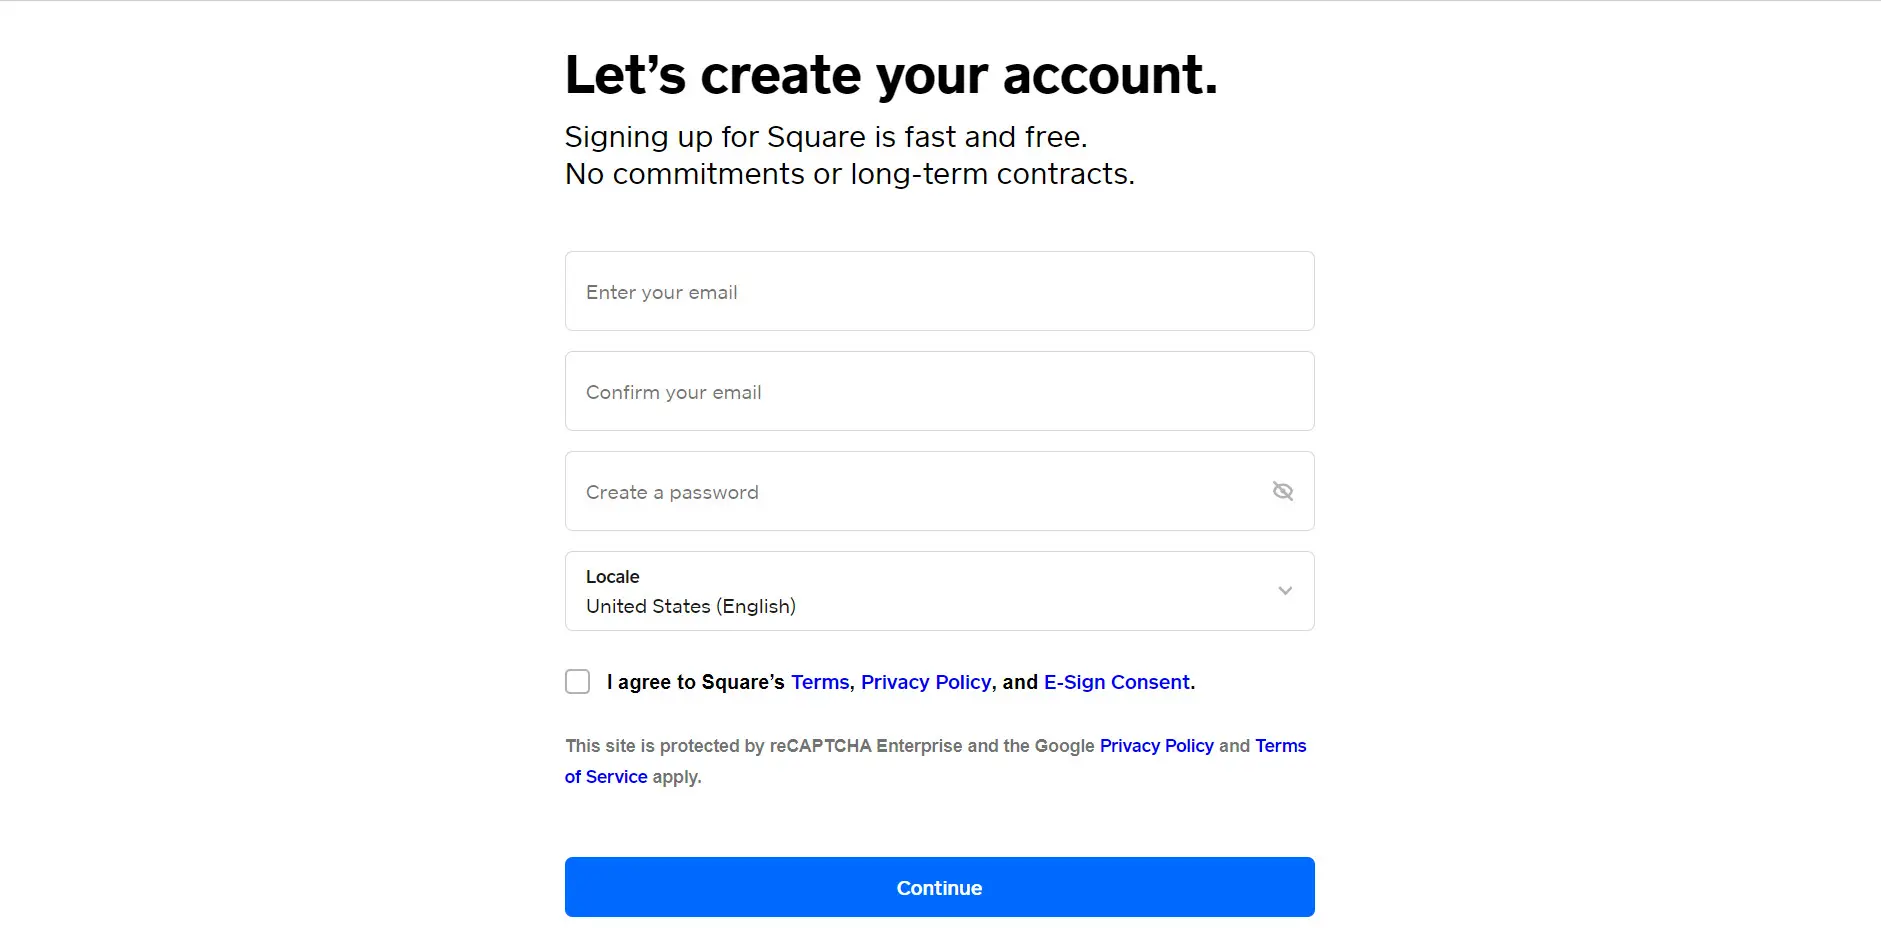
The first step requires you to enter your email address, create a password, and select your country. You must also agree to Square’s terms of service, privacy policies, and e-sign consent policy. We strongly advise you, as with any contract, to click on, read, and comprehend the details before agreeing.
Next, you need to choose your business type.
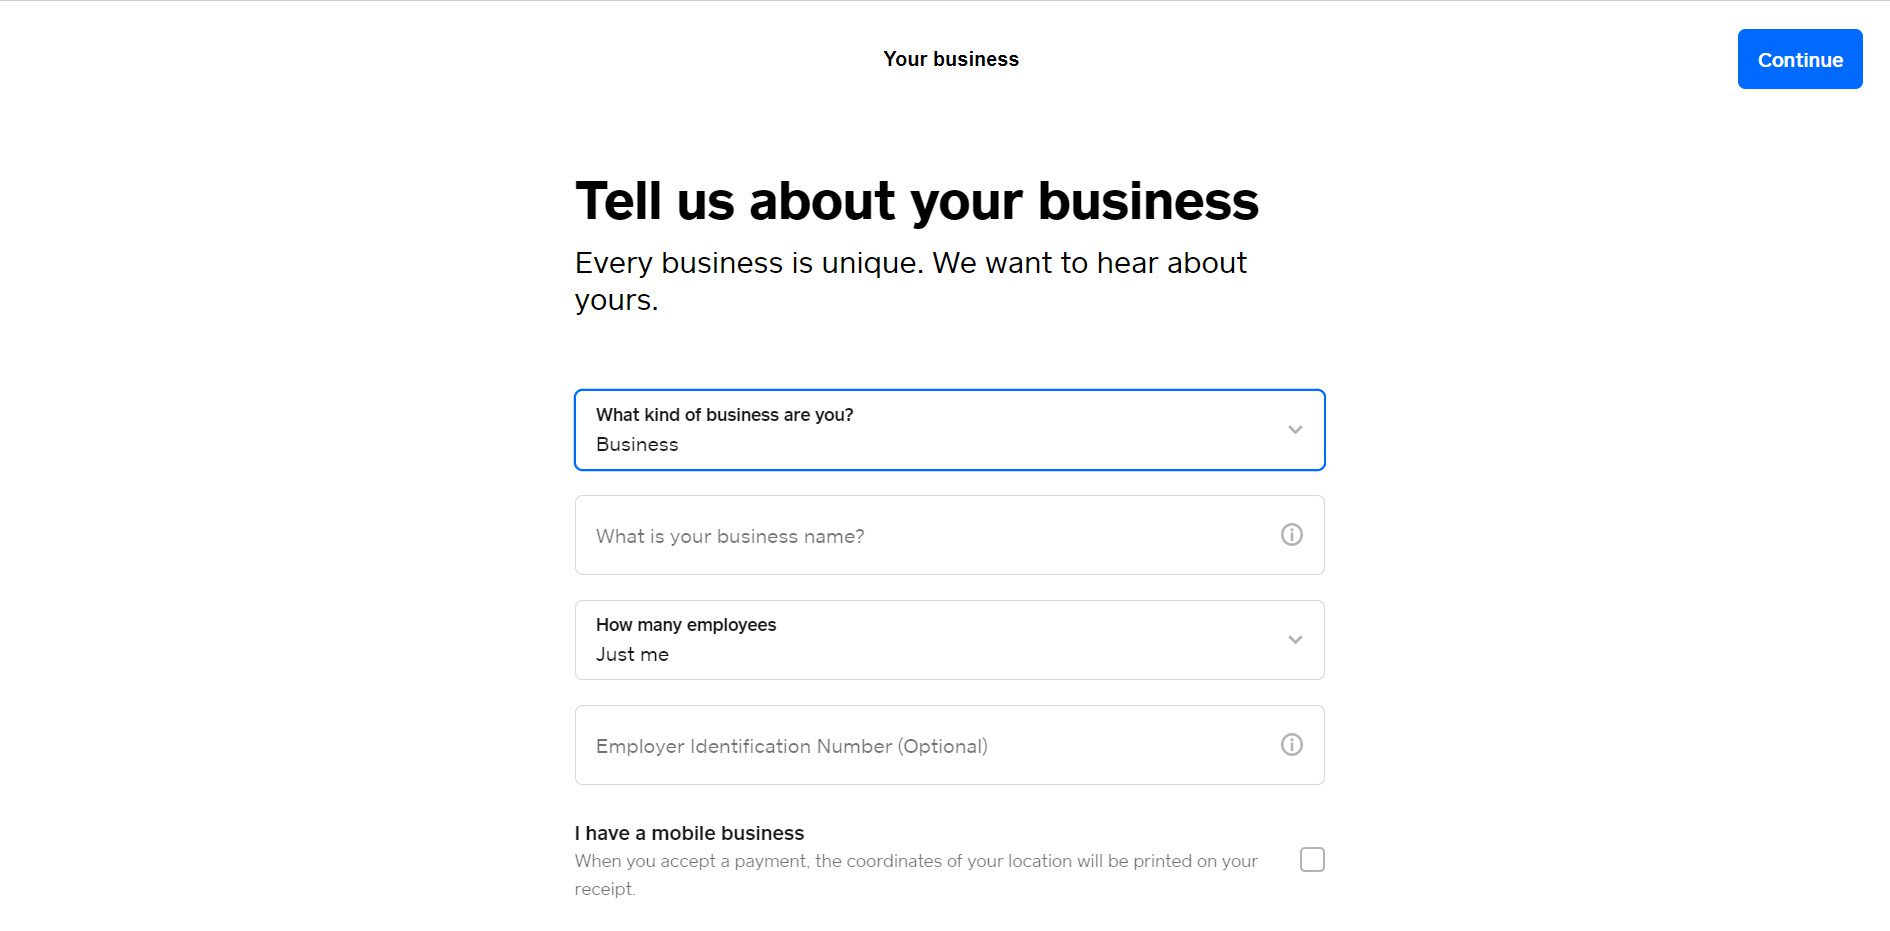
This screen is pretty simple and asks if you are an individual or if you represent a more significant business, charity, or religious organization. Enter your company name or another title that you want to appear on your receipts.
You’ll then be asked to select the type of services your company will offer and whether you’ll sell online, offline, or both.
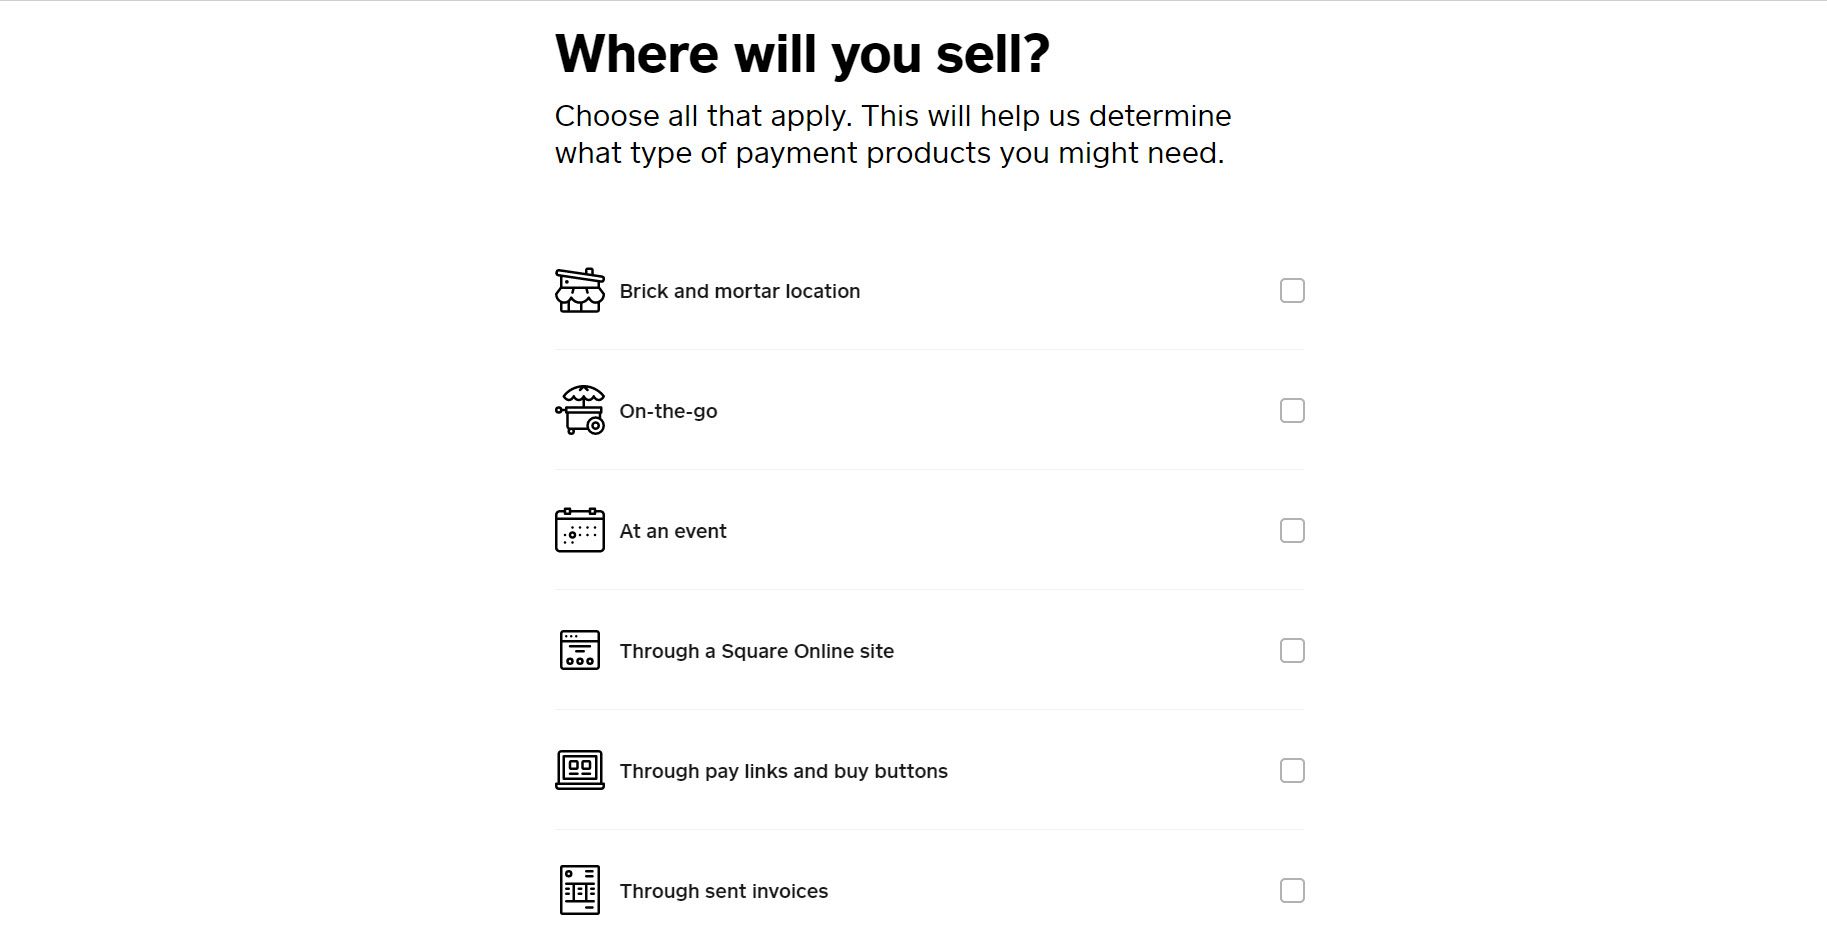
It’s time to enter the rest of the information we mentioned earlier. When you press the continue button, Square will verify your identity.
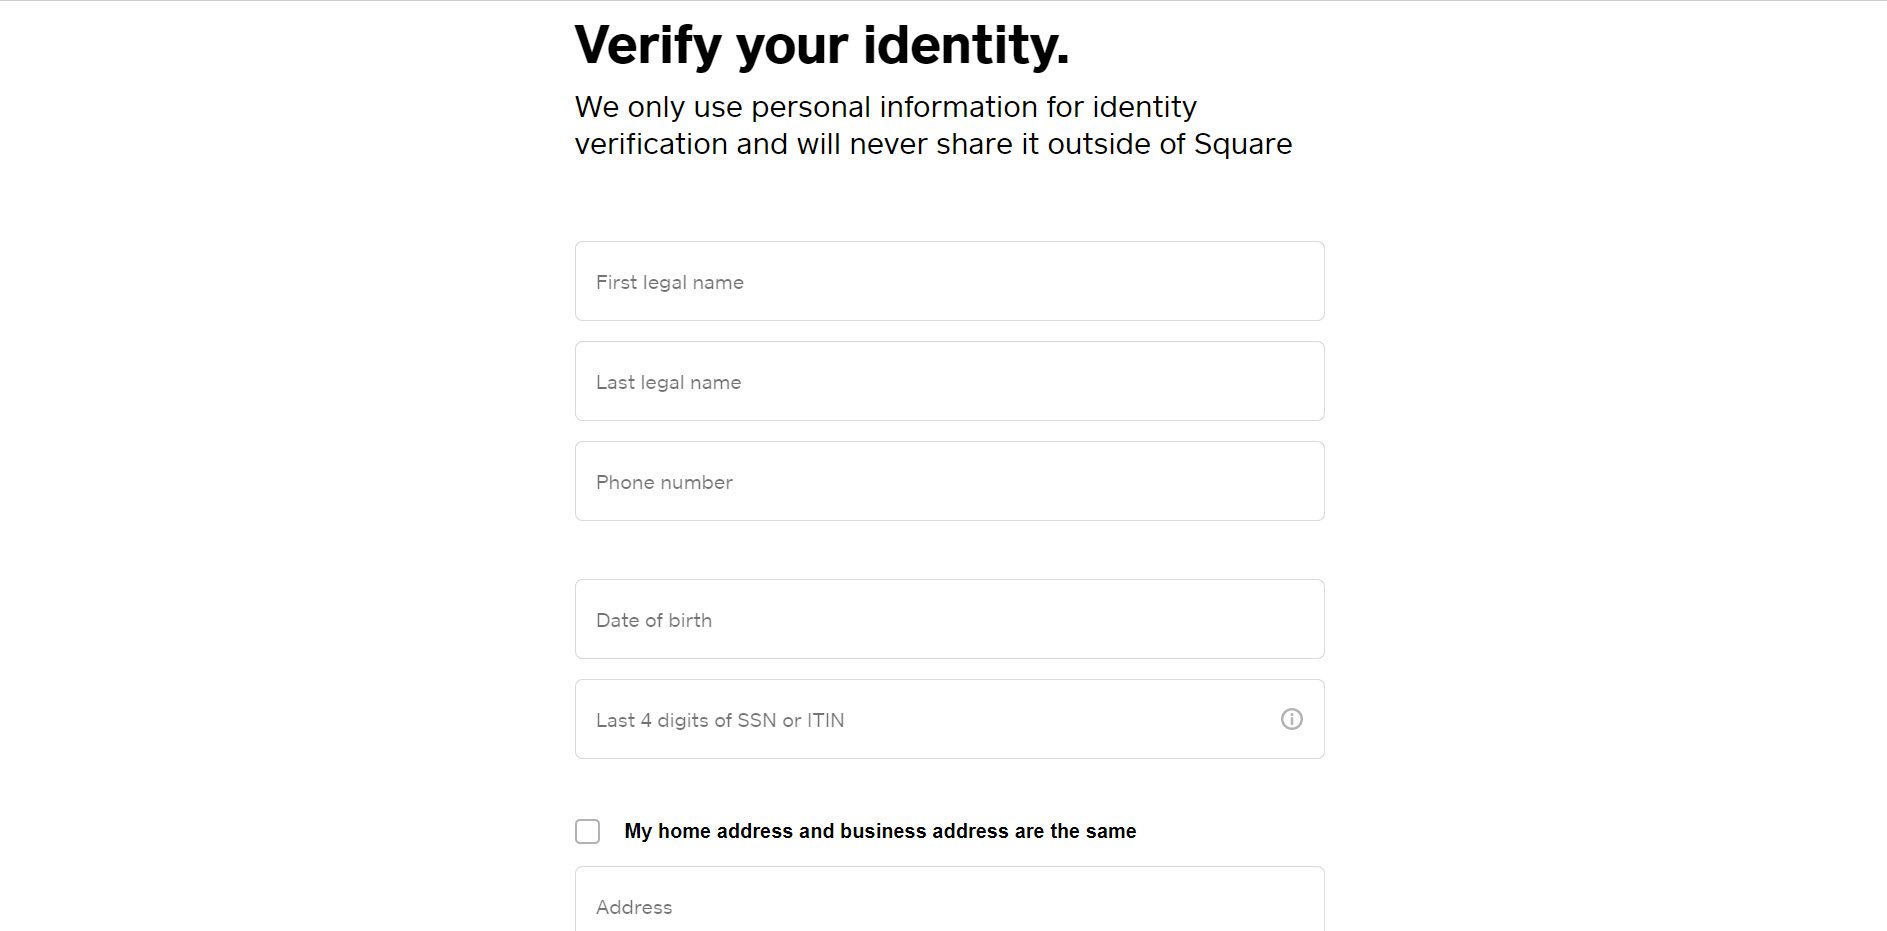
You may then be asked a follow-up question about whether your home and business addresses are identical.
Important note: Square will not run a credit check on you or your company; all it needs is the last four digits of your Social Security Number or ITIN, your legal name, street address, and phone number. Square will use this information to confirm your identity.
Next, you need to set up your deposit.
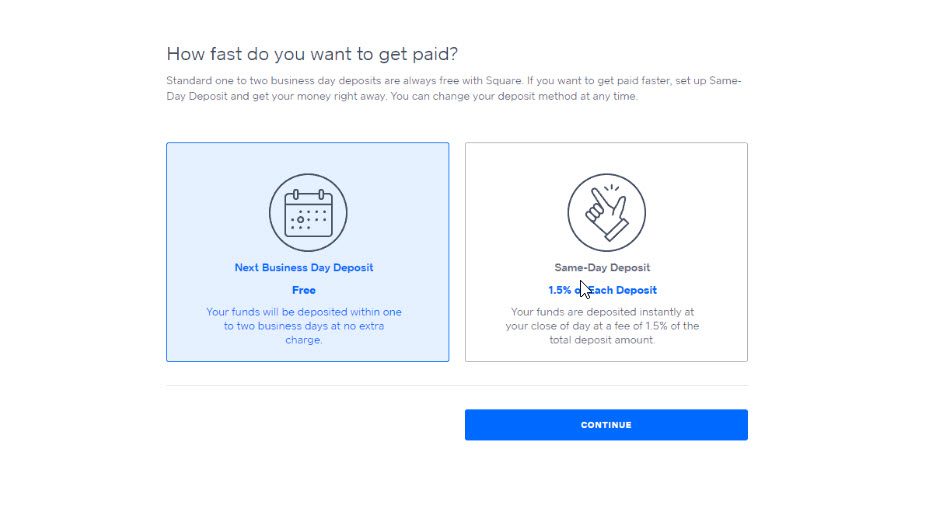
You can skip this step if you don’t want to do it immediately, but if you accept payments, you’ll need to set up deposits. Then, in a window that looks like this, enter your bank account information:
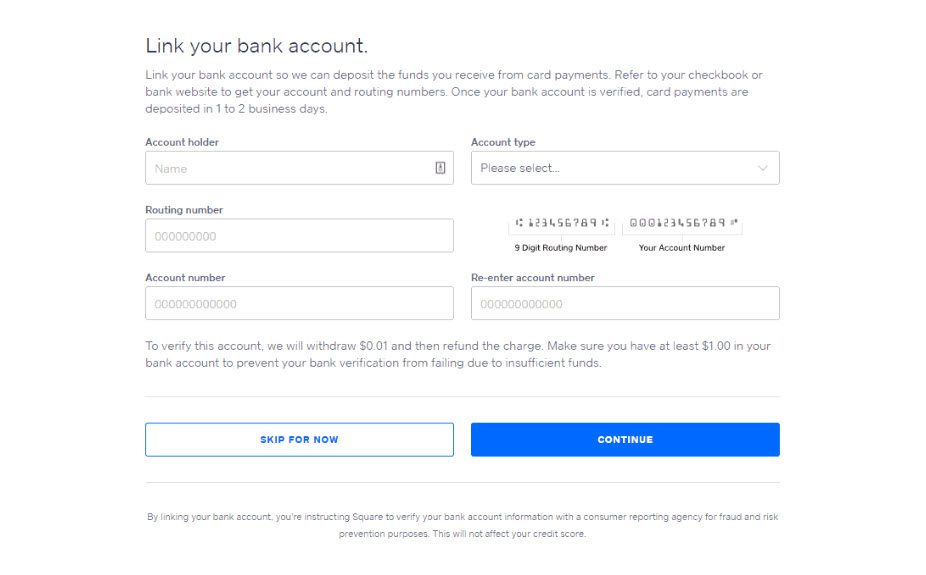
By now, Square will have verified your identity successfully. Next, you must choose a credit card reader to accept in-person payments.
Note on Compatibility: Square’s magstripe and chip card readers, as well as the Square Point of Sale (POS) app, are compatible with most Apple iOS and Android devices running the most recent software updates.
Finally, you can configure additional features. At this point, you will be presented with a menu of features such as Square for Restaurants, Square Point of Sale, and others. Each has its own signup process so we won’t go into it here. Choose the ones that interest you.
And that’s it! Now onto the next step in the Woo & Square integration process.
Step #2: Download Square for WooCommerce
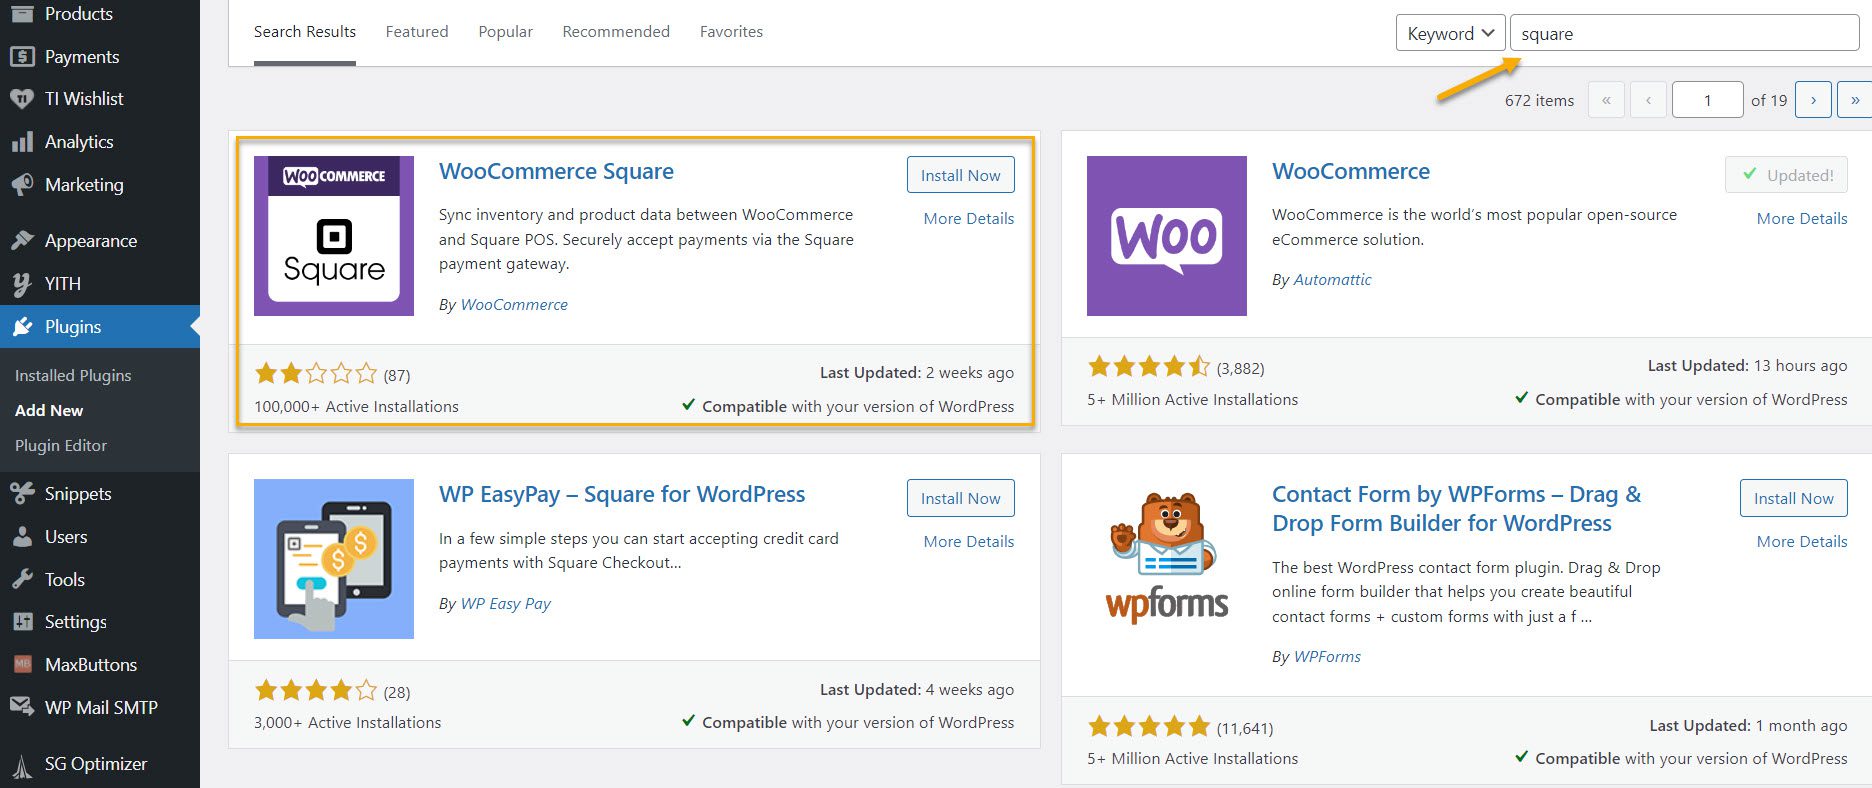
For this to happen, go to your WordPress Dashboard → Plugins → Add New, and type in the search bar the plugin’s name.
Like this:
After you install and activate WooCommerce Square, head over to WooCommerce → Settings → Payments.
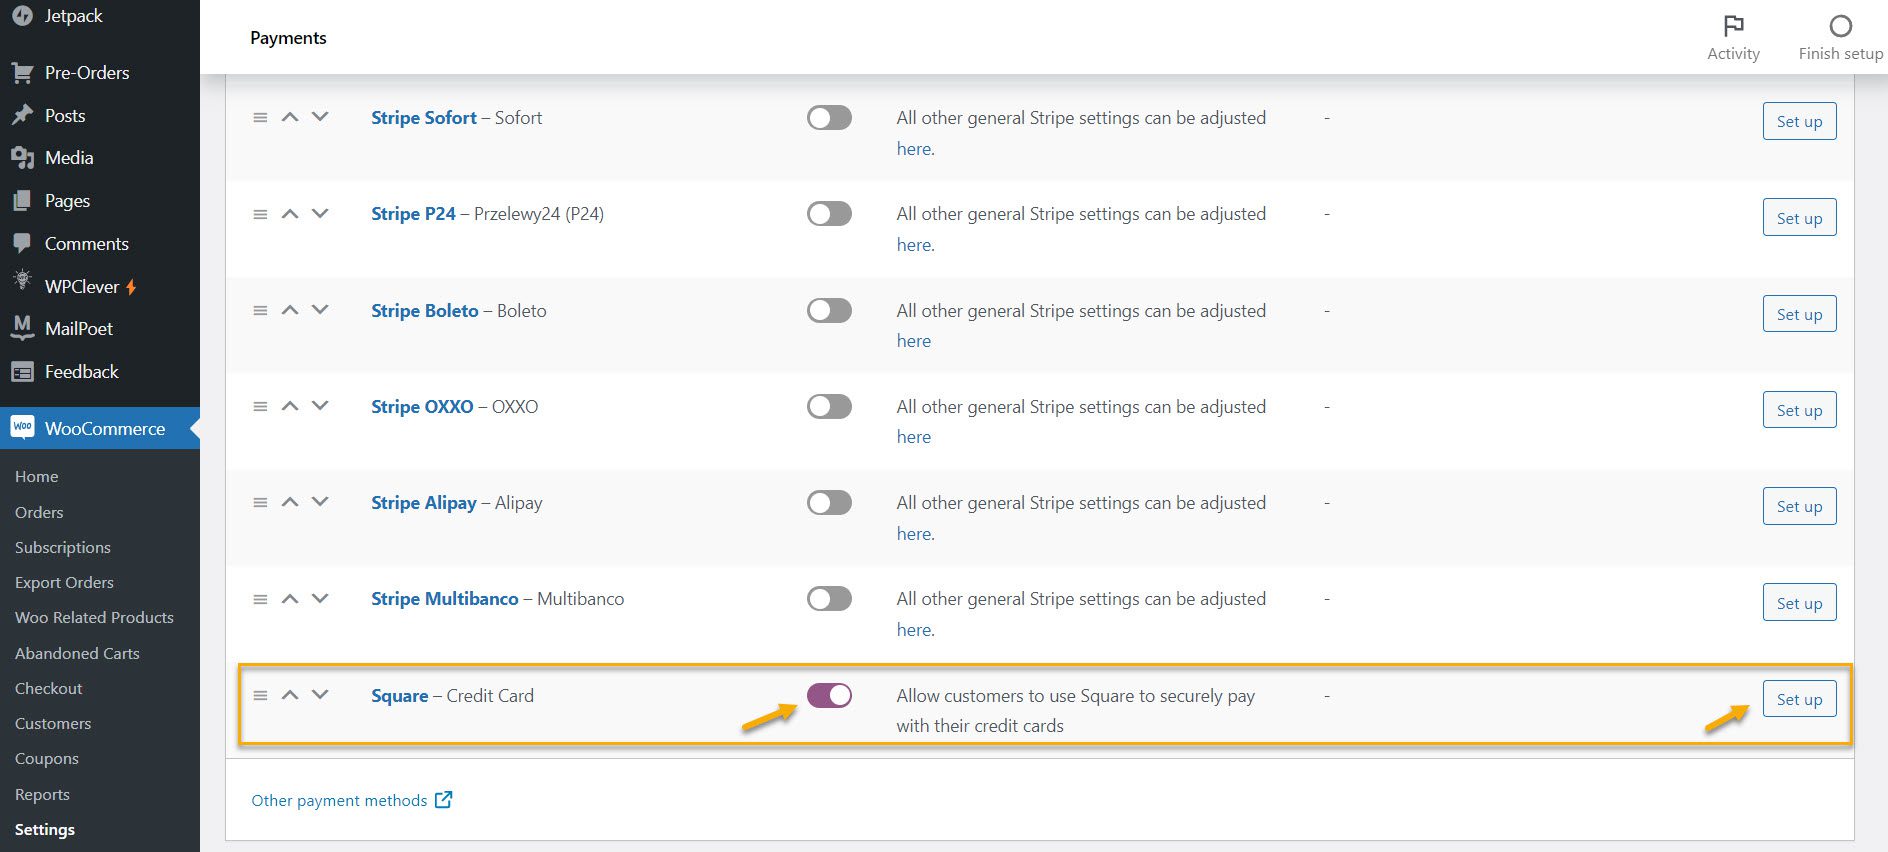
First, enable Square as your primary payment gateway, then click ‘Set up’. Now go back to the Settings page, and you will see the Square option in the navigation bar. Here you will need to authenticate your Square account with WooCommerce.
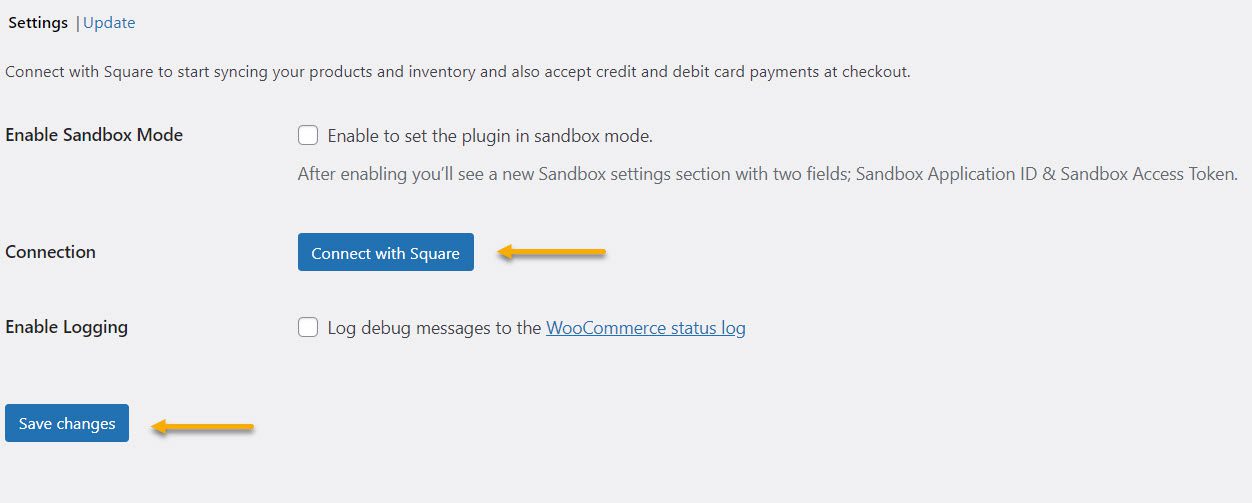
After clicking Connect with Square, you will need to sign in to your Square account and grant permissions to WooCommerce.
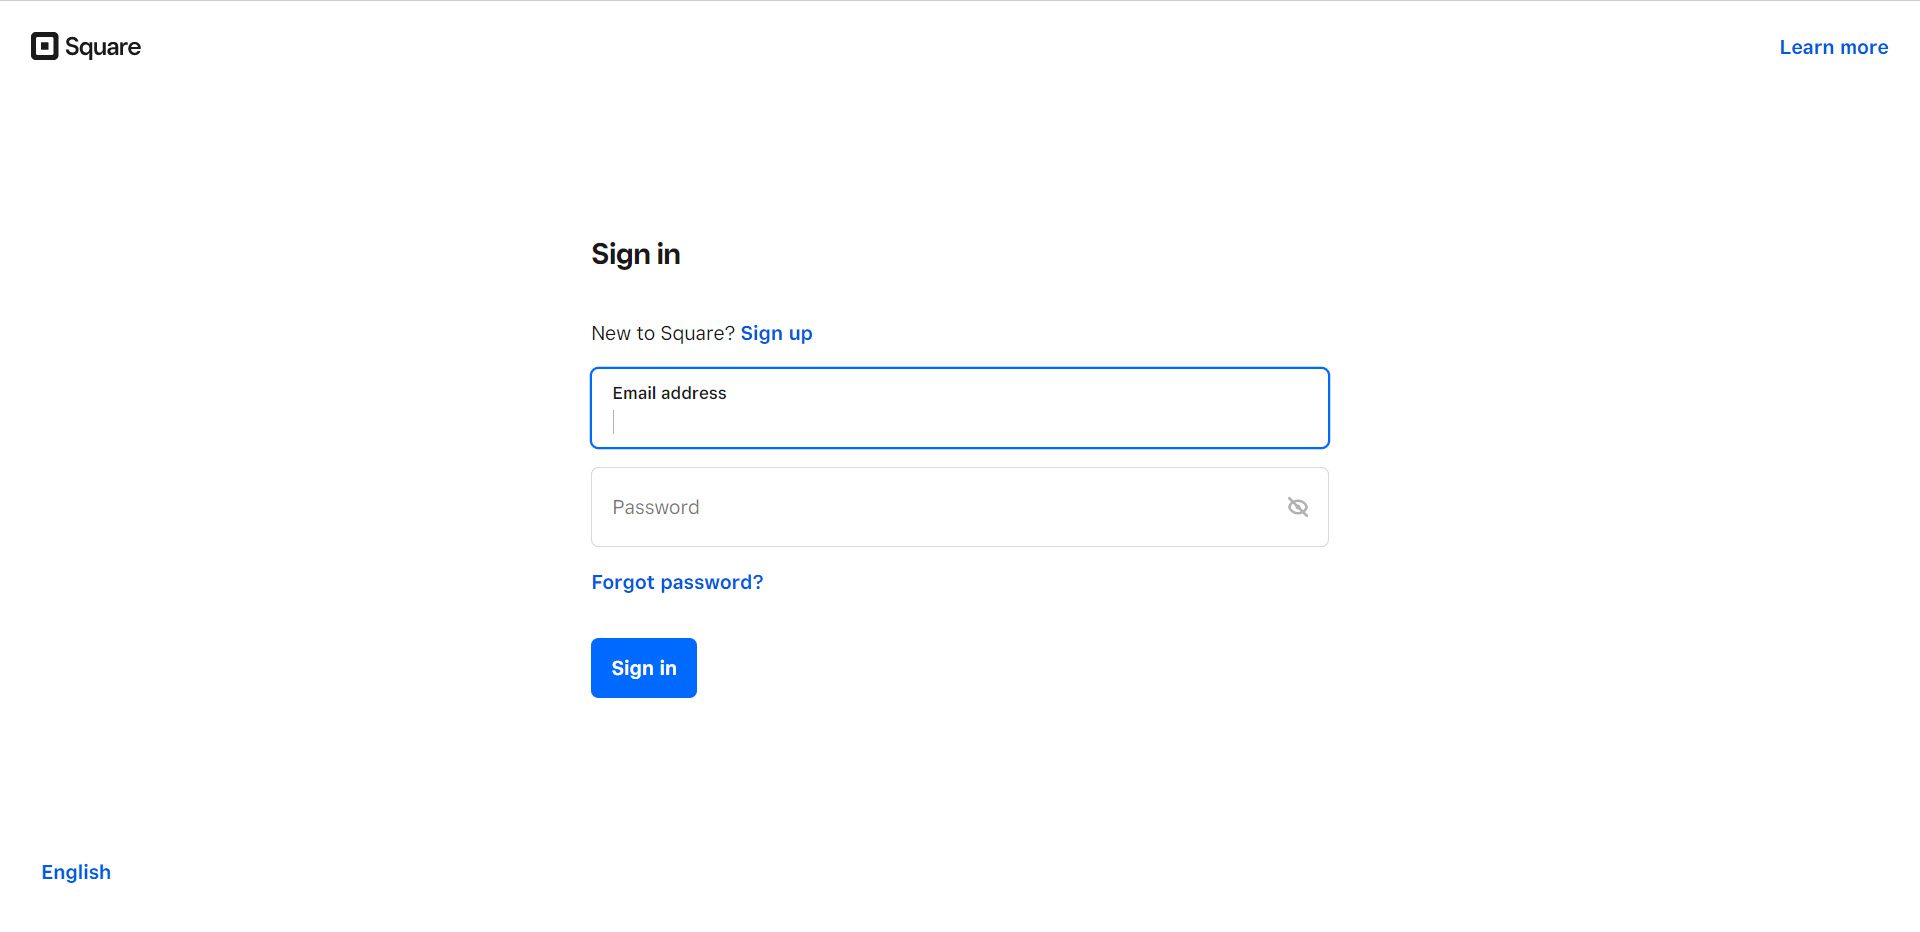
Use the email address and password that you first started with when creating your Square account.
Once you sign in successfully, Square will redirect you to your WooCommerce site, and a message will appear on your WordPress dashboard indicating that you are now connected to Square!

You must now configure Square settings in WooCommerce by selecting ‘Business location’ and ‘Product system of record.’ Checking the boxes for ‘Sync inventory’ and ‘Handle missing products.’ Then, click ‘Save Changes.’
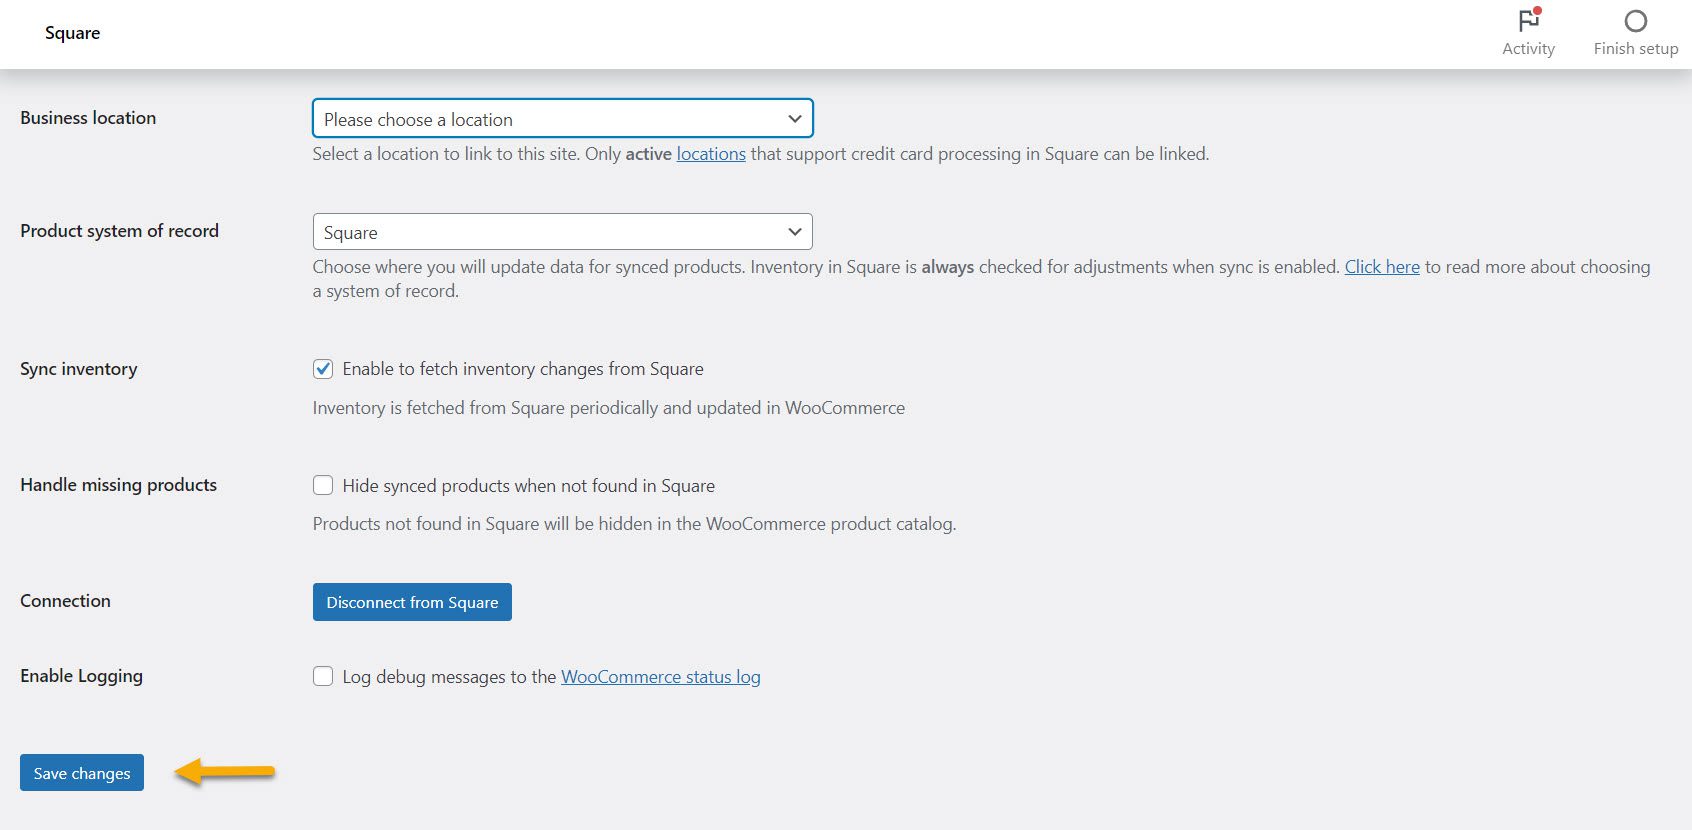
After that, as the last step, from your dashboard, go to WooCommerce → Settings → Payments again, and make sure you tick the ‘Enable this gateway’ option for Square.
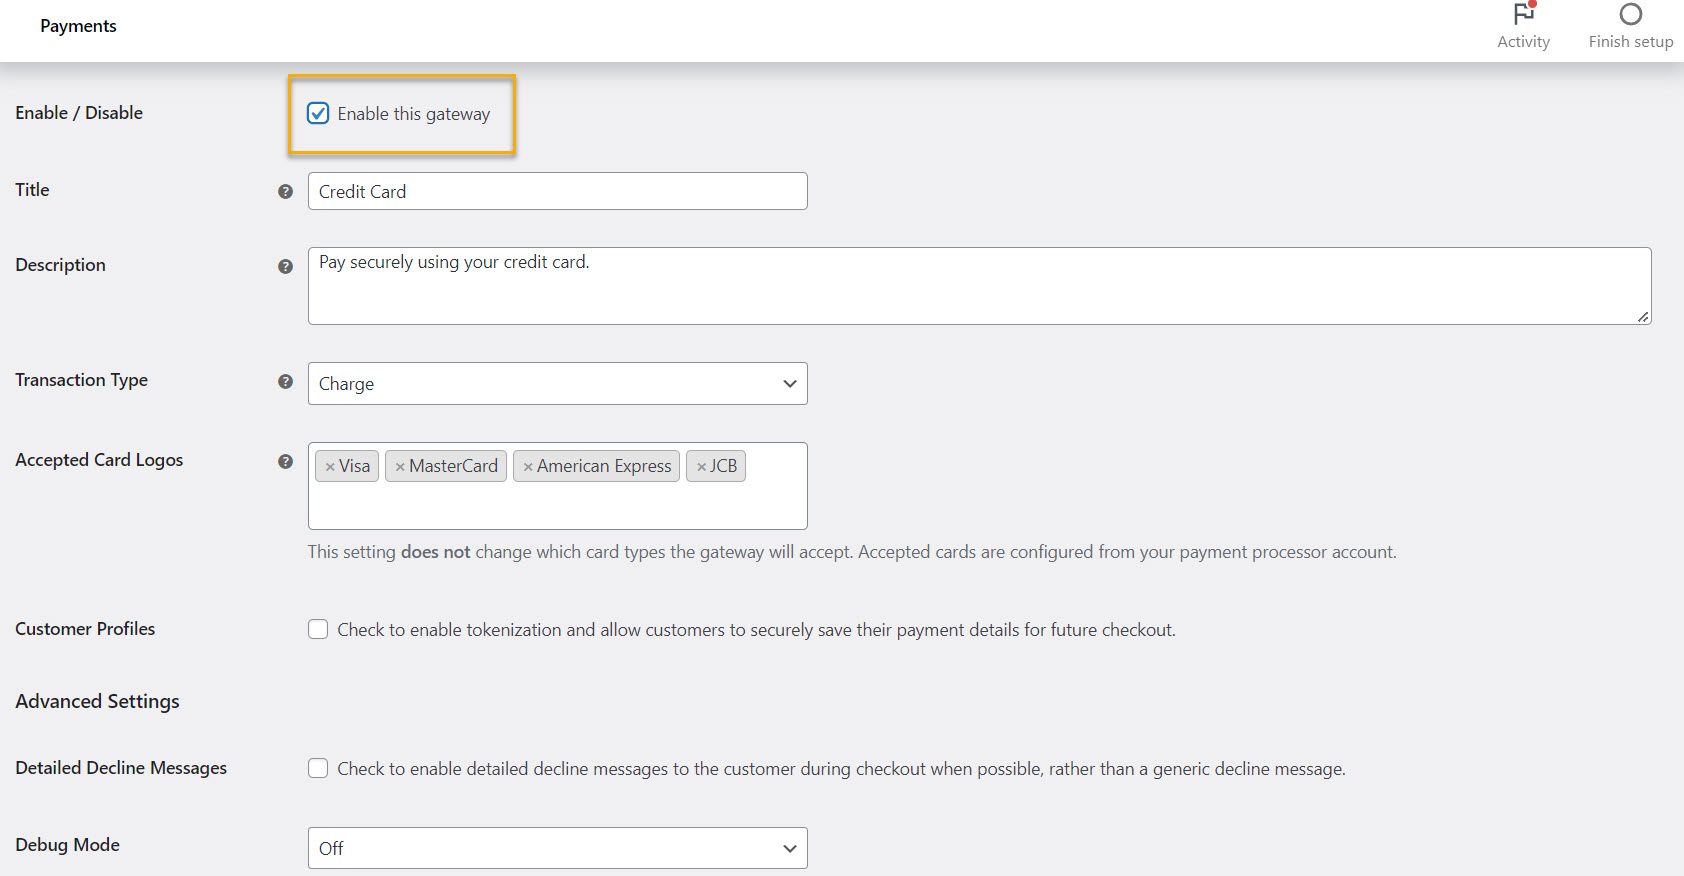
It’s also worth noting that you can set up a decline message with Square payments. As a result, if a card is declined, the customer will understand why.
When you click “Save changes,” all of your changes to your checkout page will be saved.
When you begin receiving payments, you can manage them easily from your Square dashboard. Simply go to Square and sign in to your account to access the detailed transaction history. The transaction is labeled “WooCommerce” and includes an order number.
The dashboard will display transactions from your WooCommerce store and your Square POS, making it easier to manage online and offline purchases.
Step #3: Test the integration
Perform a transaction test with Square to see if the WooCommerce-Square integration is working. For example, choose a product from your website and add it to your shopping cart. After you’ve added it to your cart, choose a payment method, preferably Credit Card. And there you have it! The payment transaction will appear in the transaction history if the integration is successful.
Wrap Up
With both automatic and manual synchronization, Square facilitates hassle-free store operation. Furthermore, this payment gateway option allows you to synchronize your items, categories, and payments thoroughly.
Oh, and let’s not forget its advantage of selling both online and offline mode too! You can now sell both online and offline by giving your customers the option to buy your goods even if their internet connection is down for some reason.

Gabriella is a Digital Content Writer and Marketer with a zeal for all things WordPress. When she’s not researching and drafting the upcoming articles, you can find her in the open air exploring the outdoors with her dog.






Comments are closed