
You’ve most likely heard it a million times by this point: almost 70% of people who visit your website for the first time will not make a purchase. Unfortunately, it’s one of the things that keeps eCommerce marketers awake at night.
Before we get into solutions for optimizing your checkout page, you should look at a typical marketing funnel for online shoppers to understand their buyer behavior. A typical marketing funnel is basically analyzing buyer behavior, the stages a consumer undertakes, and gives you an overall perspective on how to improve your website. And if you don’t fully comprehend the procedure, things could get out of hand.
But for now, WooCommerce Checkout Pages.
Your checkout page is an excellent opportunity to make a good first impression on potential customers. As a result, optimizing your checkout process can significantly boost your conversion rates.
But here’s the thing: the default WooCommerce checkout page is not quite conversion-optimized. So you can increase conversions and sales by customizing and optimizing your checkout page.
In this article, we’ll show you how to customize the WooCommerce checkout page to provide the best customer experience possible, what plugins can help you, and other valuable tips and tricks for your end.
Understanding the Default WooCommerce Checkout Page
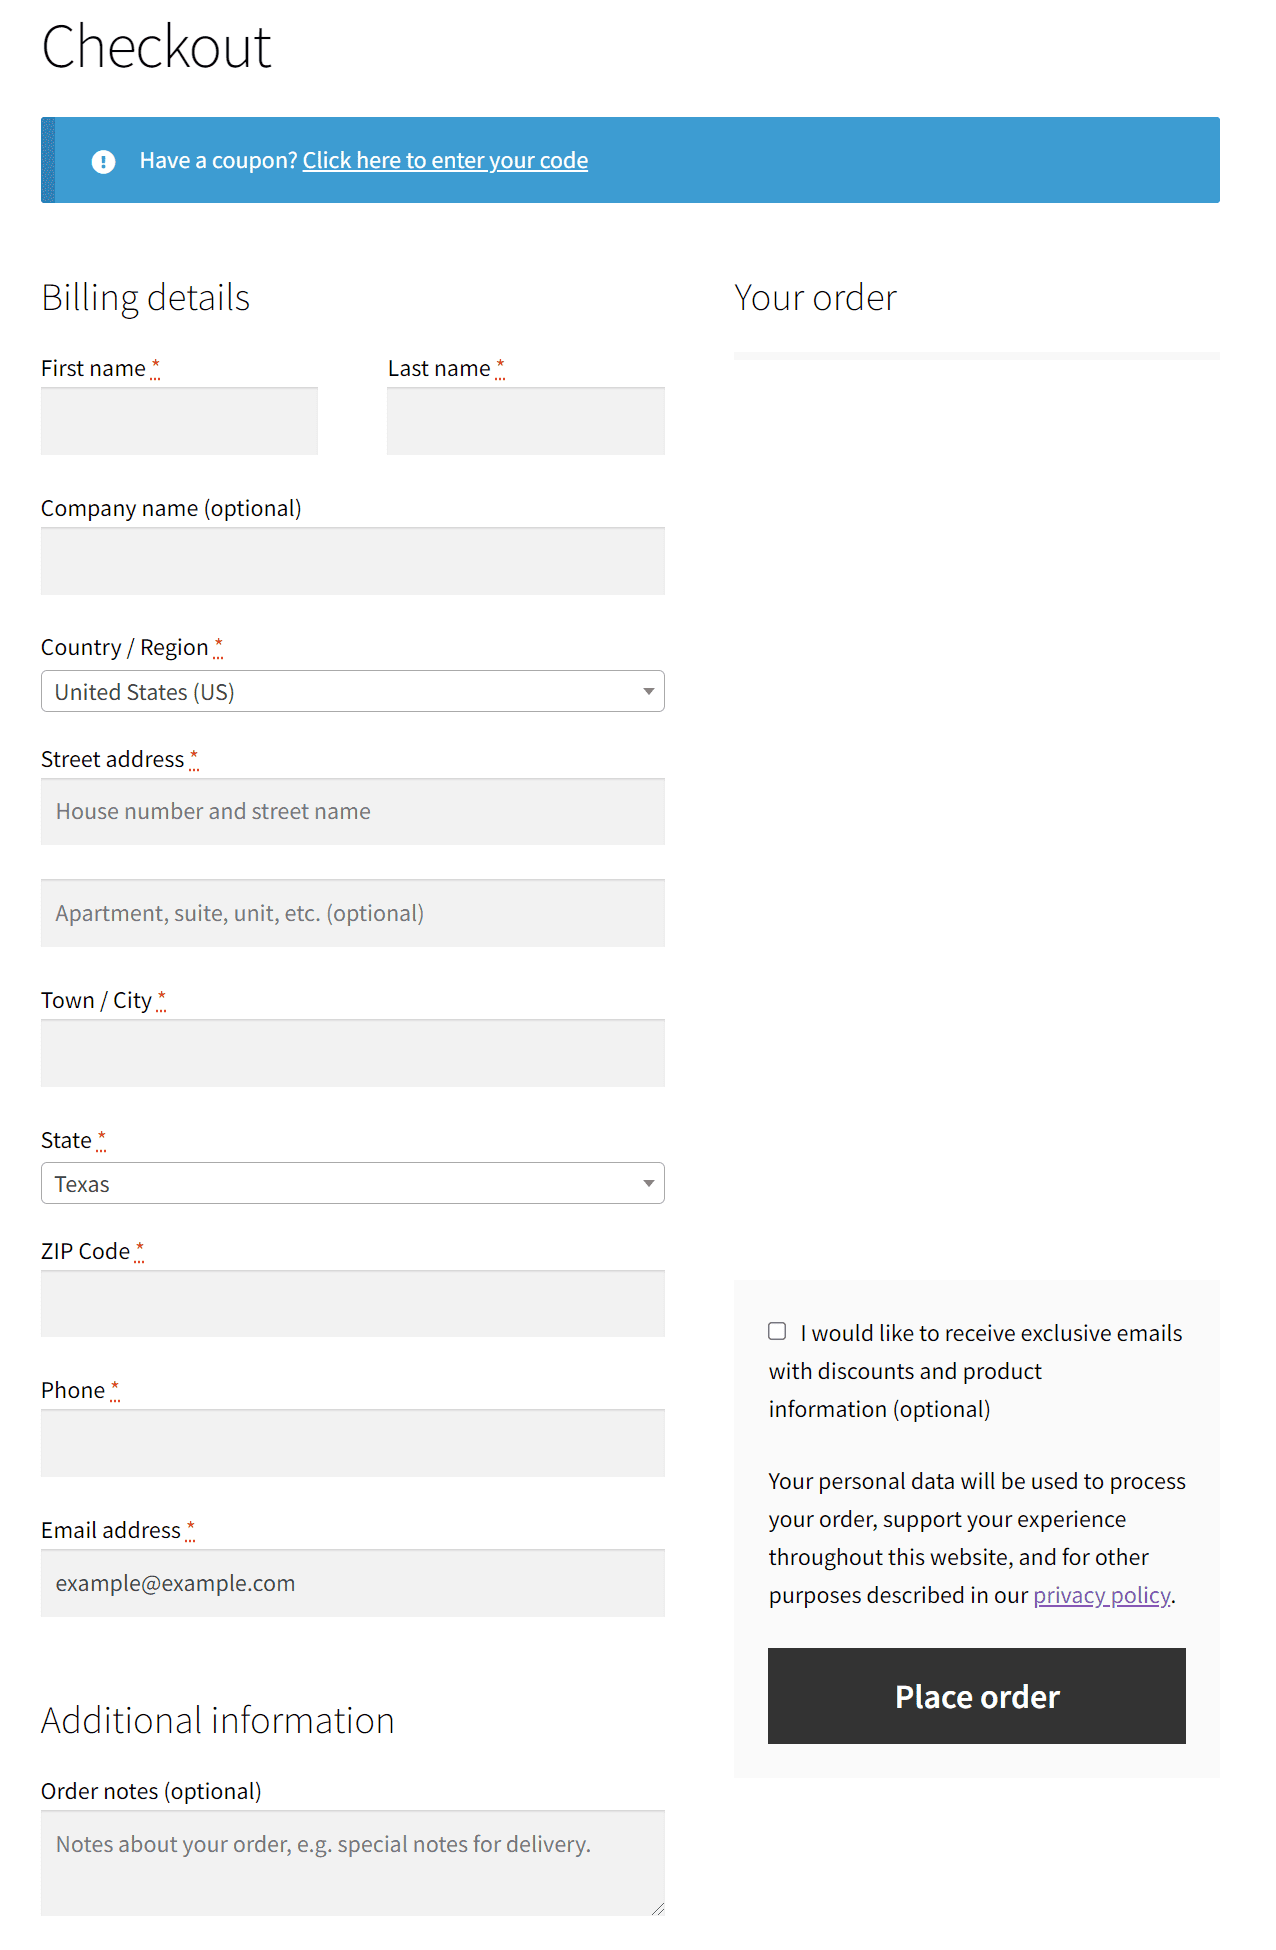
As you can see, the default WooCommerce checkout page is pretty straightforward. It satisfies basic eCommerce requirements and accepts payments. However, because it is the final step in the sales process, many online store owners overlook it, preferring to spend their time optimizing marketplace pages, driving traffic, and shipping orders on time.
The default WooCommerce checkout page includes all of the required form fields for making a purchase, including:
- First and last name;
- Country;
- Address;
- Town/city;
- Zipcode;
- Phone number;
- Email address;
- Shipping address.
Furthermore, the page displays an order summary that includes product details, a subtotal, shipping fees, and a final total.
Finally, a call to action completes the order and processes the payment. This is sufficient for processing an order, but you’ll need to make improvements to gain traction and drive revenue.
Here’s Why You Need to Customize Your Checkout Page
As previously stated, the checkout page is the final page that customers see before completing their purchase. Therefore, it can mean the difference between conversion and revenue generation or cart abandonment and loss of sales.
As a result, it’s critical to ensure that your WordPress checkout page is well-designed and functions in a way that encourages conversions.
For smaller stores, the default WooCommerce checkout page is a great place to start. It includes everything you need to get started with an online store. However, as your company grows, you’ll discover that you can provide a better experience by:
- Including your branding.
- Including custom form and return fields in your checkout form (like the shipping address).
- Changing the design and layout of the page.
- Linking products directly to your cart and checkout pages.
- Changing the labels of your input fields and the text of your buttons.
- Upselling other products or services.
So, to put it shortly, here are three main reasons why you should optimize your WooCommerce Checkout Page.
1. Higher conversion rate.
Optimizing your store’s checkout process makes it easier for your customers to complete their orders. Visitors should not have to go through multiple steps to complete a purchase on your website. Every impediment to achieving the checkout process is an opportunity for them to leave.
Accelerating the checkout process ensures that your customers finish their orders more quickly, increasing conversions and sales.
2. Encourage customers to purchase more.
Allowing customers to quickly and easily add items to their cart is part of optimizing the checkout process. In addition, this makes it simple for customers to select alternatives without returning to a single product page.
It can also persuade customers to buy more of your products, increasing your average order value.
3. Ensure a safe checkout experience.
It would help if you always kept your customers’ contact and billing information secure. This builds trust with your customer, which should lead to repeat business and positive feedback.
You can accomplish this by providing secure payment gateway options at the checkout.
And now that we’ve laid out the reasons why you should optimize your checkout page, let’s get to the more technical side of it.
How to Solve Checkout Friction Points with Good UX
As per Baymard Institute, the average total cart abandonment rate is 68.8%. So what exactly does this mean? It means that after browsing a website, adding items to the cart, or removing them, two out of every three users decide to abandon their purchase. Crazy, isn’t it?
However, aside from the apparent reasons for cart abandonment, such as finding a better product at a lower price, or something similar, learning that 18% of US online shoppers have abandoned an order due to a “too long/complicated checkout process” hits you differently. And it is here that resolving UX frictions comes in handy.
So here’s what you need to do. Let’s take the following cart abandonment reasons and try and find a way to avoid that ever happening again.
- Cart abandonment due to forced registration.
What to do? Get rid of forced registration for a better UX checkout process.
Many eCommerce websites require prospective buyers to create an account before proceeding with the checkout process. The theory behind forced registration is that if a customer has an account, they will be more loyal to the brand and return for additional purchases.
This notion is not only false, but it is detrimental to your business. The bottom line is that you should never require customers to create an account to purchase from your online store.
- Cart abandonment due to prolonged and complicated checkout flow.
What to do? Shorten the checkout process to improve UX flow.
Whether you’re serving a returning customer or a first-time visitor via guest checkout, you want the purchase process to be as simple as possible. But, according to leadership expert Michael Hyatt, friction is any force that makes the purchasing process more difficult for customers.
To put it in his words:
“Customers will always follow the path of least resistance…If you want to generate more sales, you have to identify the friction points in your selling system and eliminate them.”
Simply put, the shorter your checkout process, the more likely a visitor is to place an order. Therefore, more revenue equals fewer clicks. This is critical, especially because mobile eCommerce transactions continue to grow year after year.
- Cart abandonment due to lack of trust and sense of security.
What to do? Display security badges prominently to improve the UX checkout process.
In the online world, trust is a significant issue. After a never-ending string of corporate security breaches and cyberattacks, a barrage of fake news, and the ongoing existence of some relatively shady online activity, users require assurance that their financial information is safe.
Displaying trust badges and security icons is one of the most effective ways to alleviate consumer concerns. Including well-known symbols provides shoppers with a sense of ease and comfort in their purchasing decision, effectively aiding in optimizing your checkout process.
- Cart abandonment due to lack of payment options.
What to do? For an excellent checkout experience, consider implementing various payment options for your customers.
Not all countries use the same payment methods as American customers. Did you know that only 5% of transactions in the Philippines are card-based? Diverse forms of payment are becoming increasingly popular in the United States, particularly among younger demographics, as many millennial and Gen Z consumers choose not to have credit cards at all.
As a result, digital retailers must accept various payment methods to broaden their user experience to appeal to a broader audience. If you want to reduce friction, there are few higher barriers than not paying for desired items.
Eliminate this roadblock by embracing payment methods other than debit and credit cards, such as PayPal and Stripe, Google Wallet, Apple Pay, and other successful web payment options worldwide.
5. Cart abandonment due to cluttered checkout page.
What to do? Eliminate unnecessary elements, such as a crowded product recommendation feature.
Many eCommerce websites include relevant product suggestions in the shopping cart. While many people think of this as an excellent way to upsell and cross-sell products, in practice, it can actually harm the checkout process UX and cause sellers to lose customers.
The reason for this is that the more distractions there are during the checkout process, the more likely customers will wander off and fail to complete their purchase.
As a result, when using product suggestions, it is best to limit them to places like product pages, order confirmation pages, email campaigns, etc.
Here’s How to Customize Your Checkout Page
Customizing your WooCommerce checkout page may seem impossible if you don’t have the time to learn how to code or the budget to hire a developer. But the truth is that it is far from that if you have the proper tools. And by tools, we mean plugins.
This tutorial will show you how to use Checkout Fields Manager to customize your WooCommerce checkout page. The good news is that you won’t need to install any additional WordPress themes to accomplish this.
A little background on Checkout Fields Manager for WooCommerce
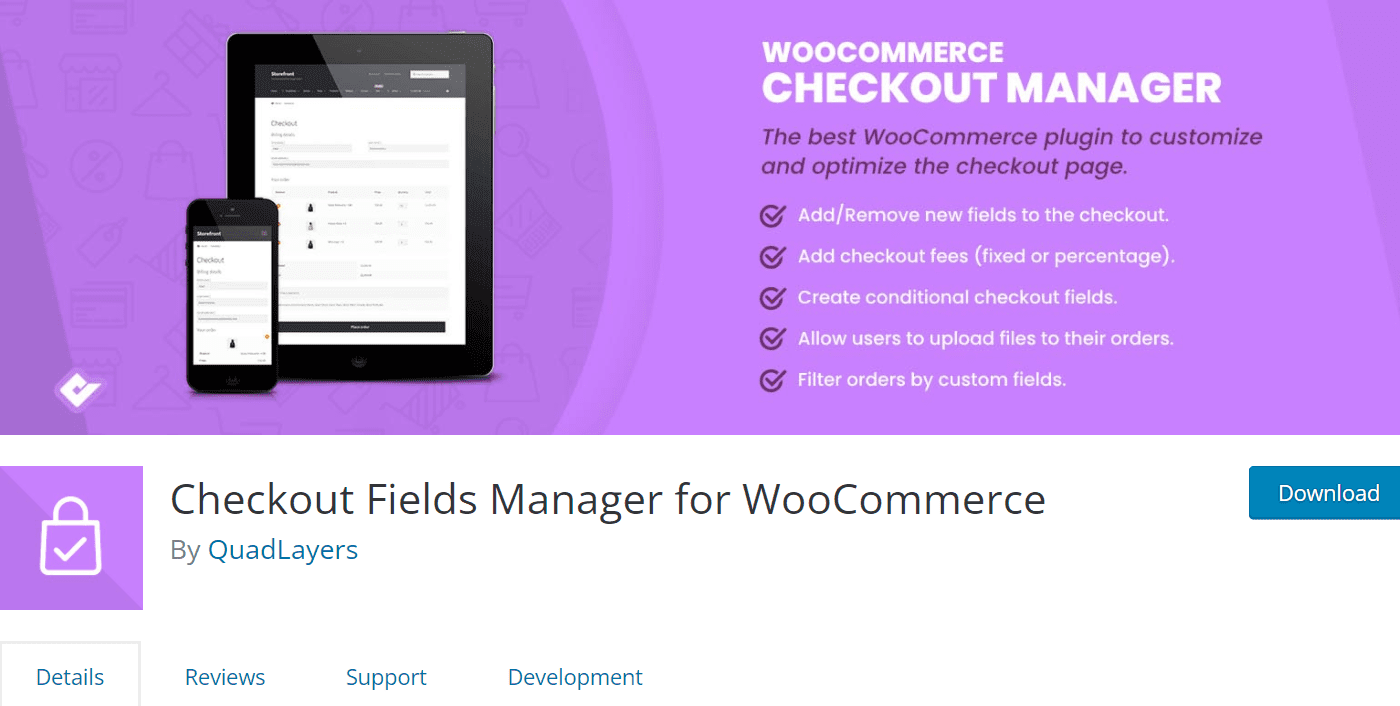
WooCommerce Checkout Manager is a plugin designed to be the checkout page wizard. Allows for field customization, the extension of billing information, and the creation of any field required at the WooCommerce checkout. You can use WooCommerce Checkout Manager to customize and manage the fields on the checkout page.
The main features of the plugin include:
- Add new fields to the checkout;
- Rearrange the order of the checkout fields;
- In the checkout, you can add or remove the required fields;
- Display new fields when an order is received;
- Display new order email confirmation fields;
- On the checkout page, you can upload files.
- Add new billing fields to the checkout;
- Add new shipping fields to the checkout;
- Fill in the blanks in the Additional Fields section;
- Construct conditional fields;
- Replace the names of checkout fields;
…and more!
So, without further ado, let’s see how you can use this plugin to customize your checkout page.
First thing first, you need to install it. For this to happen, head over to your Dashboard → Plugins → Add New and type in the plugin’s name.
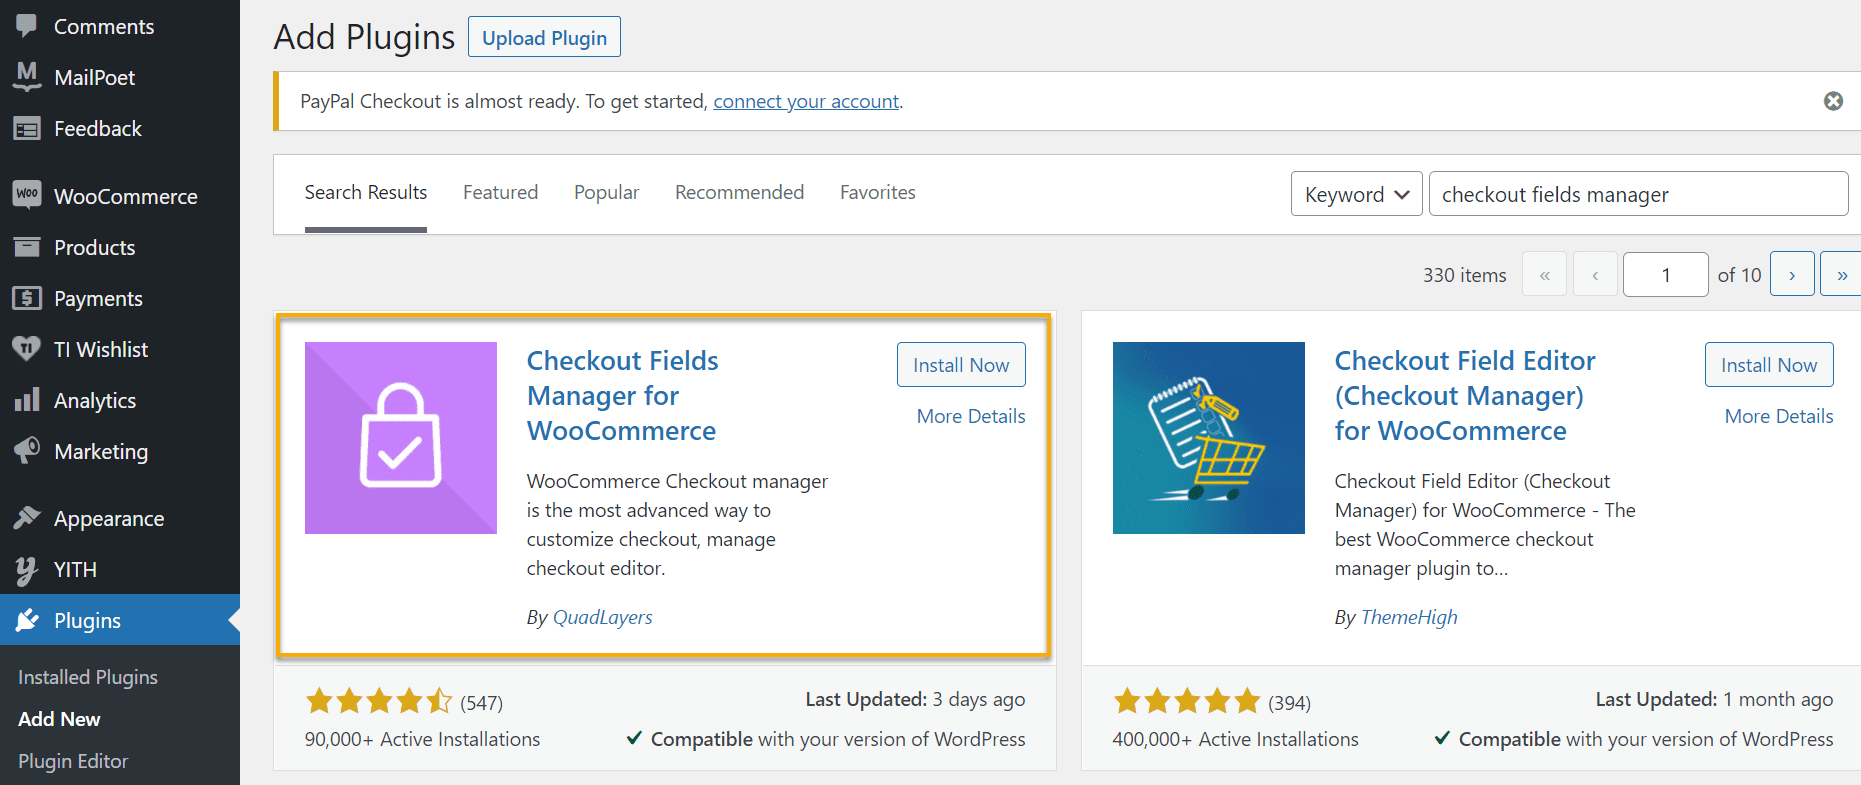
You can use the plugin to add or remove fields like first and last name, company name, country, city, zip code, address, phone number, email, and others.
To do so, navigate to WooCommerce → Checkout and then the Billing, Shipping, or additional tabs in your WordPress dashboard. In addition, there will be a list of all the fields that you want to show or hide there.
Let’s check out the Billing fields first. 👇
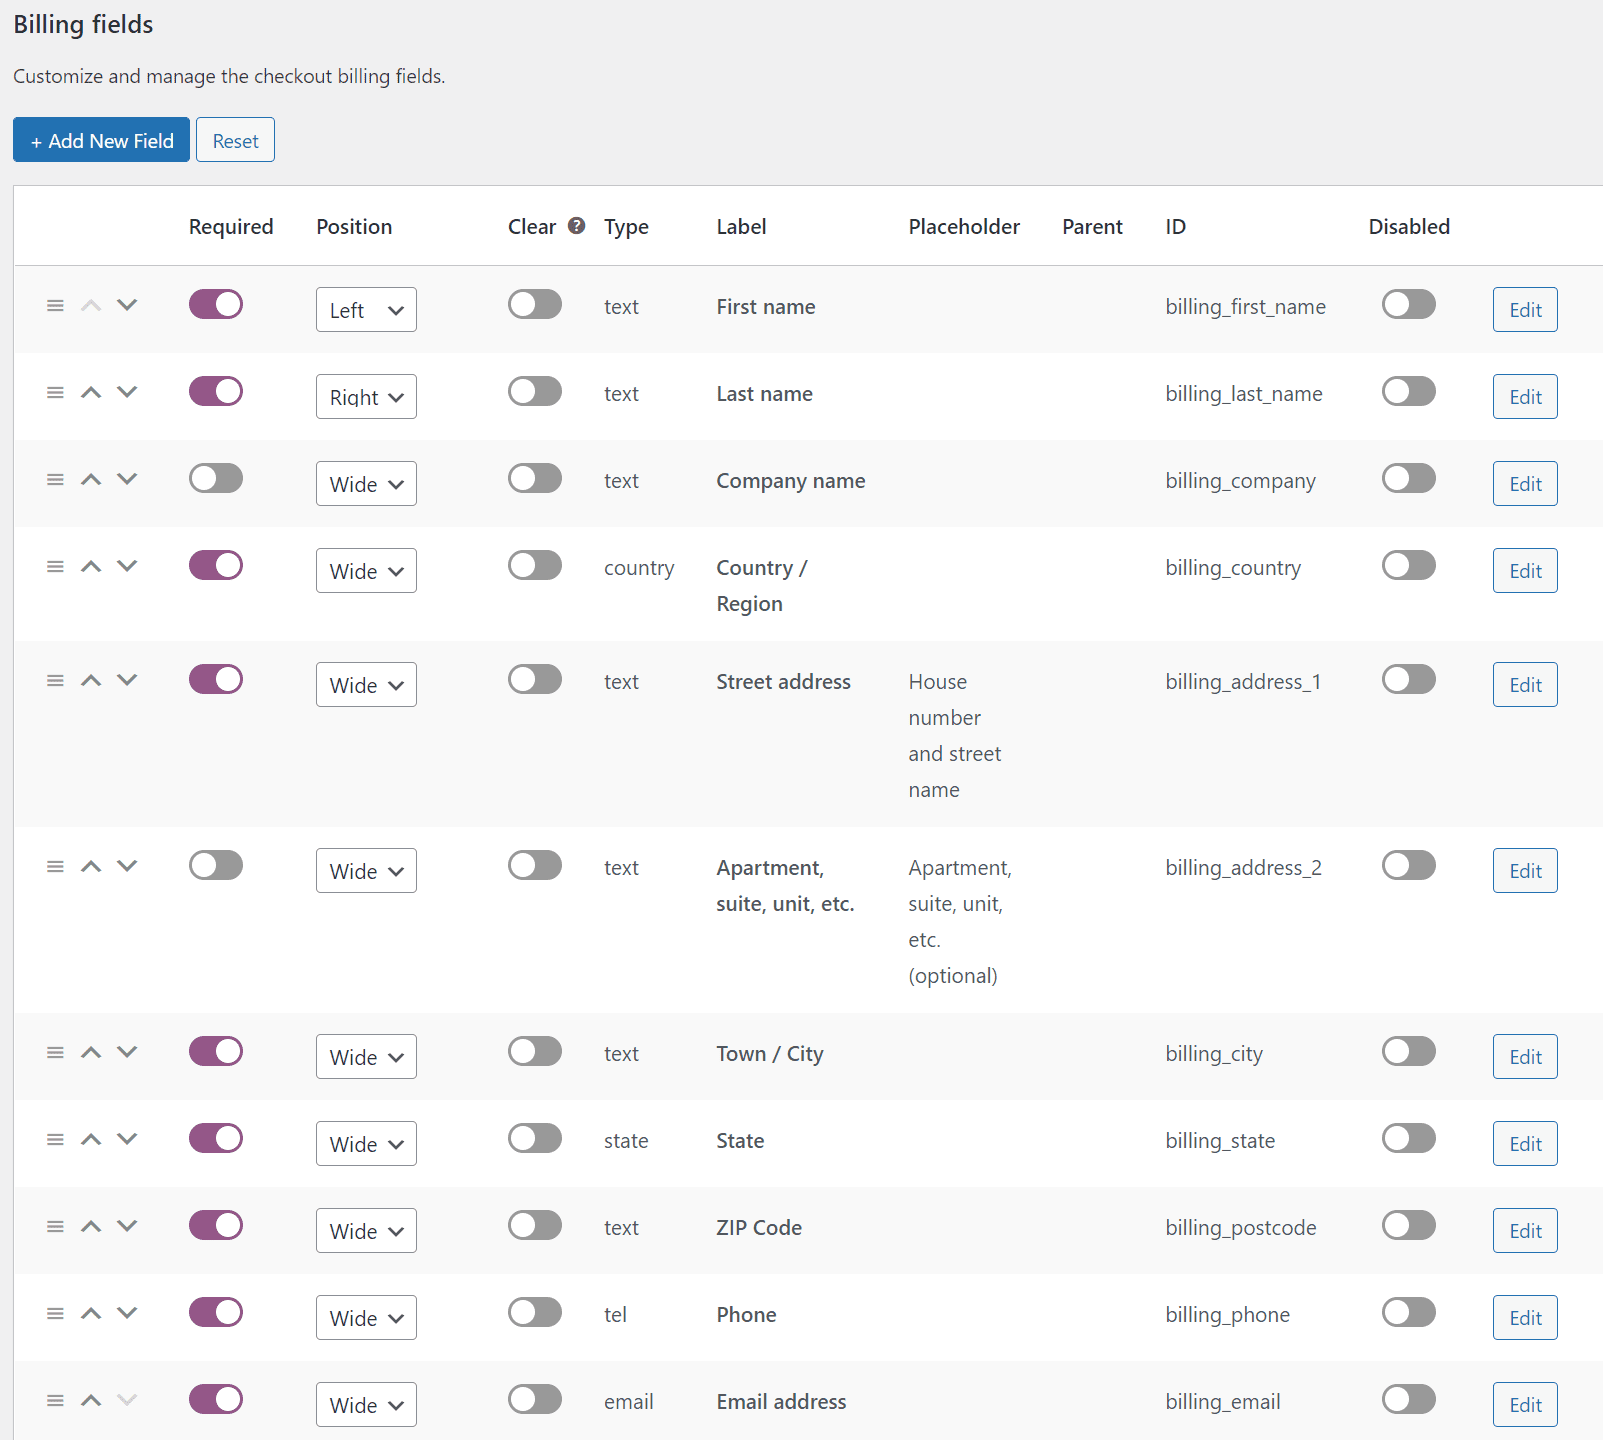
You can change the position of every label from left to right and wide and enable or disable an item if you wish to.
Also, the top bar features a list of all the items that you can edit and customize, such as billing, shipping, order, emails, etc.

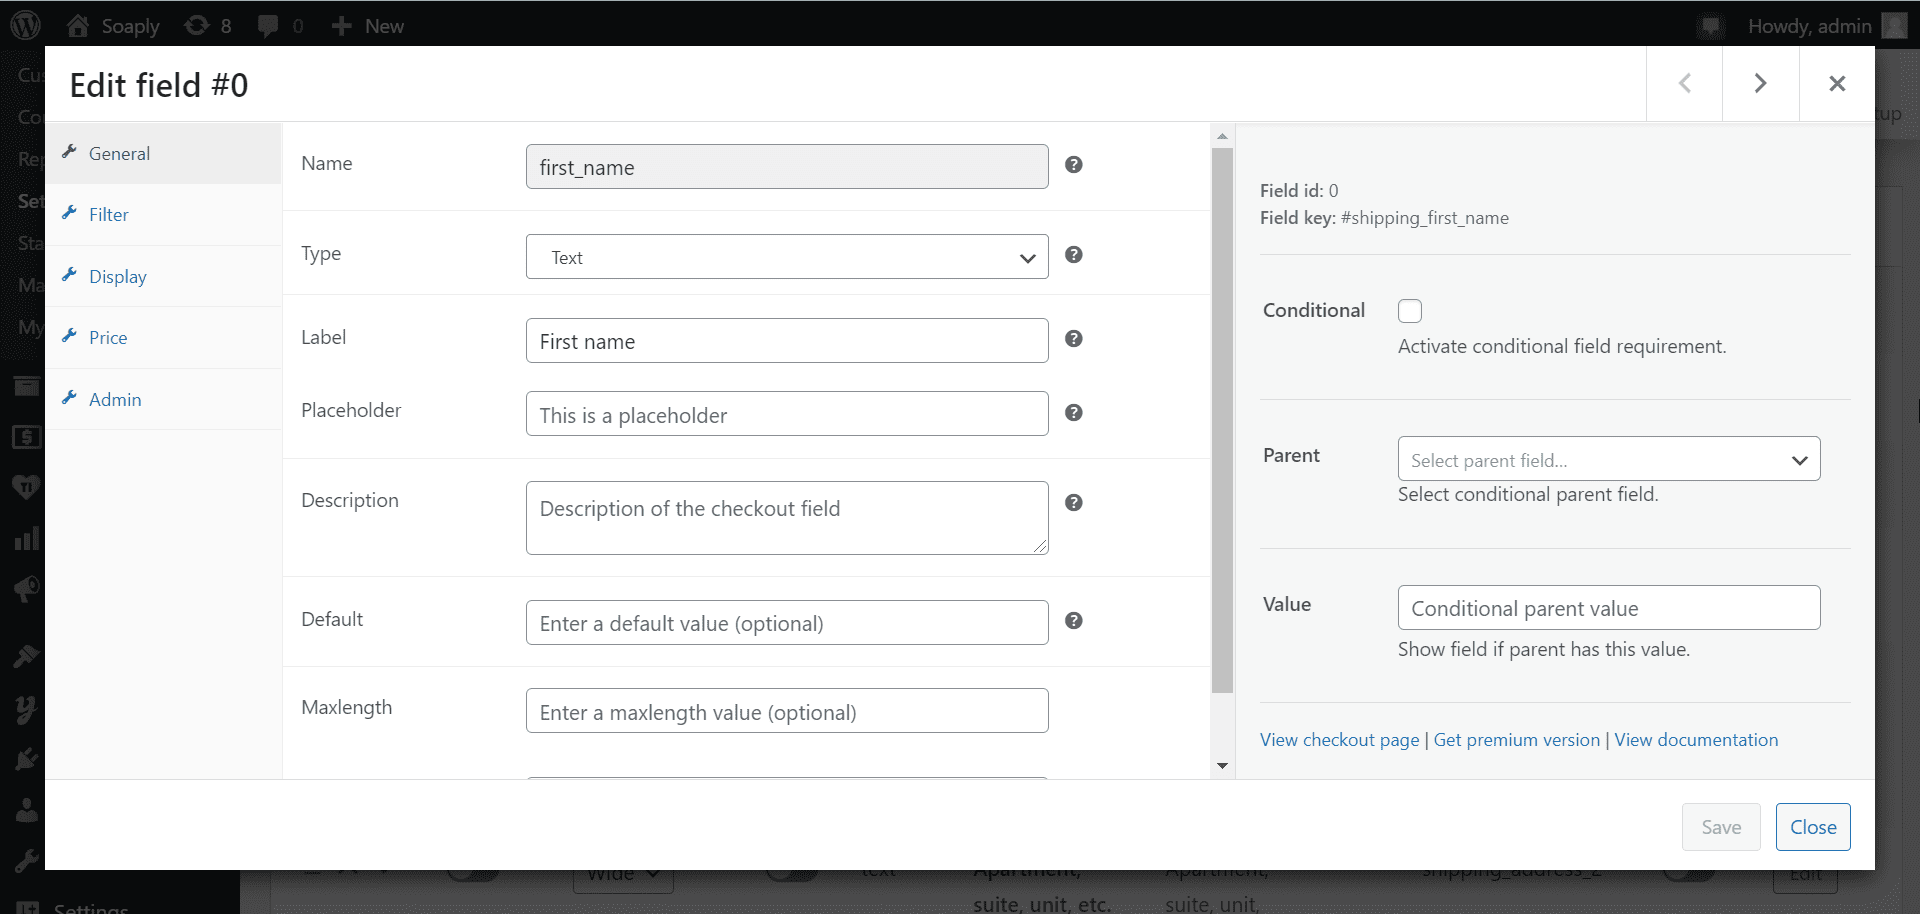
If you want to edit a field, just click on the little Edit button at the end of the field, and the editor will automatically pop on.

Here you can change the label text, add a description of the checkout field, add filter options, and more. Just don’t forget to hit Save before you exit the editor.
Checkout customization options
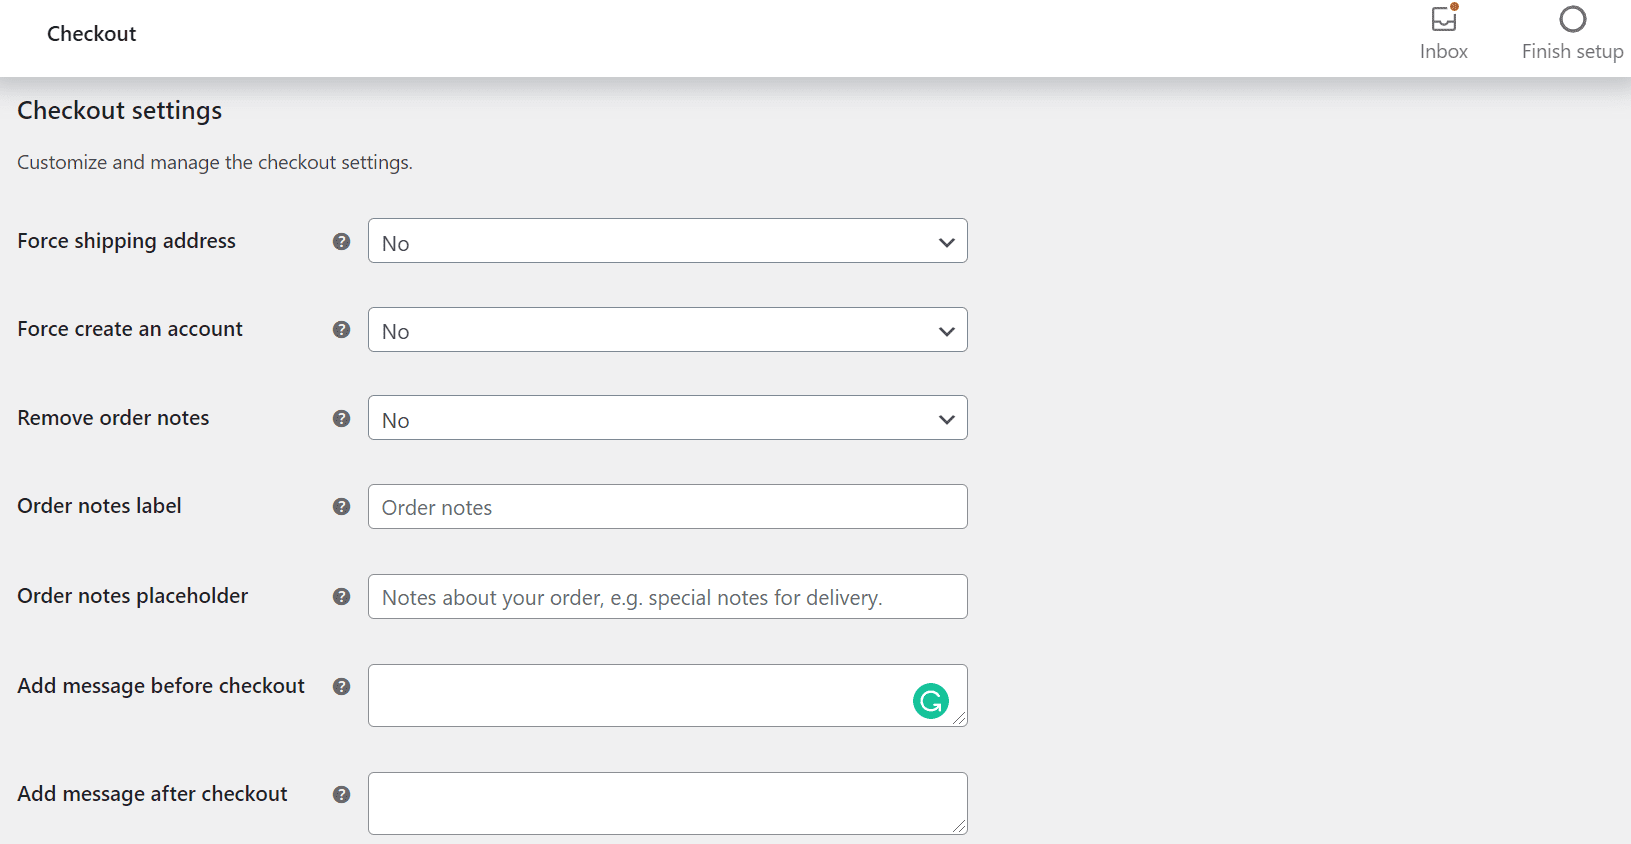
If you go over to the Checkout tab, this is what you’ll be presented with.
As you can see here, you can make specific changes such as adding a customized message before and after checkout, choosing whether or not to force a user to create an account if they want to make a purchase, etc.
Upload your own file field
One of the most intriguing aspects of the WooCommerce Checkout Manager plugin is allowing customers to upload any file during the checkout process. This comes in handy when booking a hotel or renting a car online; you need to upload your ID or driver’s license. You can also edit those files and allow users to manage them if additional documents are required.
The good news is that Checkout Manager allows you to create an unlimited number of custom fields and apply as many conditions as you want to customize your checkout page and provide users with a one-of-a-kind experience.
Add extra fees to the checkout page
Another exciting way to customize the WooCommerce checkout page is to include fees. This can be very useful if you want to have a surcharge for situations such as:
- Express shipping;
- Special handling;
- Additional charges for shipping to specific countries or locations;
- Fees for credit cards or payment gateways.
Go to WooCommerce → Checkout → Billing to add fees with Checkout Fields Manager.
You’ll notice various billing fields that you can enable. For this example, we’ll add a fee for Delivery and will need to create a new field, so we’ll click the Add New Field button.
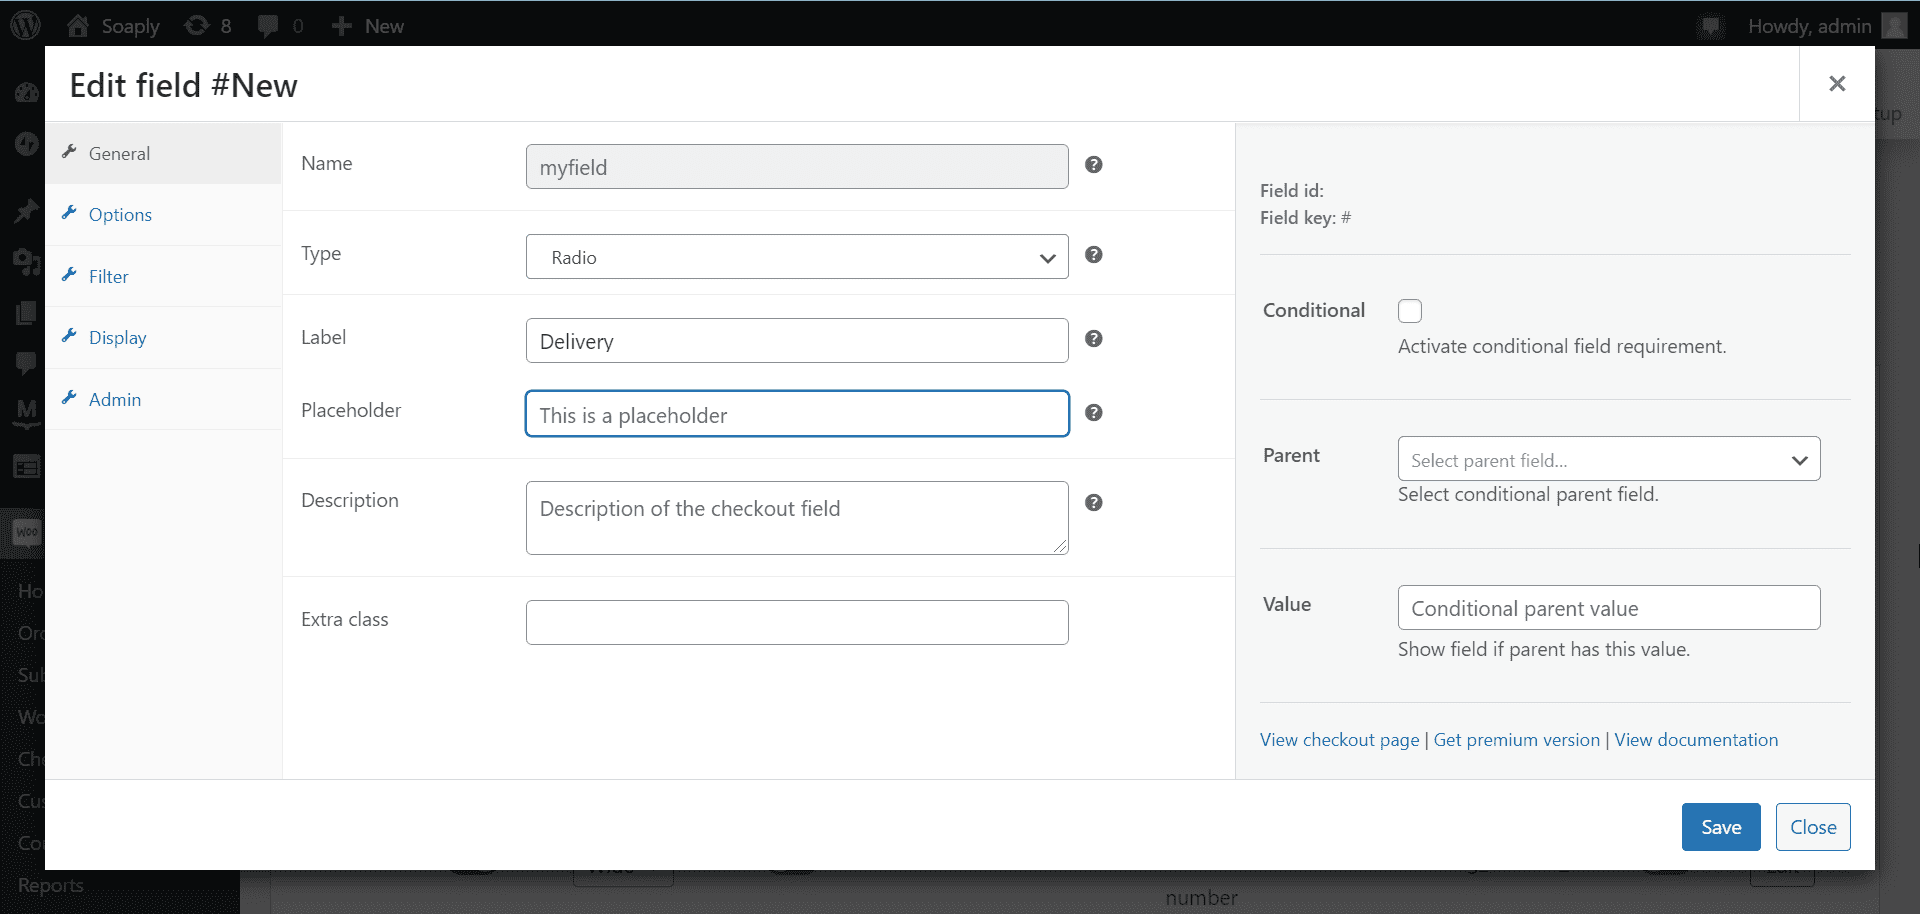
Then, on the Options tab, add two labels: Yes and No. When the shopper selects Delivery, they will be charged an additional amount that you can set from the Editing field above.
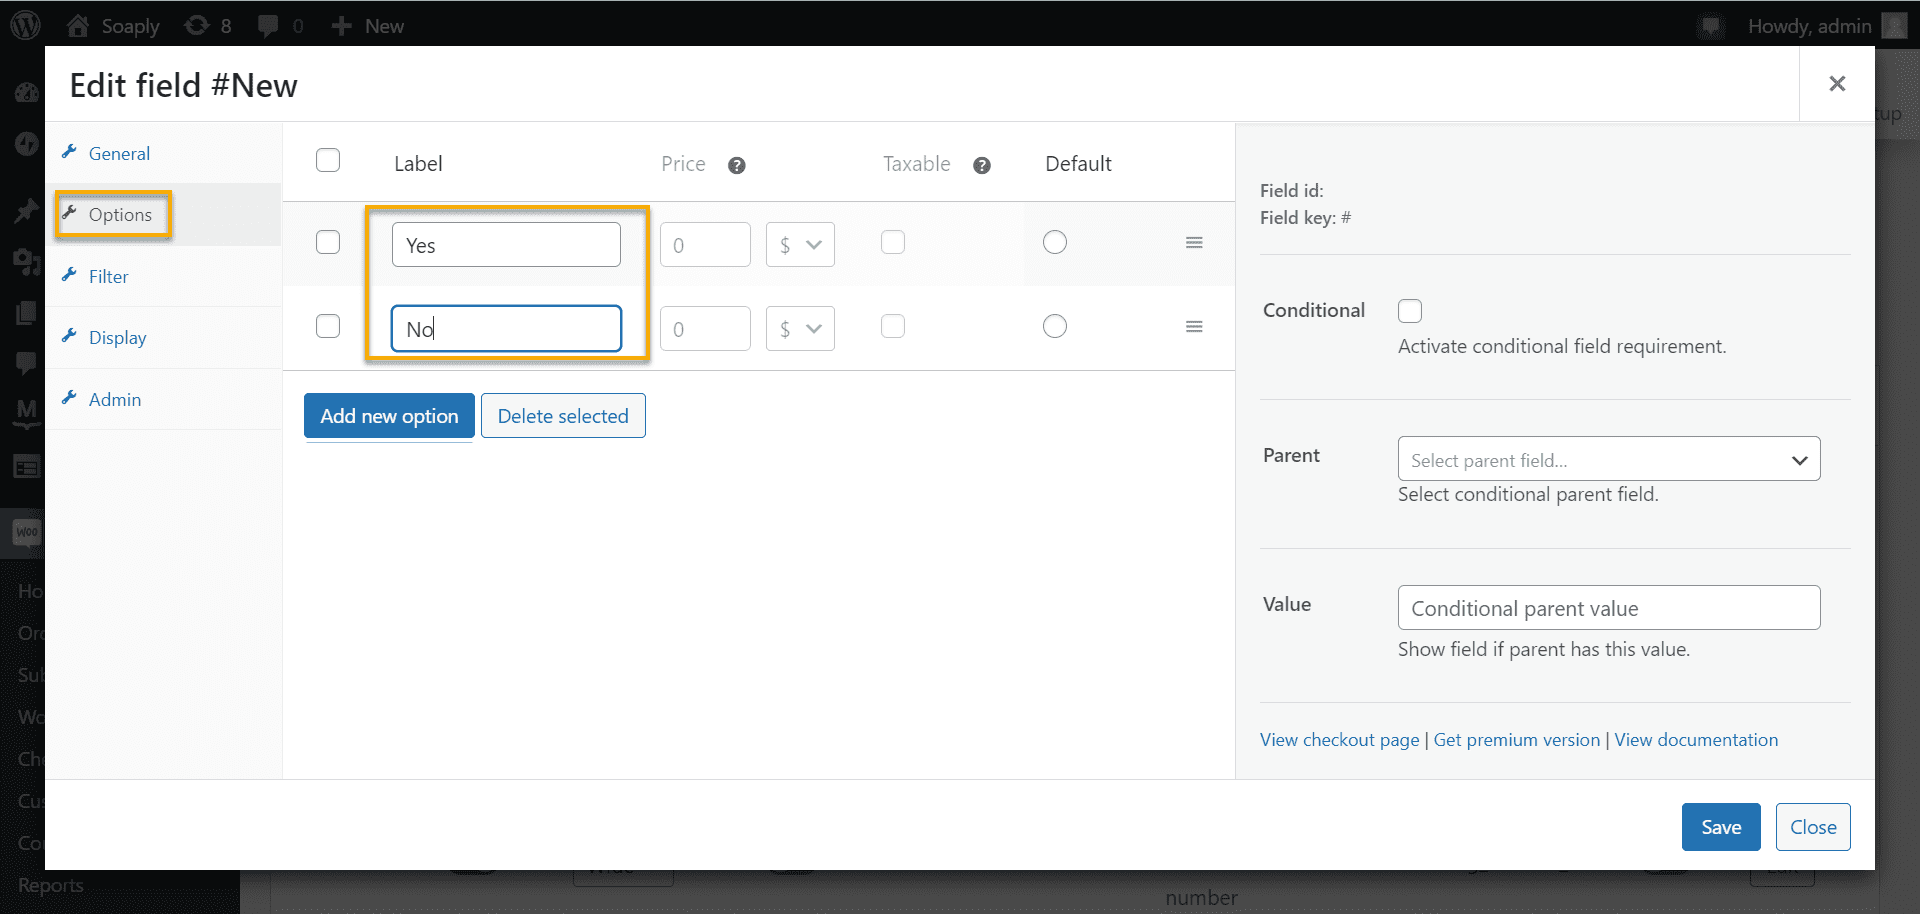
Quick Reminder: To add a price tag, you must first download the pro version of the plugin, as the price feature is only available in the pro version.
After you’ve entered all of your desired values and made all of your desired customizations, remember to save the changes, and you’re done! When a user selects the Delivery option at checkout, the extra fee will be automatically calculated in their checkout process.
Now that you’ve got a grasp of how to get around WooCommerce Checkout Fields Manager, it’s time we unravel more checkout plugins that you can use for your checkout customization.
A1 Plugins You can Use for Your WooCommerce Checkout Page
So we’ve already mentioned WooCommerce Checkout Fields Manager; let’s see what else we have under our sleeves!
WooCommerce Checkout Add-Ons
This WooCommerce Checkout Add-Ons plugin enables various features to improve checkout on top of the core WooCommerce checkout experience. With free and paid options available, quickly update and integrate these add-ons for improved checkout performance and functionality.
Additionally, Checkout Add-Ons provide a plethora of features that allow you to customize your checkout experience, such as:
- Create custom field types to cover many applications, including text, text area, drop-downs (i.e., select fields), multi-selects, radio buttons, checkboxes, multi-checkbox lists, and file uploads.
- Add option fields for upsells and add-on services (does not support inventory management);
- Add fixed-amount or percentage-based costs based on how customers interact with the field if desired.
- Create conditional add-ons that appear or change based on factors such as the cart subtotal, the number of products in the cart, or the value of another add-on.
- At checkout, dynamically update the order details and total as options are selected or modified.
WooCommerce Cart Notices
WooCommerce Cart Notices increases sales and customer satisfaction by displaying dynamic, actionable messages to your customers as they check out. Use tried-and-true tactics to boost conversions and earn more money from existing customers while also informing them about sales and promotions to improve the shopping experience.
The following are some of the plugin’s key features:
- Show personalized messages to your customers on the cart and checkout pages;
- Notifications can be added anywhere on your site using shortcodes (for example, display promotion notices at the top of a shop or category page).
- Increase sales and average order value by encouraging customers to spend more to receive benefits – giving customers a reason to spend more can result in a 50% increase in upsells!
- Using message variables, display dynamic notices. For example, you can specify a minimum amount for free shipping, and the message will dynamically display the difference in the customer’s total to qualify!
Direct Checkout for WooCommerce
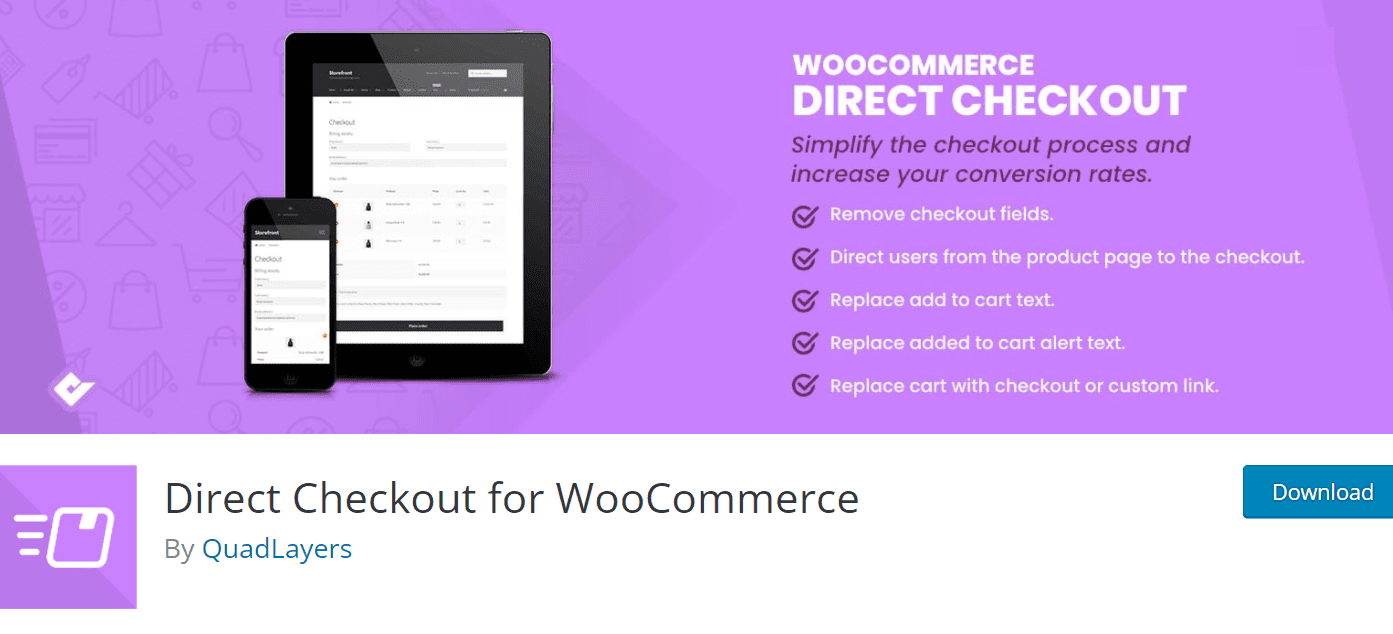
WooCommerce Direct Checkout is a plugin that allows for the reduction of steps within the WooCommerce checkout process. For example, skipping the shopping cart page can shorten the checkout process.
Each product includes a “Add to cart” button that directs customers to the checkout page. This may encourage buyers to shop more frequently and quickly. In addition, you will increase sales by decreasing cart abandonment.
This plugin’s features include:
- Simplify the checkout process.
- Reduce cart abandonment
- Skip adding to cart.
- Avoid reloading the checkout page.
- Remove checkout fields.
- Quick purchase functionality.
- Simplify Woocommerce.
Over to You
As you can see, customizing the WooCommerce checkout page is an excellent way to improve the user experience for visitors. Adding or removing fields from the checkout page is a simple process aided by a plugin.
Sometimes your reason to change things up on your checkout page is a mandatory client request, and other times it is your intuition about what will work best. In any case, if you pay close attention to the issue, your revenue and overall feedback will thank you.

Gabriella is a Digital Content Writer and Marketer with a zeal for all things WordPress. When she’s not researching and drafting the upcoming articles, you can find her in the open air exploring the outdoors with her dog.


Comments are closed