
- Ch.1: Choose Your Hosting Provider
- Ch. 2: Activate WooCommerce
- Ch. 3: Choose a Suitable Theme
- Ch. 4: Build Your Store’s Branding and Identity
- Ch. 5: Prepare the Homepage
- Ch. 6: Prepare the Product Page
- Ch. 7: Set Up Filtering and Sorting
- Ch. 8: Set Up Wishlist
- Ch. 9: Set Up Shipping & Payment
- Payment Testing Survival Kit
The time has come to create our very own online store. We decided to go beyond a tutorial and put to practice what we preached so far. For diversity, we’ve decided to ditch the good old fashion stores for a little while and try out something else. So how do you feel about an online handmade cosmetics store? That’s our go-to for today’s article, and we’re about to share every step of the process.
We’ll walk you through the necessary steps you need to take to build an online store using WooCommerce, from start to finish. So without further ado, let’s get started!
When opening an online store, there are several factors to consider. Some of them, such as product development and building a marketing strategy, can be challenging.
However, don’t spook yourself just yet; by using WooCommerce, you will be adding eCommerce functionality to your WordPress site that isn’t as complicated as it may appear, and we’ll prove it to you.
From choosing a hosting provider to customizing product pages to setting up payments and shipping options, we’ll show you everything you need to know to get your WooCommerce store up and running.
So, are you ready to increase the quality of your handcrafted cosmetics store? Let’s begin!
To make this easier, we will break this how-to guide into mini-chapters so you can keep up and better comprehend the information at hand.
Ch.1: Choose Your Hosting Provider

One of the first and most crucial considerations you must make is the hosting for your online store. There are various critical things to take when starting an internet business, but one of the most significant is where to host it.
The appropriate web hosting service might differ between knowledgeable, satisfied customers and annoyed buyers, or even an unaware audience of your existence. The challenge for most small businesses and startups is knowing what to search for before deciding on the right hoster.
For our little but significant handmade cosmetics store, we’ve chosen Cloudways as our hosting provider as it ticks all the boxes.
Cloudways is a managed hosting company that focuses on performance and ease of use. Cloudways takes care of everything from server and application setup to continuous server maintenance, so you can focus on expanding your business.
It allows you to choose from five platforms, including Amazon Web Services and Google Cloud Platform, and offers budget-friendly pay-as-you-go plans. You can even join up for a free trial without using your credit card.
Unlike most other web hosting providers, Cloudways allows you to create a website for free. First, you will need to create a username and password for a three-day trial account or log in with Github, Google, or LinkedIn credentials, which is also a great touch.
After logging in, you will want to choose a content management system (CMS) from a list of well-known and respected options, including Drupal, Joomla, Koken, Magento, and, of course, WordPress. Cloudways is already hosting 600,000+ WordPress websites.
Furthermore, Cloudways balances your website load by utilizing the resources of numerous clustered servers; it does not offer standard shared, VPS, or dedicated hosting plans. Instead, the company provides a variety of pay-as-you-go, hourly cloud hosting plans that only charge you for the time you spend. So if you cancel a plan ten days into a month, for example, you’ll only be charged for ten days of hosting. Sounds good, right?
So, whether you’re an online store, an agency, or a freelance developer with several clients, Cloudways has the right mix of capabilities to help you get the most out of your managed hosting solution for your company’s websites and client projects. You can take our word for it.
Ch. 2: Activate WooCommerce
With our website taking its first steps in the digital world, it’s time we install and activate WooCommerce. To do this, you will need to follow these steps:
- First, from your WordPress Dashboard, head over to Plugins → Add New.
- In the search box, type in WooCommerce, then install the plugin.
- Next, don’t forget to hit activate to be fully operational.
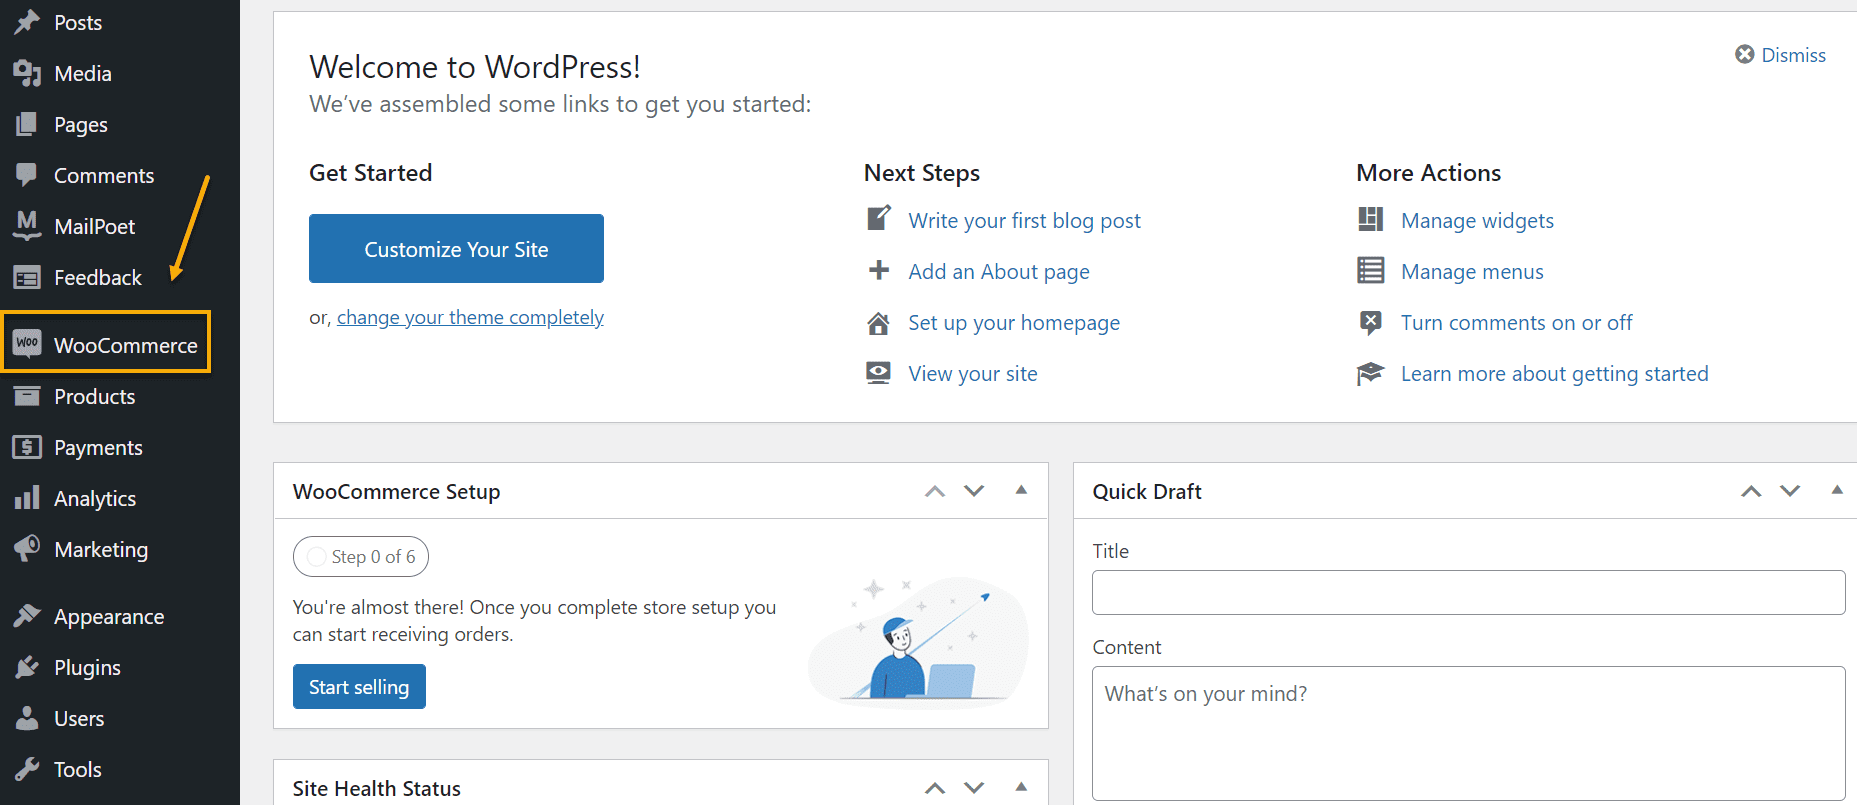
Once WooCommerce is activated, you will see it in the sidebar of your WordPress dashboard. See the screenshot below.
Once WooCommerce is active, several items will be added to our online store for it to function correctly:
- Orders, products, and other taxonomies now have new menu items, custom post types, and taxonomies;
- New widgets and shortcodes;
- Customer and shop manager user roles.
Now that we’ve got the most apparent element out of the way, it’s time we discuss themes.
Ch. 3: Choose a Suitable Theme

WooCommerce is the greatest eCommerce WordPress plugin on the market. So naturally, its themes are pretty great too.
However, not all WooCommerce themes are created equal. In reality, installing the WooCommerce plugin on any old WordPress theme won’t provide you with the best online store experience.
Almost every WooCommerce theme you come across includes a few must-have features. An interactive cart symbol, a customer reviews section, product templates, breadcrumbs, and other fun stuff are all available. All of these are extremely necessary and not challenging to come by.
For our store, we’ve gone with WooCommerce Storefront.
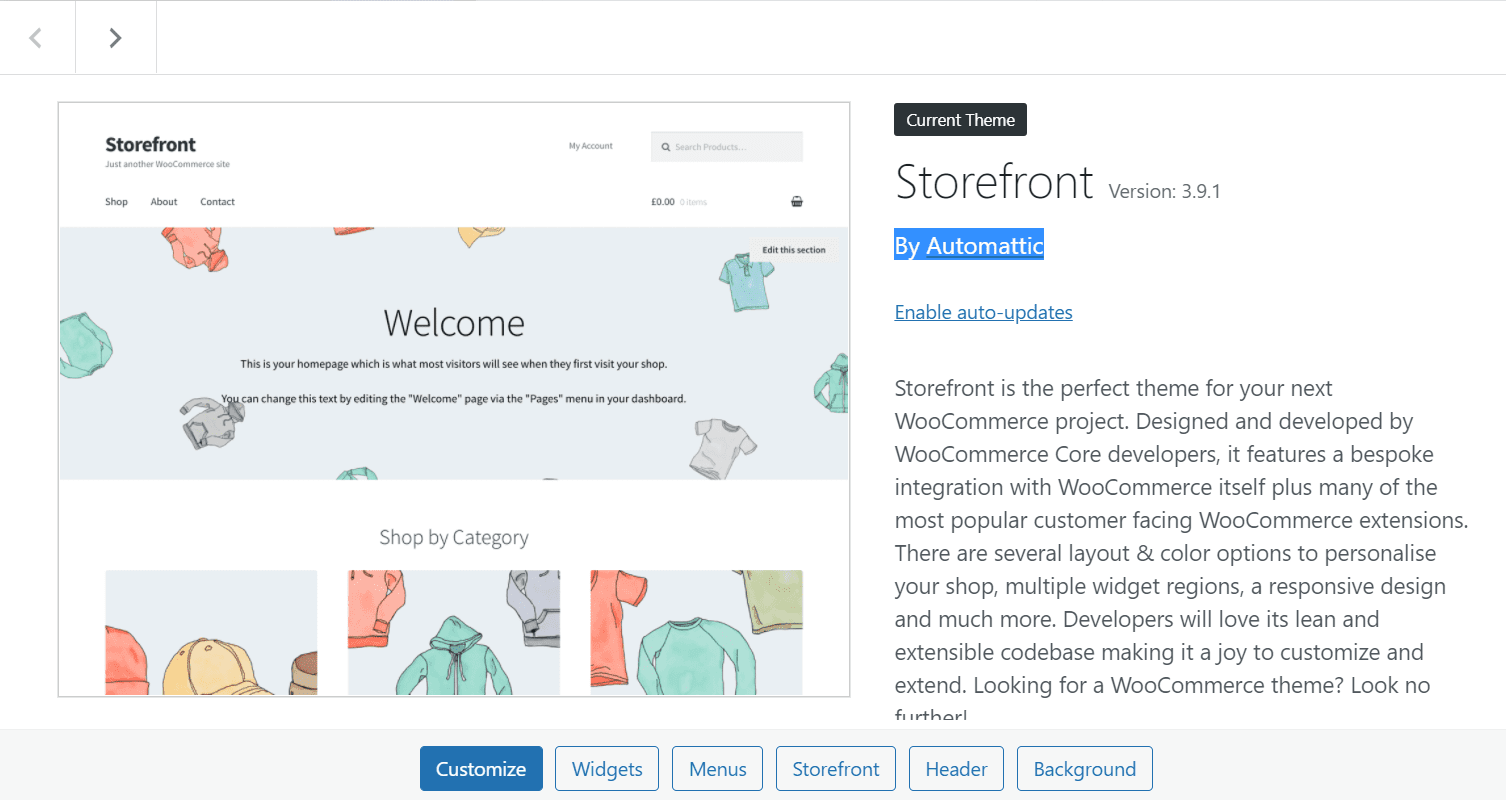
Storefront is WooCommerce’s official WordPress theme, and it was built to go along with their eCommerce WordPress plugin. The design is free to download, but you’ll need to pay for some of Storefront’s premium plugin extensions to get the most out of it.
Storefront is lightweight, quick to load, SEO-friendly, accessible, responsive, and easy to customize. What else could you ask for? It was also created to be a simple WordPress theme that you can extend with child themes. As a result, the core version has a minimalistic appearance when you first activate the theme. See the screenshot below.
Now, to activate the theme, you will need to follow these steps:
- First, head over to Appearance → Themes → Adds New from your WordPress Dashboard.
- Type ‘Storefront’ in the search box and hit enter.
- Next, hover over the theme and hit install.
- Then hit activate as you would with any other theme or plugin.
- Et voilà, Storefront is up and running!
Our store now has a hosting provider and a WordPress theme. Awesome! Let’s move on to our next steps.
Ch. 4: Build Your Store’s Branding and Identity

“Your brand is how people perceive you wherever they interact
with your business—both the impressions you can control and
the ones you can’t.”
It’s not an easy task to create a unique brand from the ground up. What should it resemble? What should people think of it? Will it strike a chord with my intended audience? When creating an image for our online store, we should ask ourselves these familiar questions.
So what is brand identity in its purest form? According to HubSpot, what your brand says, your values, how you explain your product, and how you want people to feel when they connect with it all make up your brand identity. Your brand identity is your company’s personality and a promise to your customers.
First things first, name your brand.
The name you choose for your online store can significantly impact its success. A bad name can cause more problems than just failing to connect with customers; it can also lead to insurmountable business and legal obstacles. A clear, mighty name, on the other hand, can be incredibly beneficial to your marketing and branding efforts.
Try to avoid names that are difficult to spell and instead come up with something that expresses your store’s worth.
Because our online handmade cosmetic store is unique, we’ll have to come up with a creative and unique name.
Behold, Soaply a handmade soap business born out of passion. Passion for teaching you how to build your online business, of course.
We need a logo for our store now that we have a name. Something that represents us. Have you ever seen a brand without a logo? We’re guessing not because there aren’t any. A logo has a significant impact on how your customers perceive your brand.
Two critical aspects here are understanding the purpose of your logo and creating one that stands out. You might want to reach out to a graphic designer or illustrator to portray your brand for this particular task. Also, feel free to read Noupe’s article for more information on choosing a suitable logo.
So, let’s recap what we’ve done so far:
- First, we’ve chosen our hosting provider – Cloudways. ✔️
- Installed and Activated WooCommerce. ✔️
- Chosen Storefront as our theme. ✔️
- Came up with a creative name for our online store. ✔️
And the rest is still uncovered, so let’s dig in!
Ch. 5: Prepare the Homepage

Creating the ideal WooCommerce homepage isn’t as difficult as you might think. There are many best practices that most successful eCommerce websites follow, and if you know what they are, you can follow in their footsteps.
For our handmade cosmetics online store, we will stick to the following basic steps:
- Create a clear headline that expresses our store’s distinct value proposition.
As soon as our homepage loads, we want to inform new visitors about what makes our store unique. The best way to accomplish this is to include a prominent headline at the top of the screen. Then, before they scroll down, that headline should inform users about what they can expect from this store.
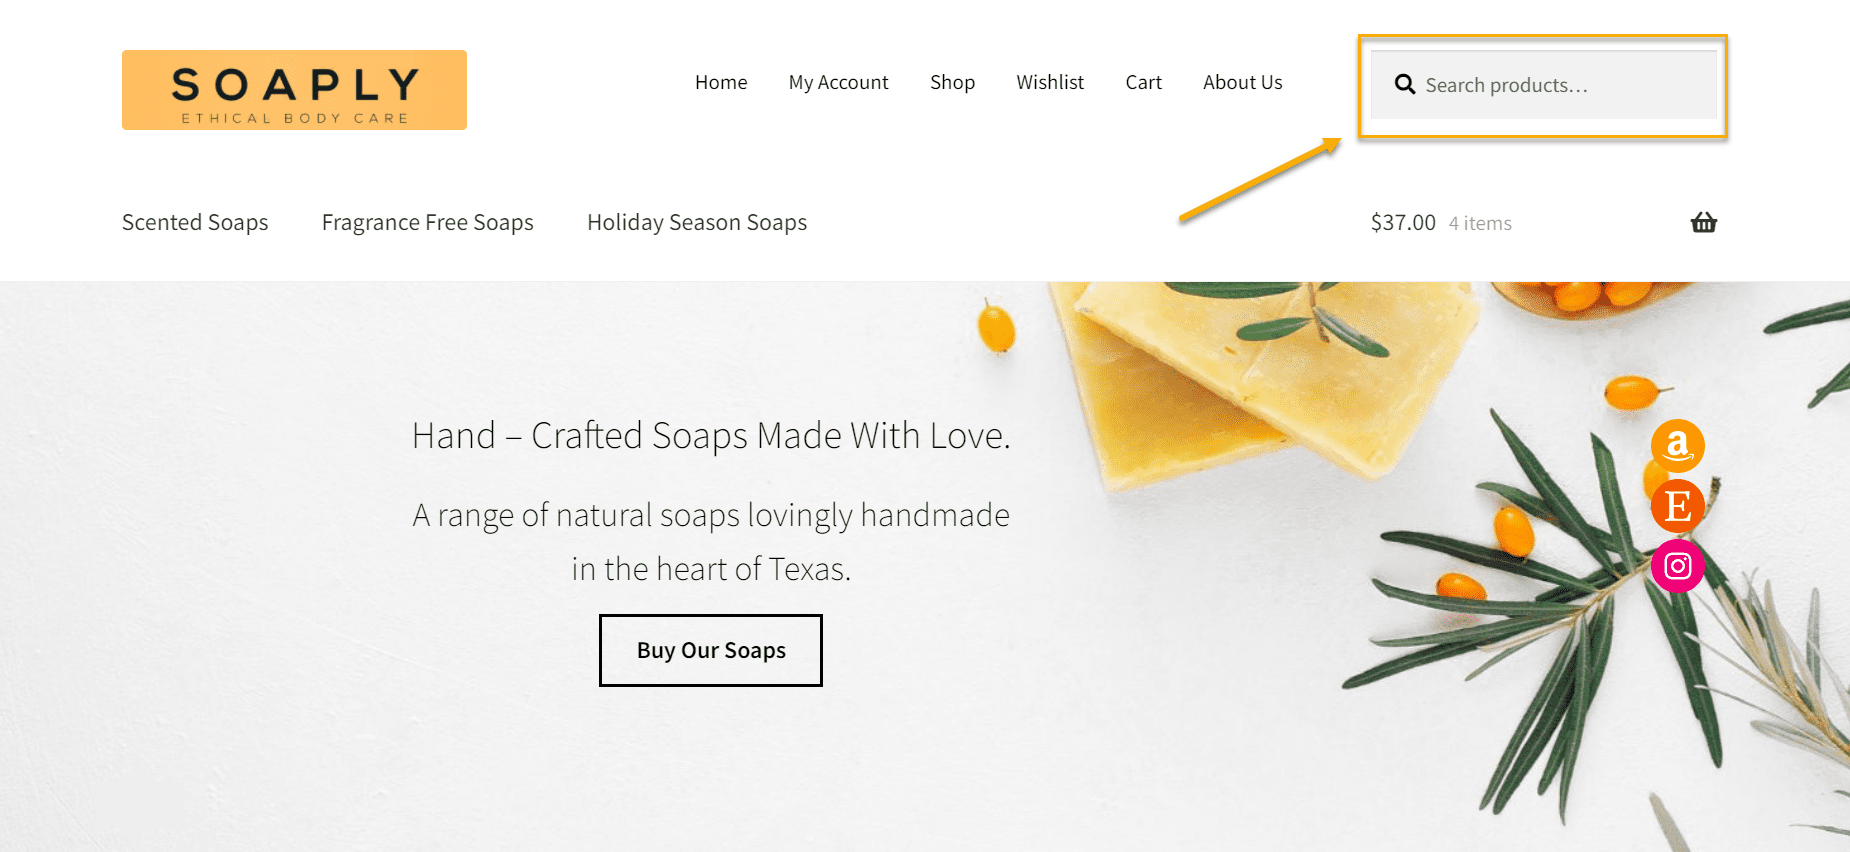
Let’s see what our homepage looks like:

As you can see, we’ve stuck with the simple yet straightforward design approach that you can do too, with the help of WooCommerce and Storefront. So there is no need for extra plugins and extensions, and we’ll show you how.
Here are the essential homepage elements that every homepage needs to have.
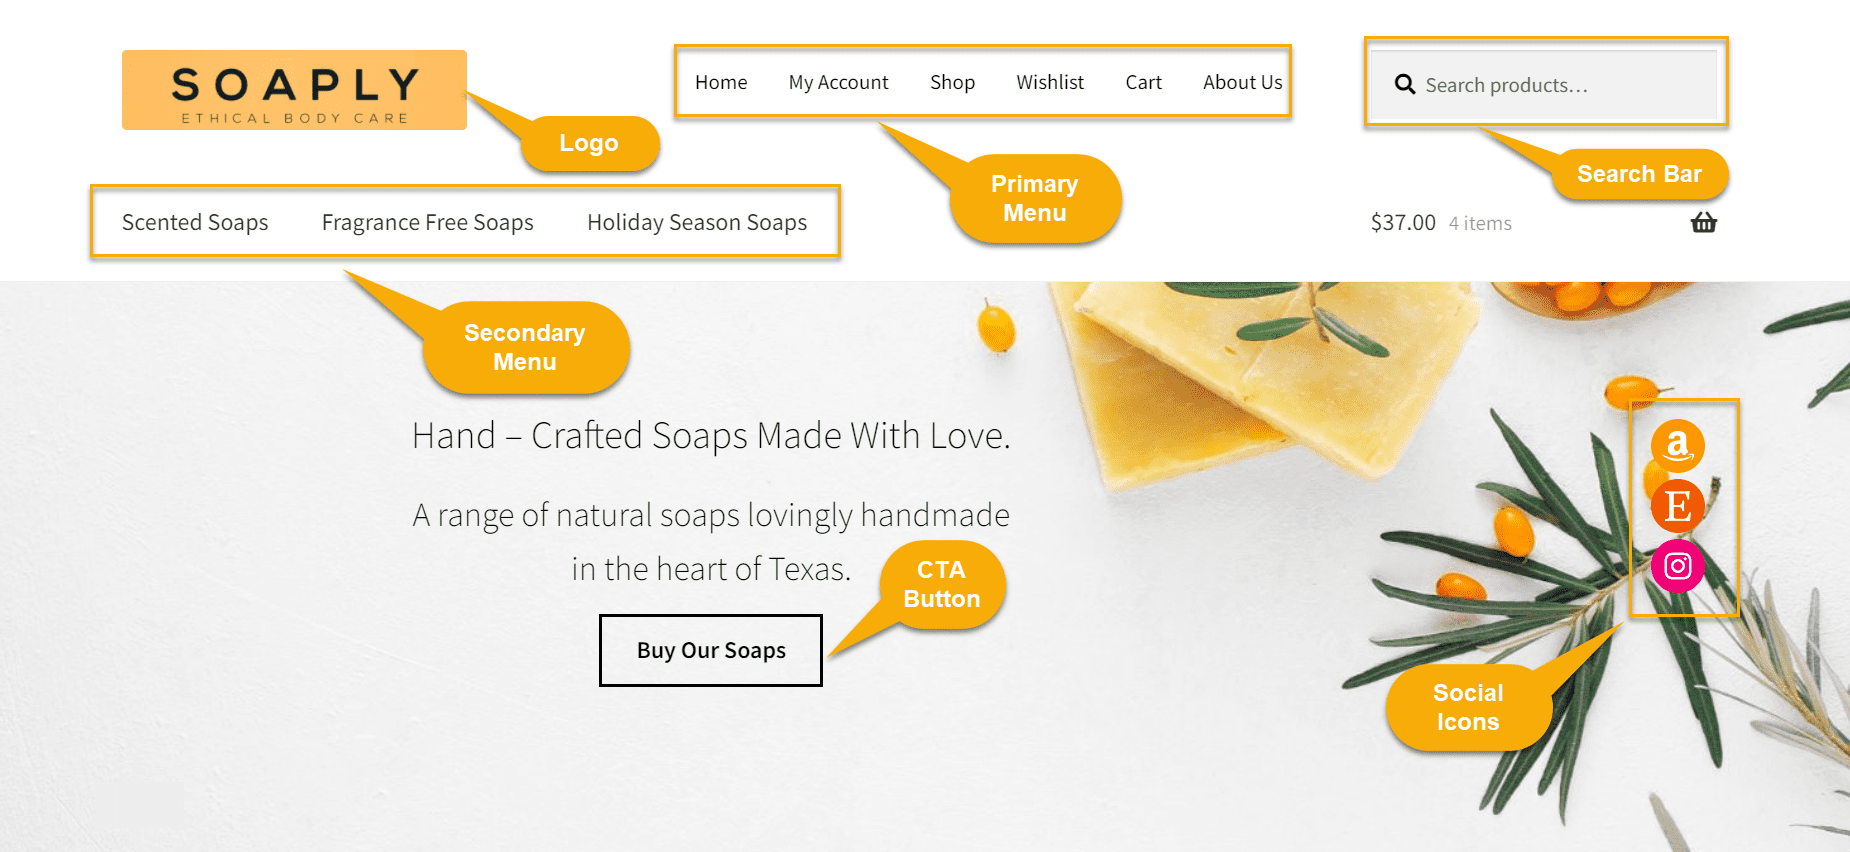
As it has been pointed out, we have a logo, a primary menu consisting of product categories such as Holiday Season Soaps, Scented Soaps, Fragrance-Free Soaps, a secondary menu made out of Home, Cart, My Account, Shop, About us, and Wishlist, a search bar, a shopping cart and lastly, some social media icons.
How to do it:
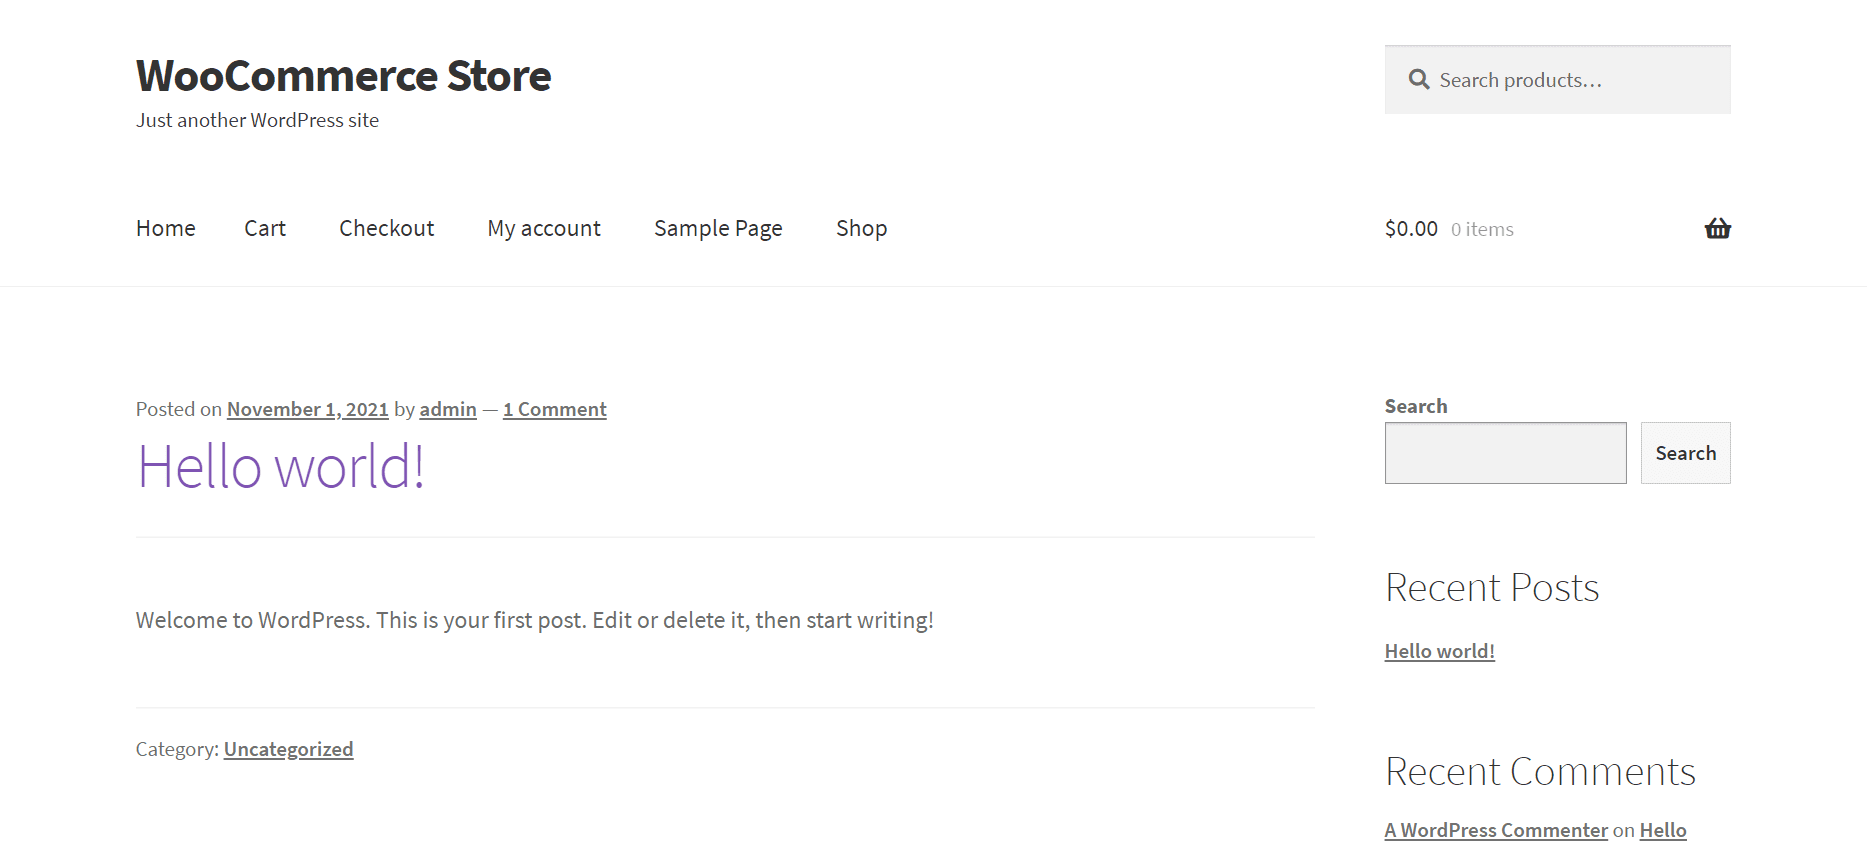
First off, head over to the website from your WordPress Dashboard. See the screenshot below.
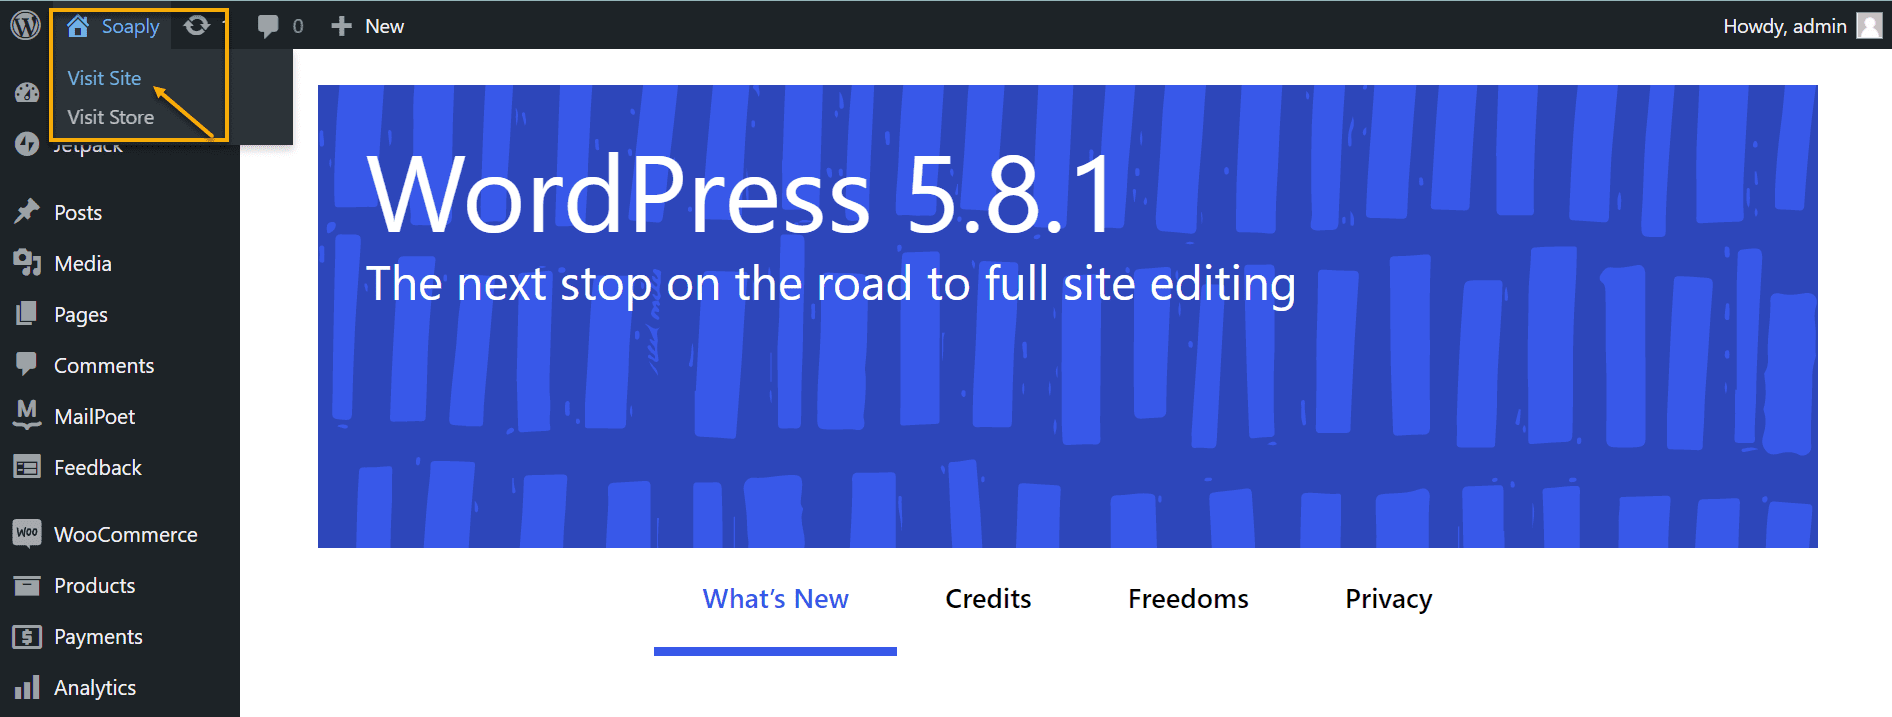
Hit Visit Site or Visit Store, both of them will take you to the same place.
Once there, this is what you will see:
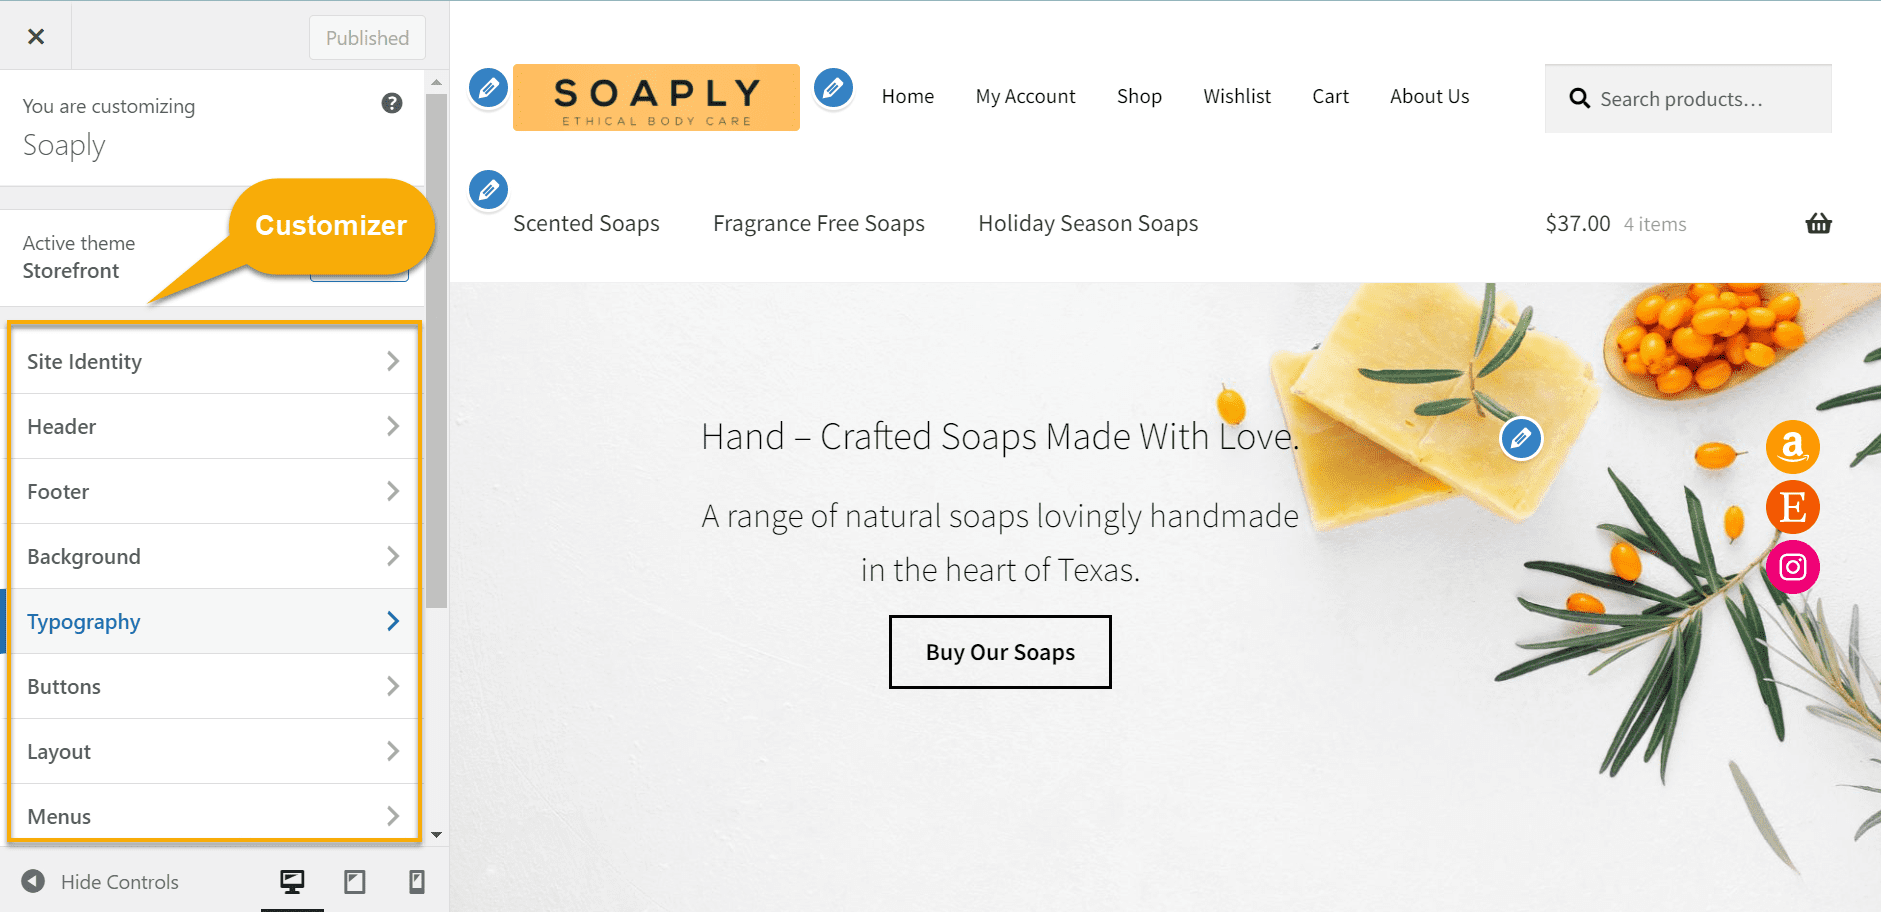
On the left, you have the Customizer, which will allow you to make changes to your page, add or remove any text, change the typography and background color, and the background image.
Also, if you want to erase some items, such as the second search bar in the screenshot below, make sure you are on the store’s page, then head over to Customize, click on the little pencil icon, and you will see an editing panel, such as this one:

Hit the three tiny vertical dots, then click Remove block.
On the other hand, if you want to add any type of widgets to your homepage, such as social media icons, head over to Customize → Widgets → Sidebar and choose the block you wish to use.
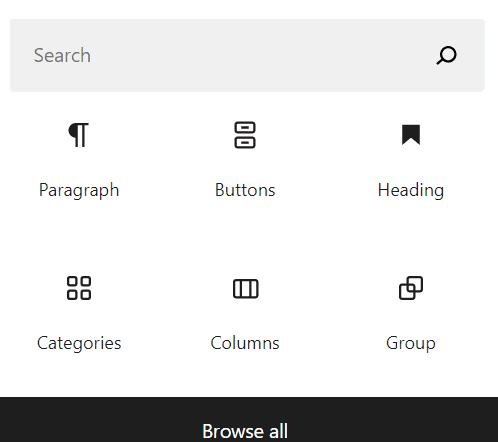
You can use a complete list of things; you just need to browse all.
Once you’re satisfied with the homepage, don’t forget to hit Publish and save your work.
2. Add a search bar for facilitating customer navigation.
The search bar in the screenshot above is automatically generated once you install and activate WooCommerce and Storefront. As we’ve mentioned before, WooCommerce comes with several in-built features, and the search bar is one of them.
However, if you want to spice up your search bar, we can recommend a plugin that will do the work for you.
YITH WooCommerce AJAX Search – Free and Premium

AJAX search is a search method for products that display suggestions as users type in the search bar. The flexibility it provides when deciding what to show in the search results makes YITH WooCommerce AJAX Search one of the best product search plugins for WooCommerce.
Pros of choosing the AJAX search bar plugin:
- Assist customers in saving time when looking for products.
- Customize search forms.
- Users can search within specific categories or tags using filters and filter the results based on their preferences.
- You can include badges and prices in the search results to highlight particular products.
3. Make the Shop page visible.

People will frequently visit your WooCommerce store without knowing exactly what they want to buy. One of the most effective ways to assist those users is to include the product page on the homepage. Customers can see it right in front of their faces, eliminating the possibility of missing out.
You can always go back to these pages from your Dashboard and edit them, remove them, or even add extra ones if you’d like. However, you will need to head over to your Dashboard → Pages → All Pages to do this. This is what you will see:
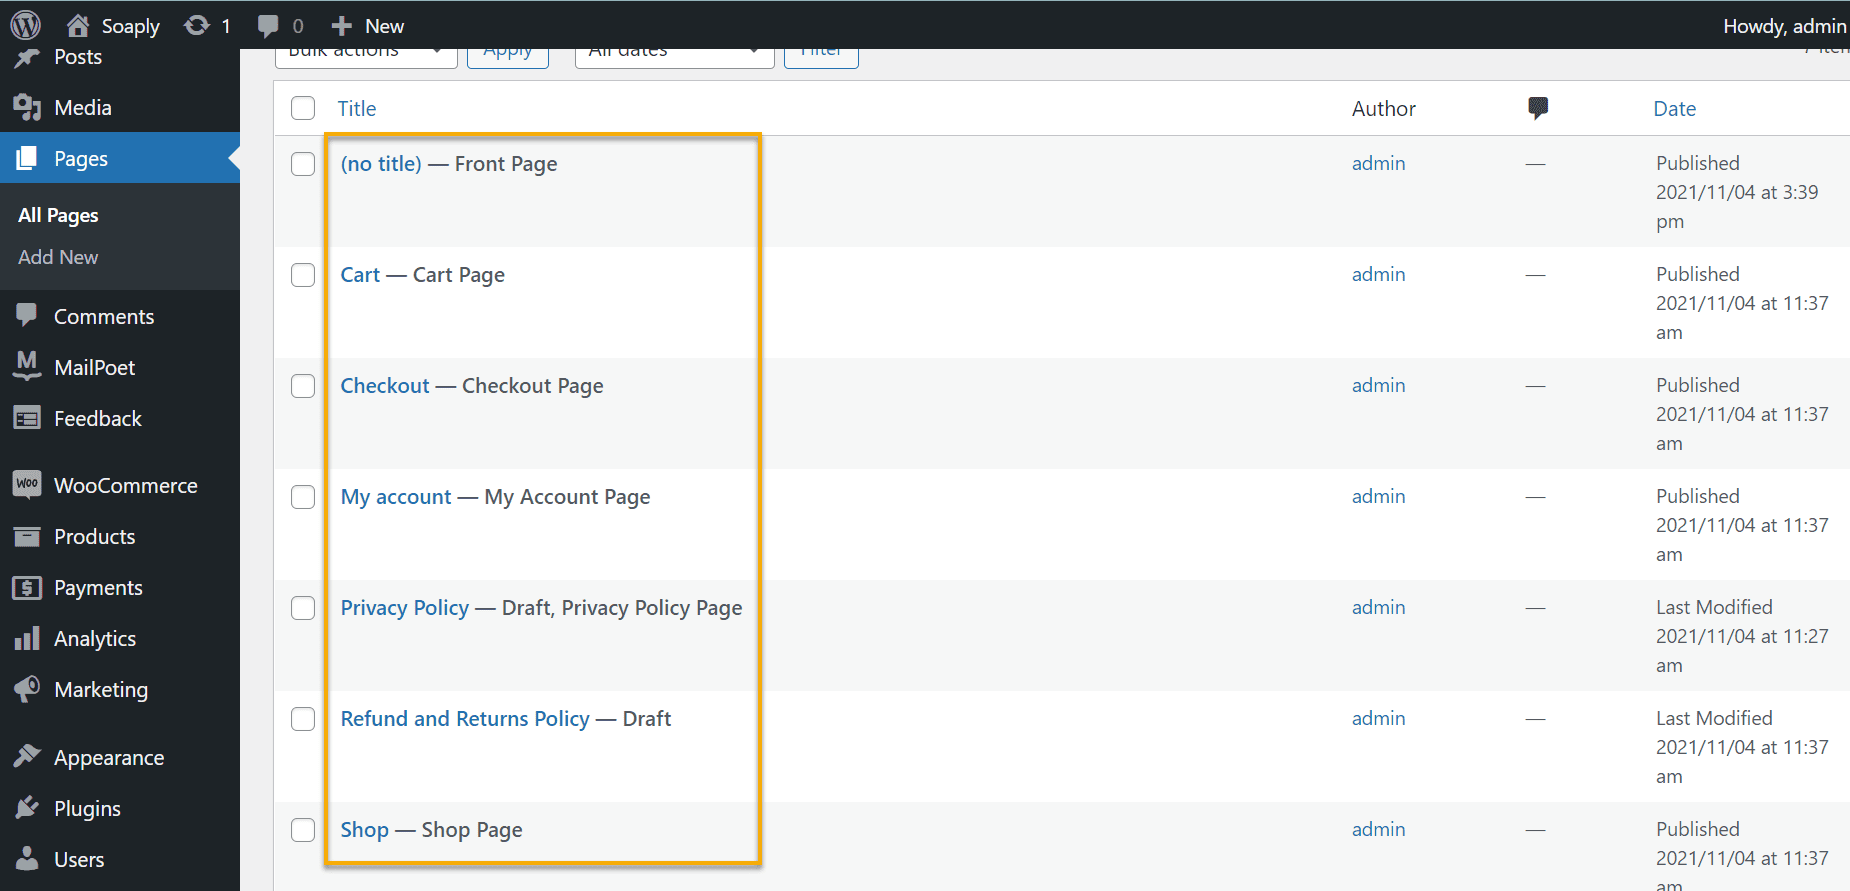
You have two options if you want to edit one of these pages. First, hover over to the page you want to work on, and you will see a little editing section right under it.

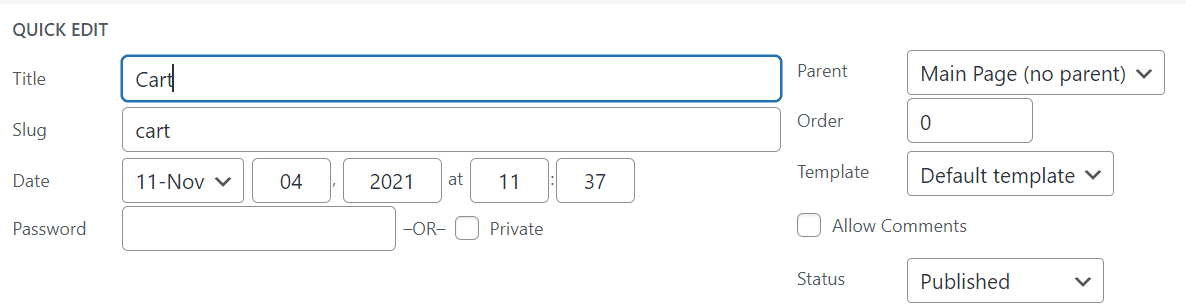
If you click on ‘Quick Edit,’ you can change the page’s title, slug, date, password, etc.
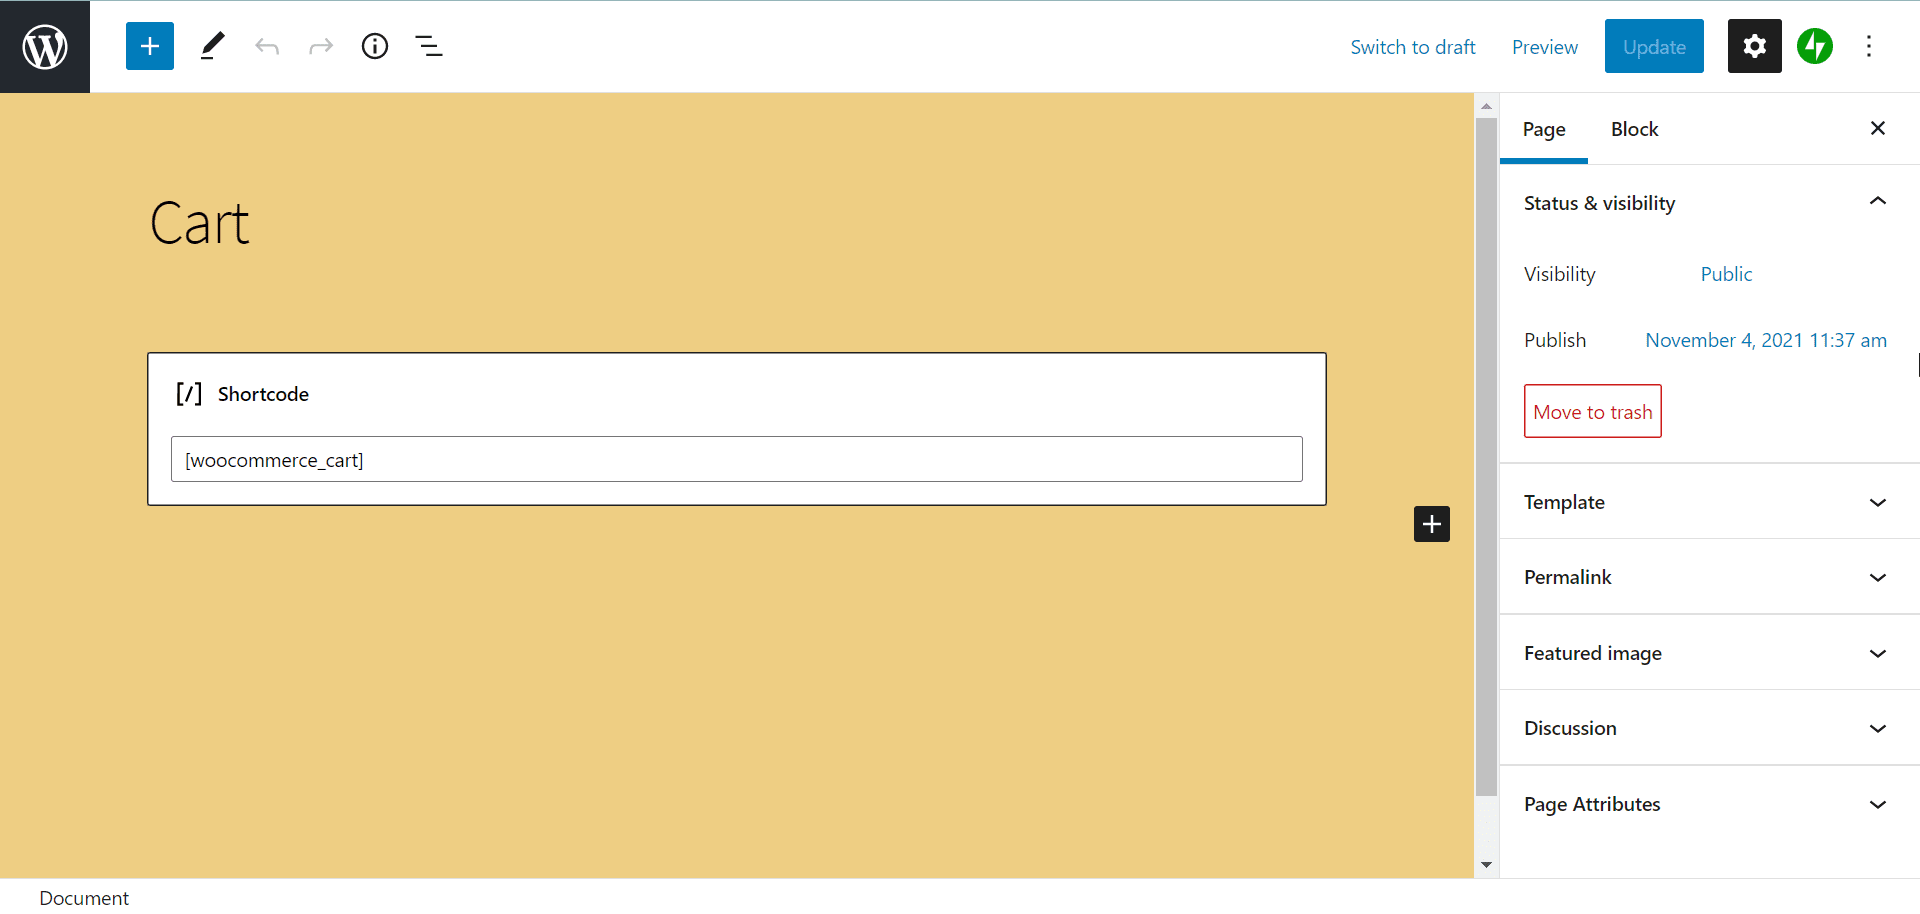
If you hit ‘Edit,’ however, you can make more complicated edits, such as adding shortcodes, featured images, changing templates, adjusting the permalink, etc.
Once our homepage begins to shape, we can create our product page and add products to the store. We’ll show you how: 👇
Ch. 6: Prepare the Product Page

Because our online store is one-of-a-kind, there are a few steps we need to keep in mind when creating the product page. First off, we need to add some products. Adding products to WooCommerce is simple, even if you’ve never used WordPress before. However, you may require assistance in creating your first product, which is the focus of the next paragraph.
How to do it:
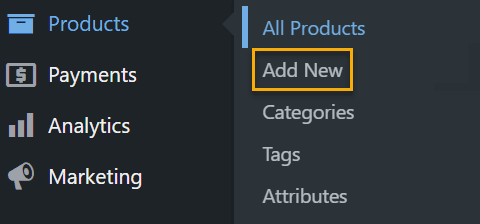
After installing WooCommerce, open your WordPress dashboard and go to WooCommerce → Products → Add New.
This should launch the WordPress editor you’re already familiar with and a new page where you can add any products you want. Let’s add some cute soaps in our case.
First, we’re going to add the product name.
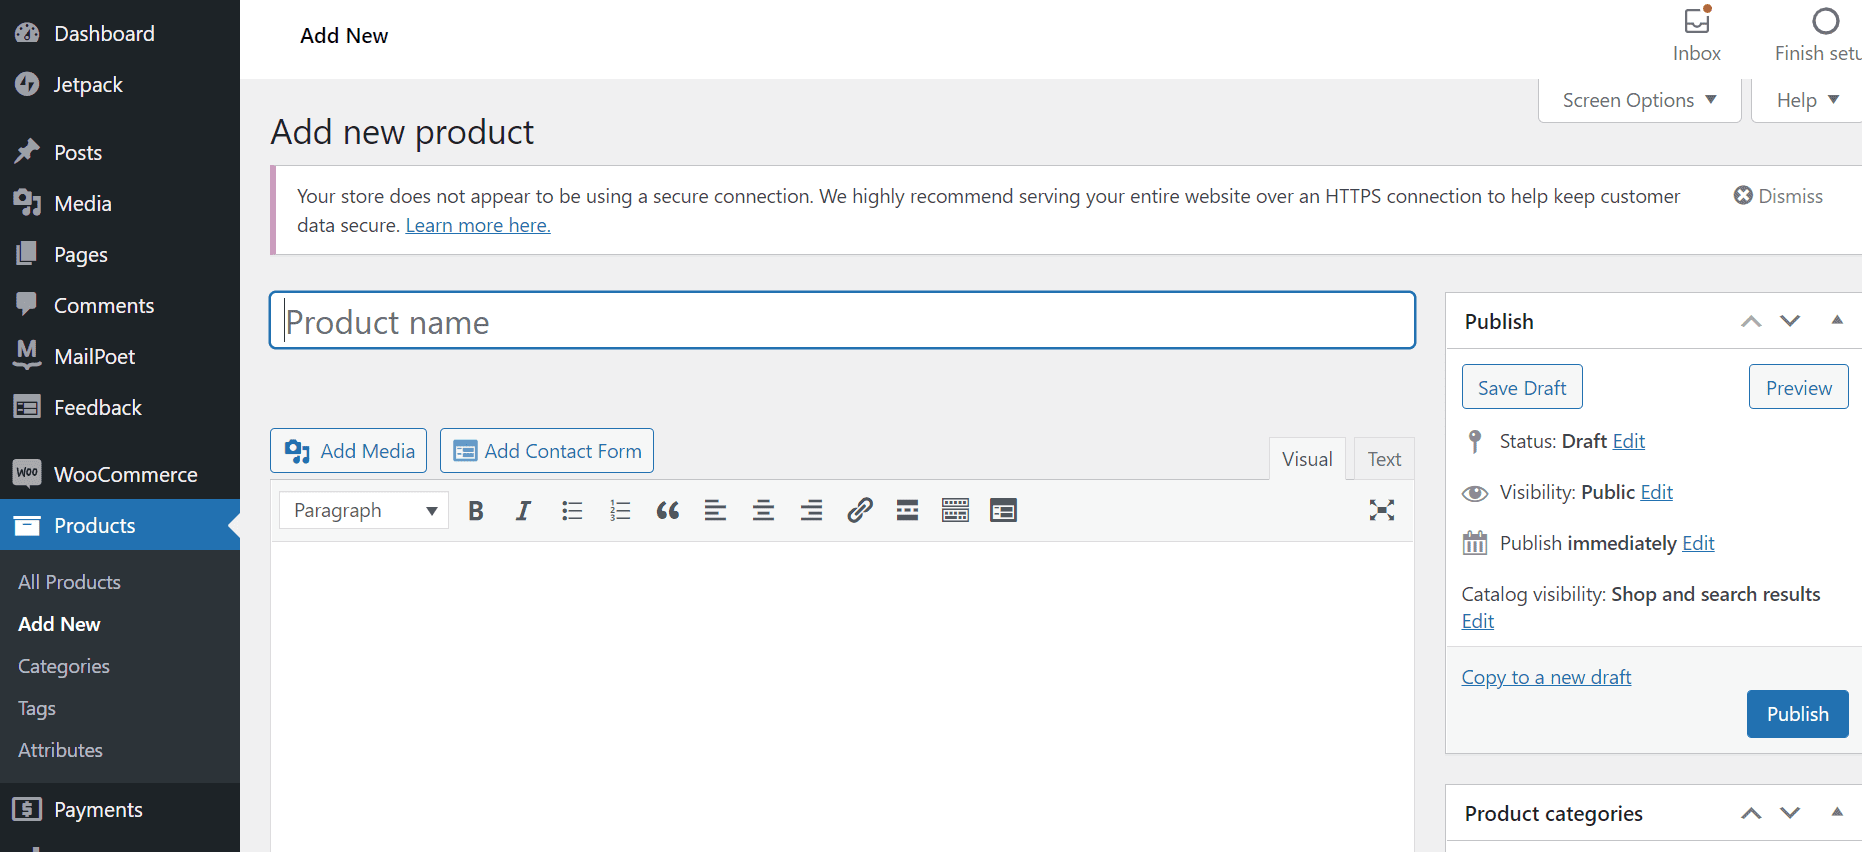
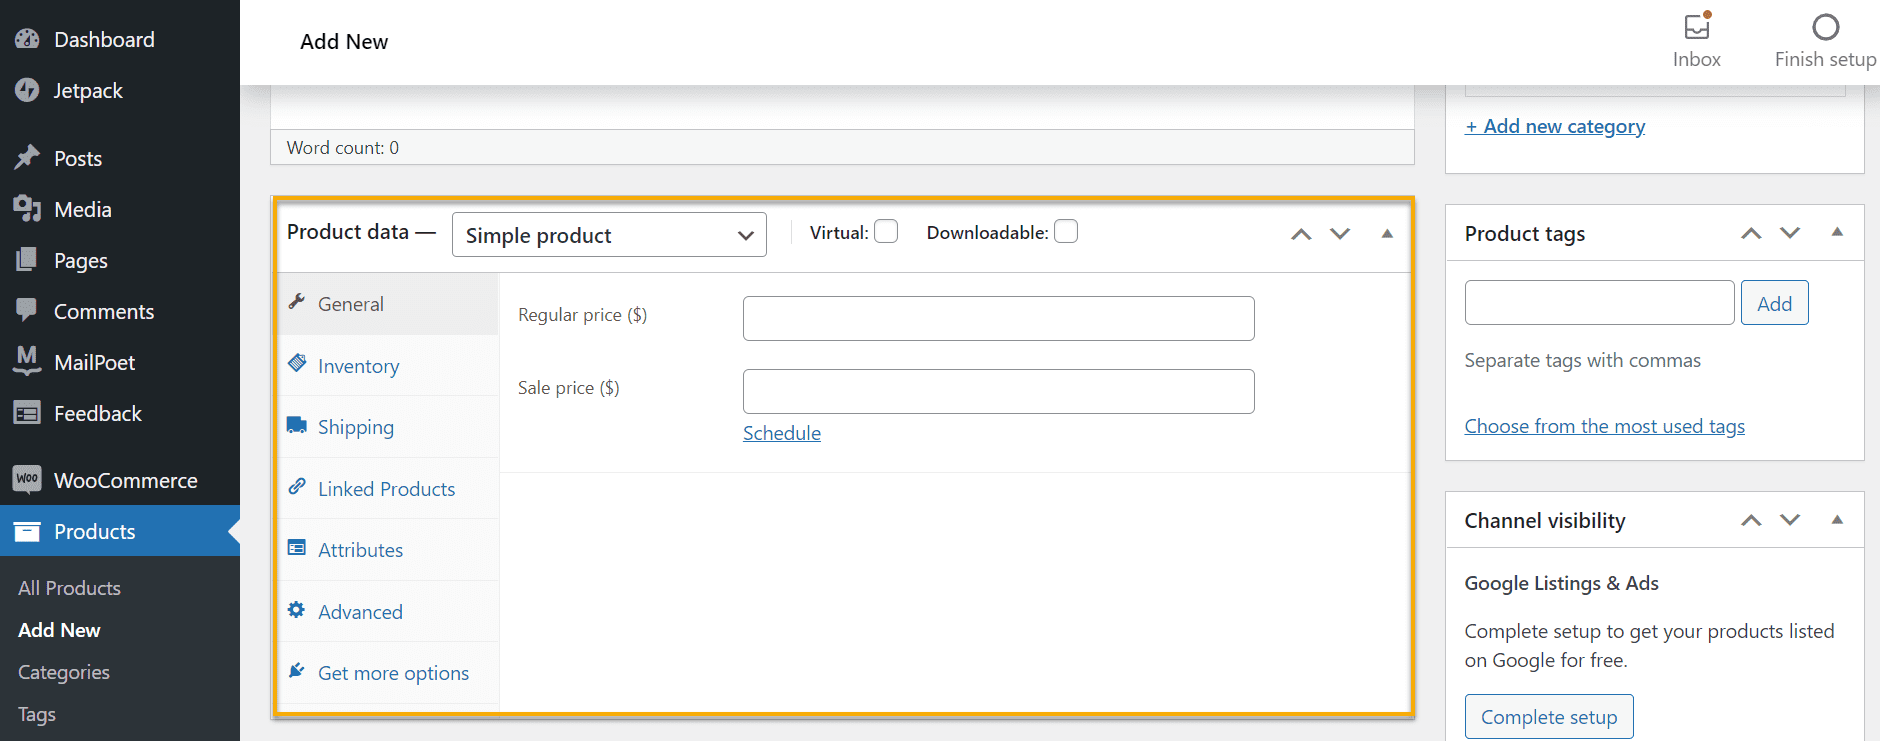
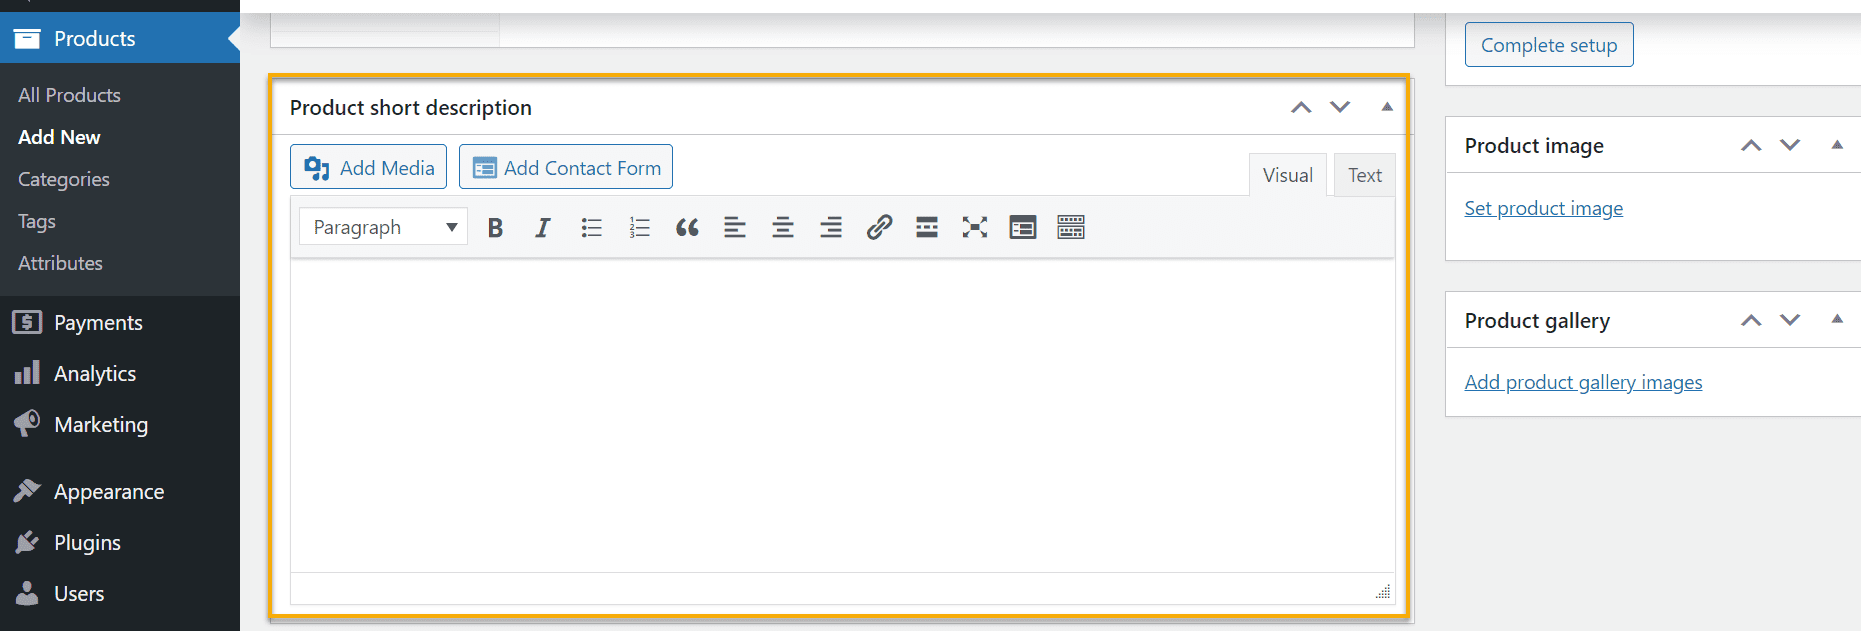
Type in the product name you want to add and display it on your site in the first row. After you’re done, comes the product description and price. You will see the designated sections for these options if you scroll down.
A few key points to remember here:
- Stick to high-quality and outstanding product images. You want your customer to almost feel like they are touching the product. In addition, you want them to have an excellent first impression.
- Add a catchy product description with engaging content that resonates with them. Don’t just list the product features.
- If you are selling healthcare or beauty products, you might want to display the ingredients used to make the products.
Now, let’s see what our product page looks like:
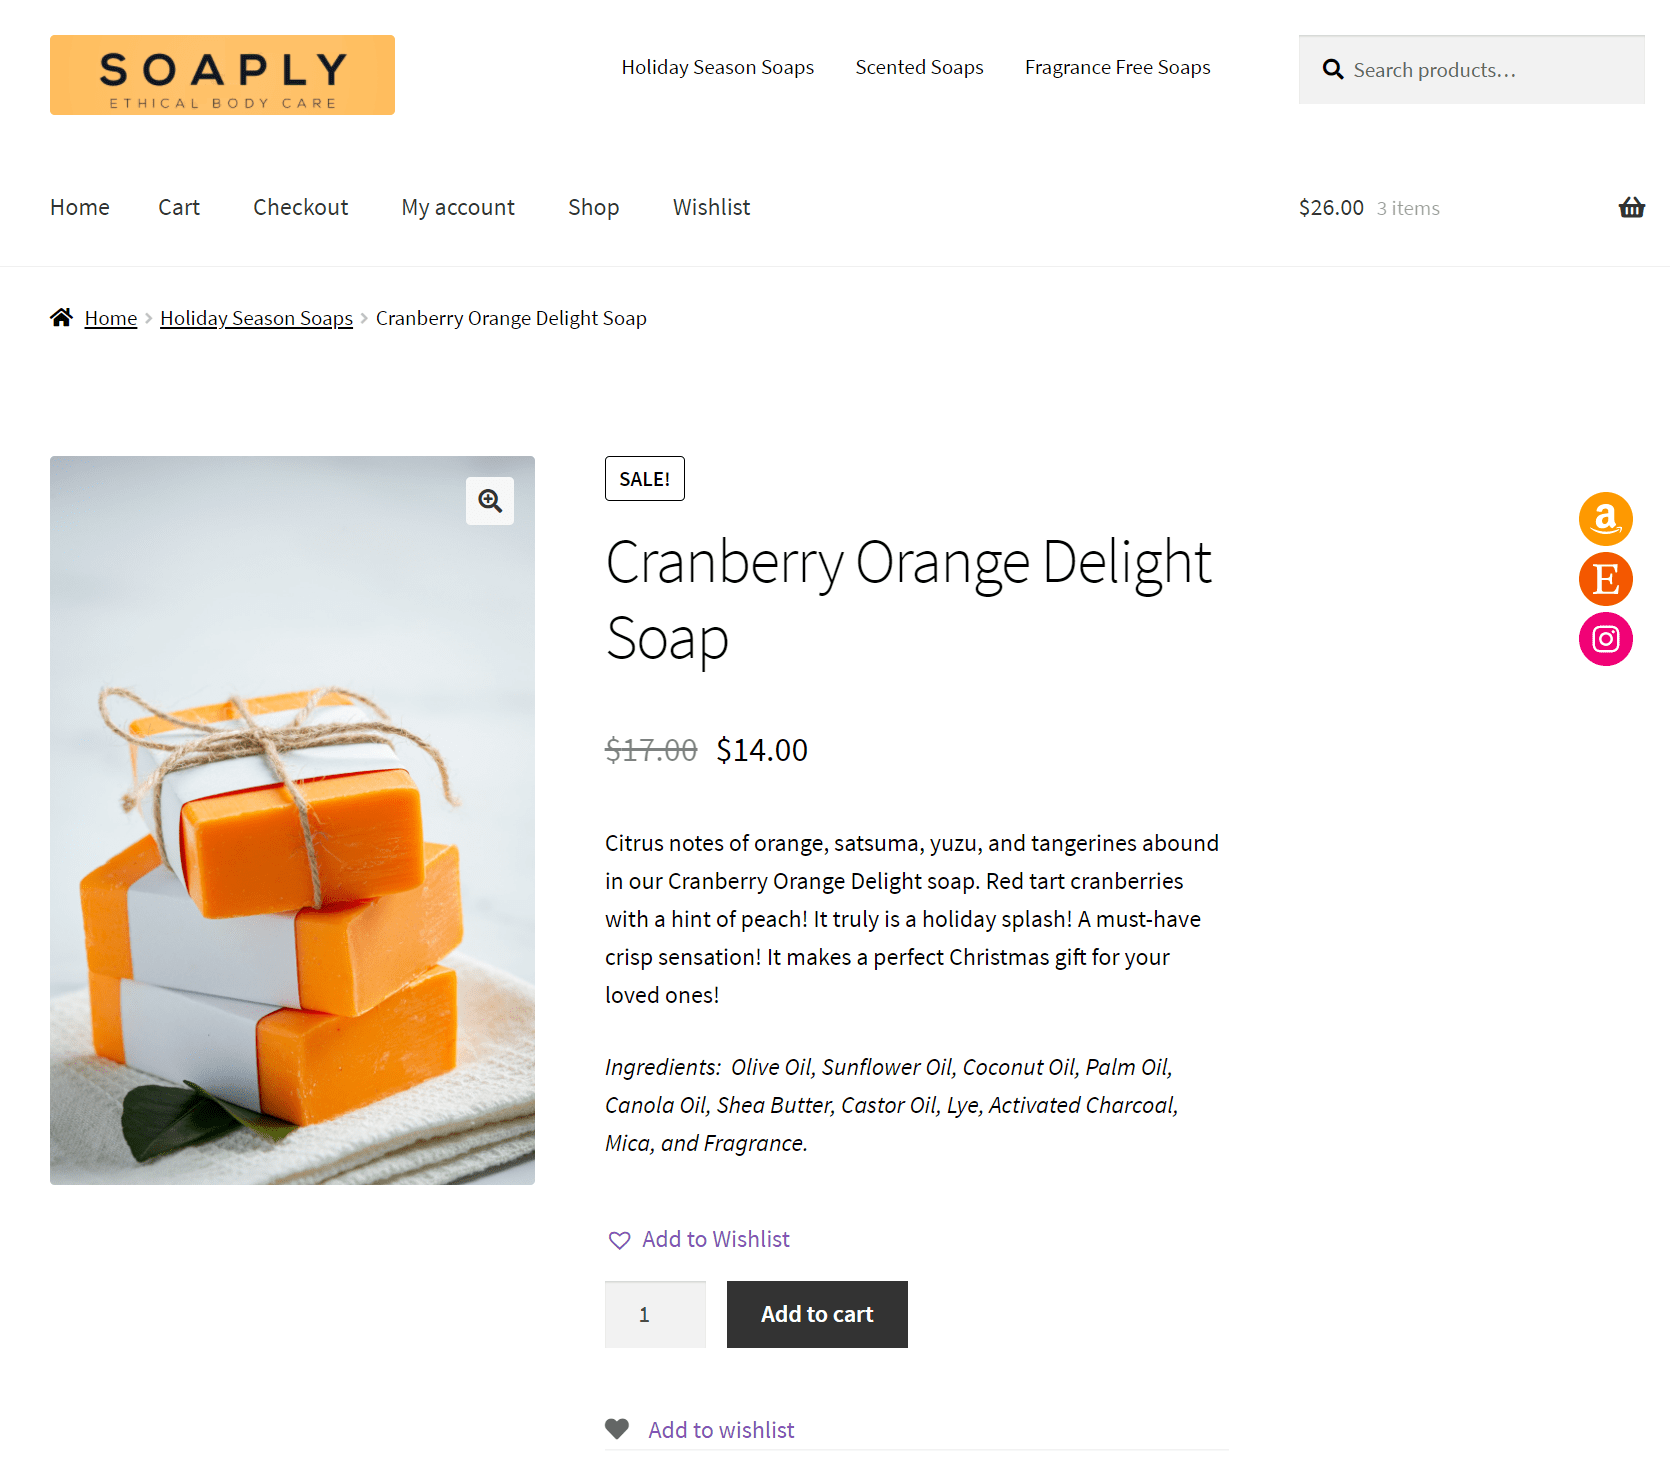
Quite pleasing to the eye, we’d say.
As you can see, we have a clear and breathable design with a white background, black text, and a high-quality product image. Our product page features all the necessary elements that it needs for an improved user experience, such as:
- Product name;
- Product description;
- Price;
- Wishlist option;
- Add to cart button;
- Product quantity;
- Product image;
- Zoom in and out option;
- Primary menu and secondary menu.
However, that’s not all. If we scroll down, we will see some more useful features of a single product page, such as:
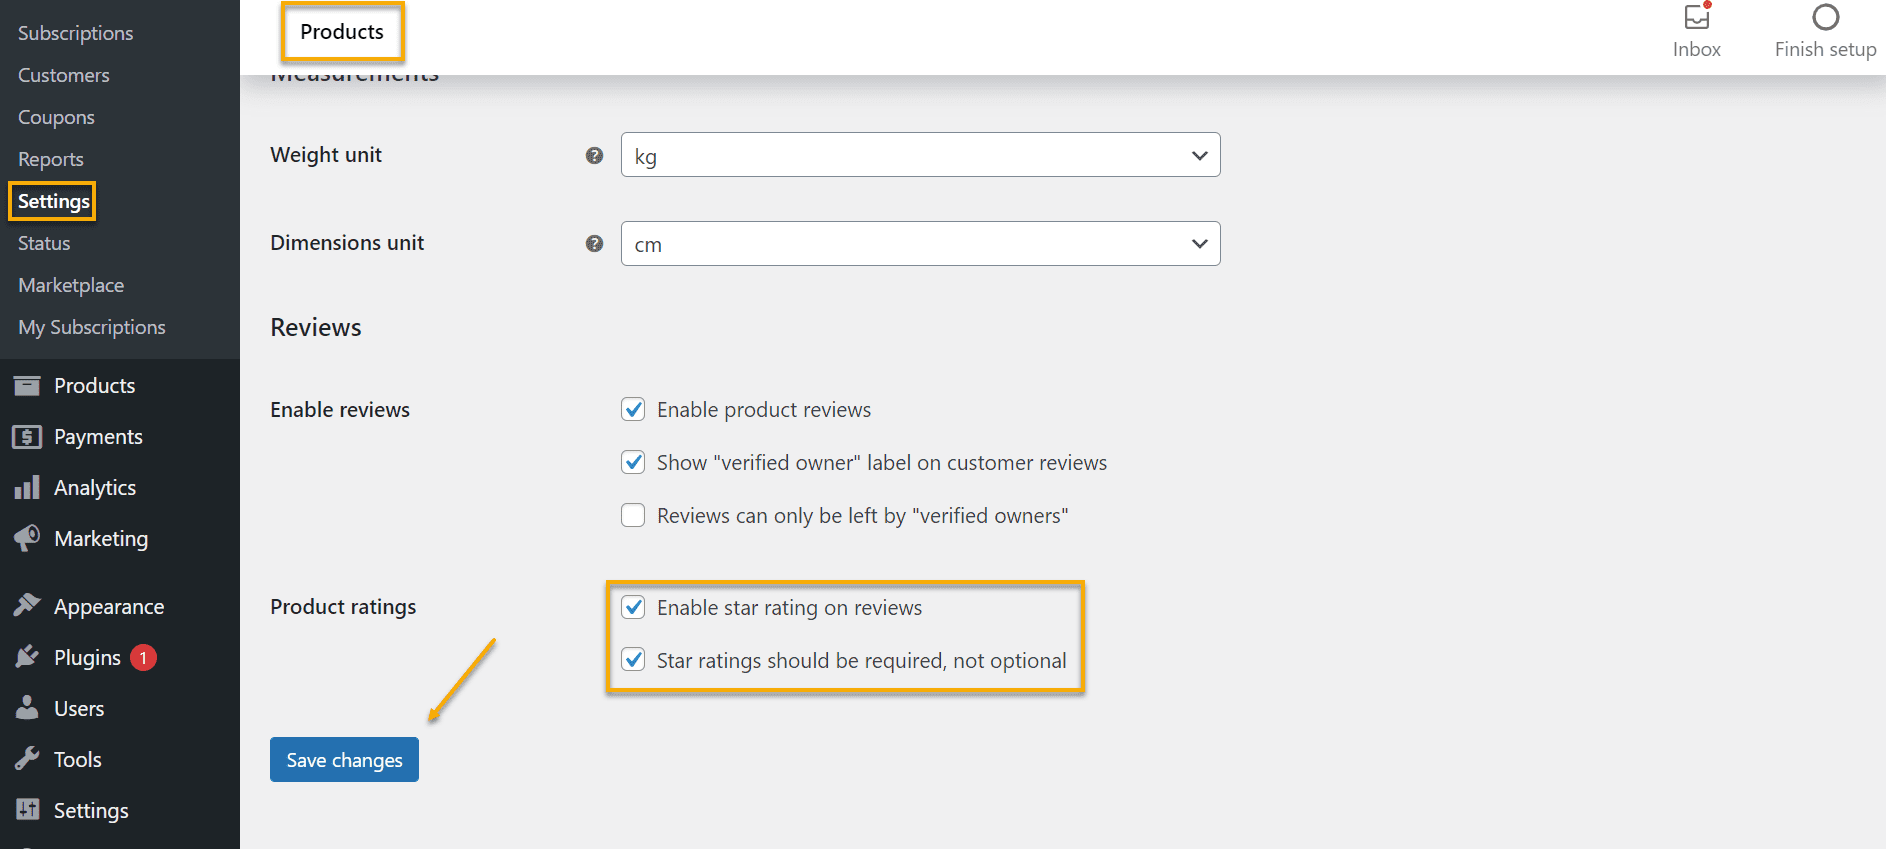
- Reviews / Client Testimonials
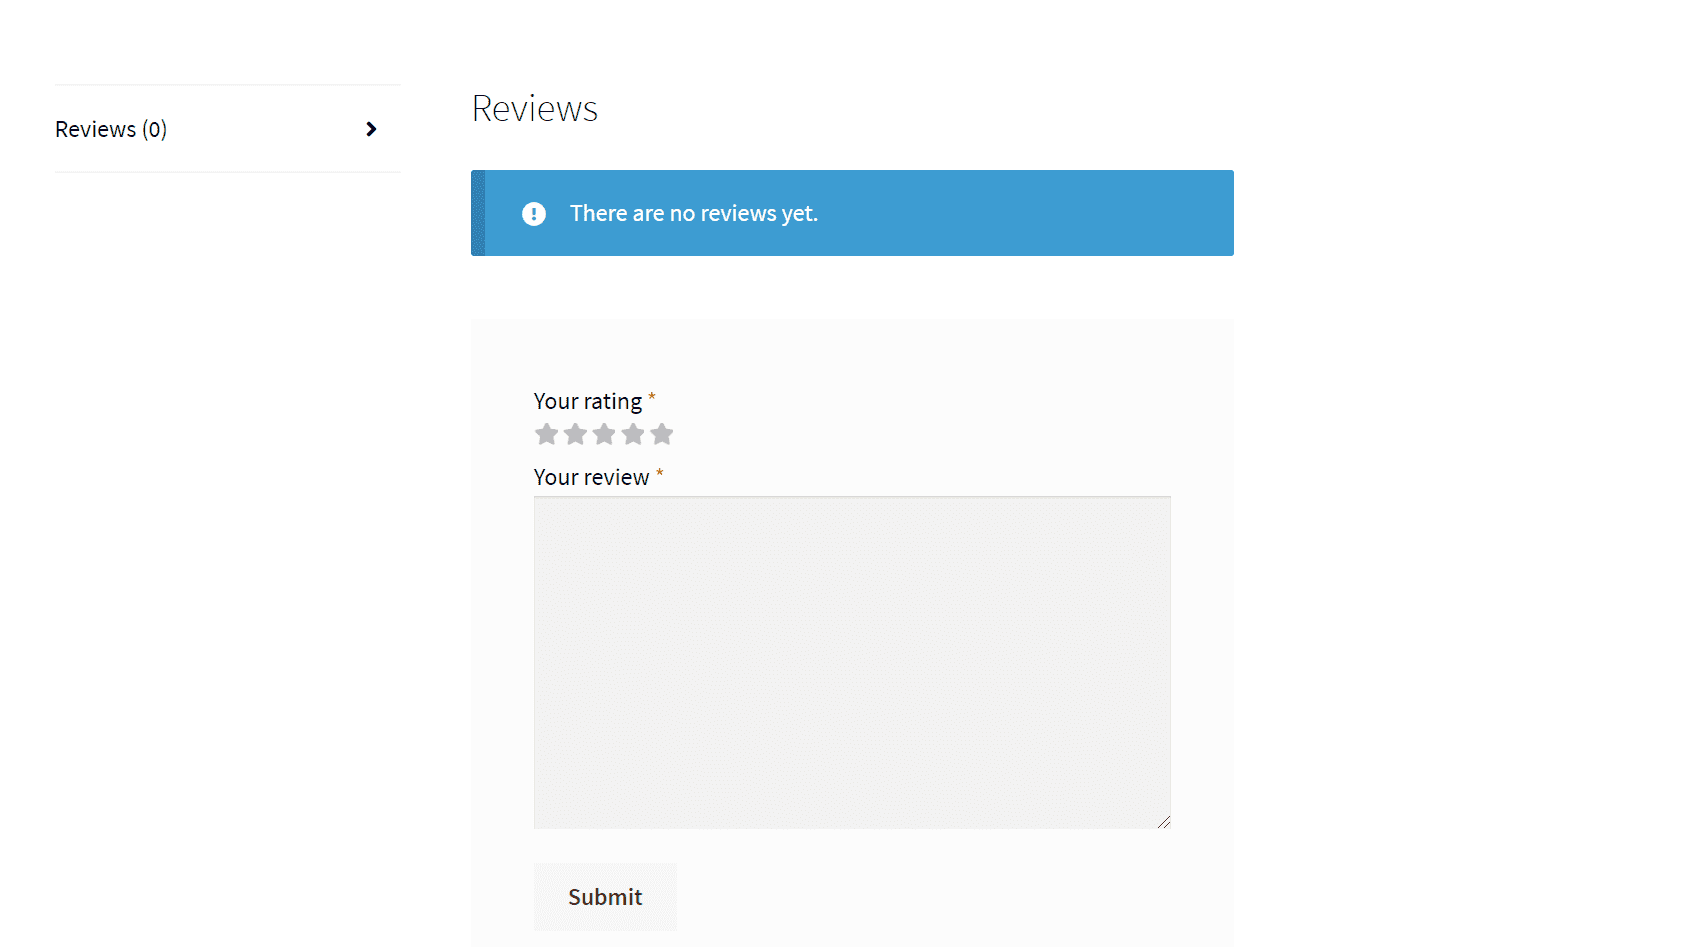
Customer reviews are an already integrated part of WooCommerce. Head over to WooCommerce → Settings from the Dashboard to enable customer reviews. Once there, hit the Products tab, scroll down and tick the Enable product reviews option. See the screenshot below.
- Related Products
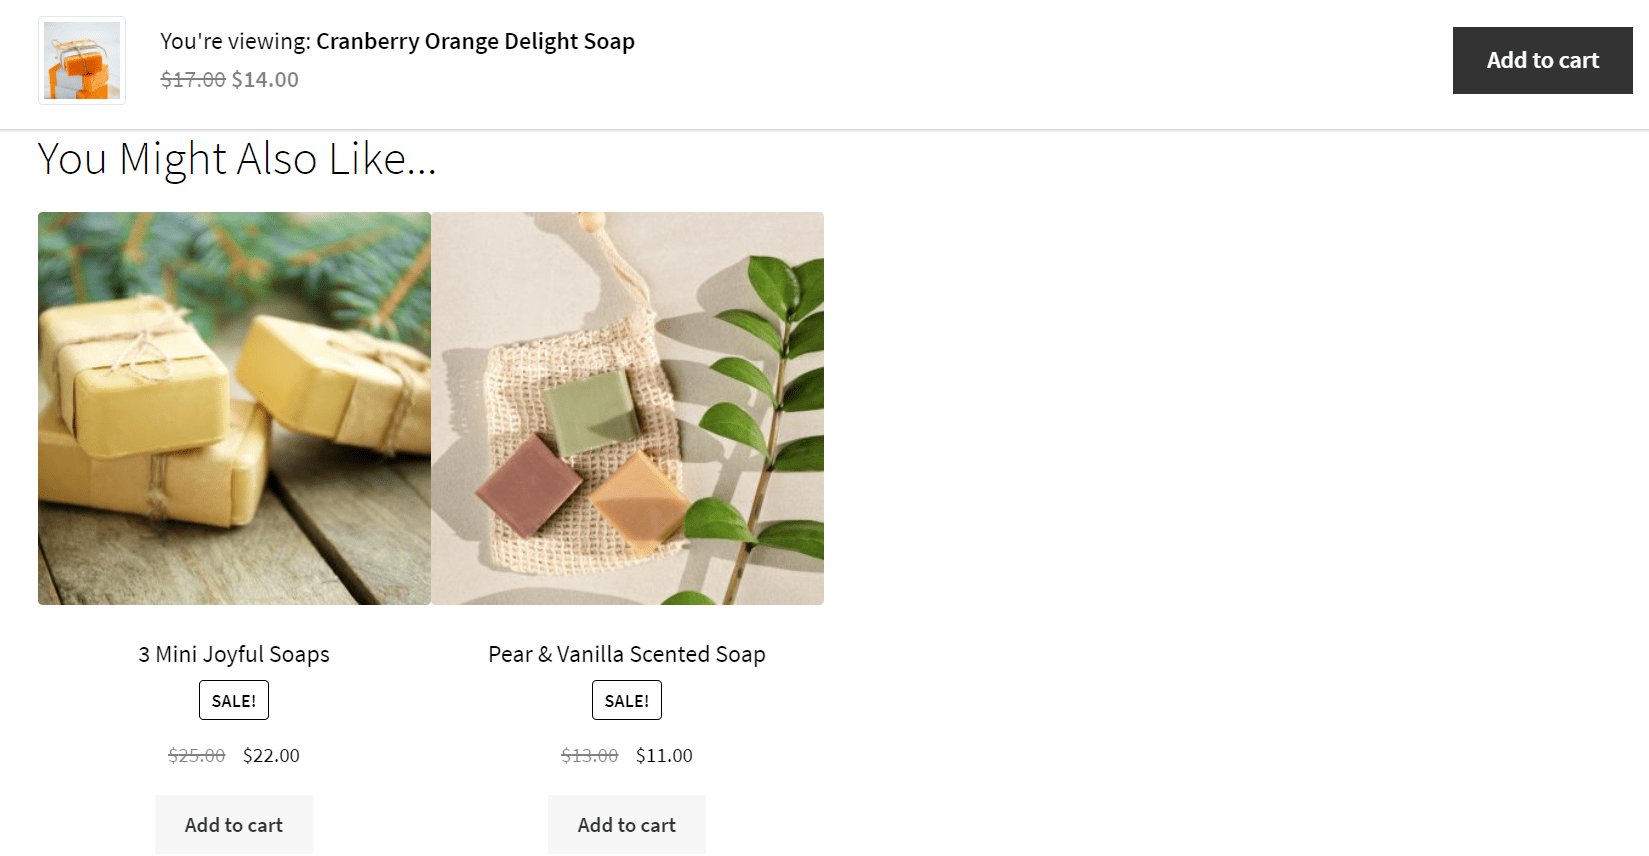
This feature also comes with WooCommerce and Storefront as you install them, so you don’t need to do any specific modifications. Of course, you will get this if you stick to the default features, but you can always add a little extra touch to it, and we have the perfect plugin for the job.

Woo Related Products can assist you in adding visually appealing product sliders to your posts, pages, or sidebar widgets. It will display related products at random based on product tags, categories, and attributes.
For example, our soap categories are divided into three main categories (Holiday Season Soaps, Scented Soaps, Fragrance-Free Soaps), which the user can see right from the homepage.

And if the user clicks on a specific category, they will only see the products meant to be in that category. See the screenshot below.
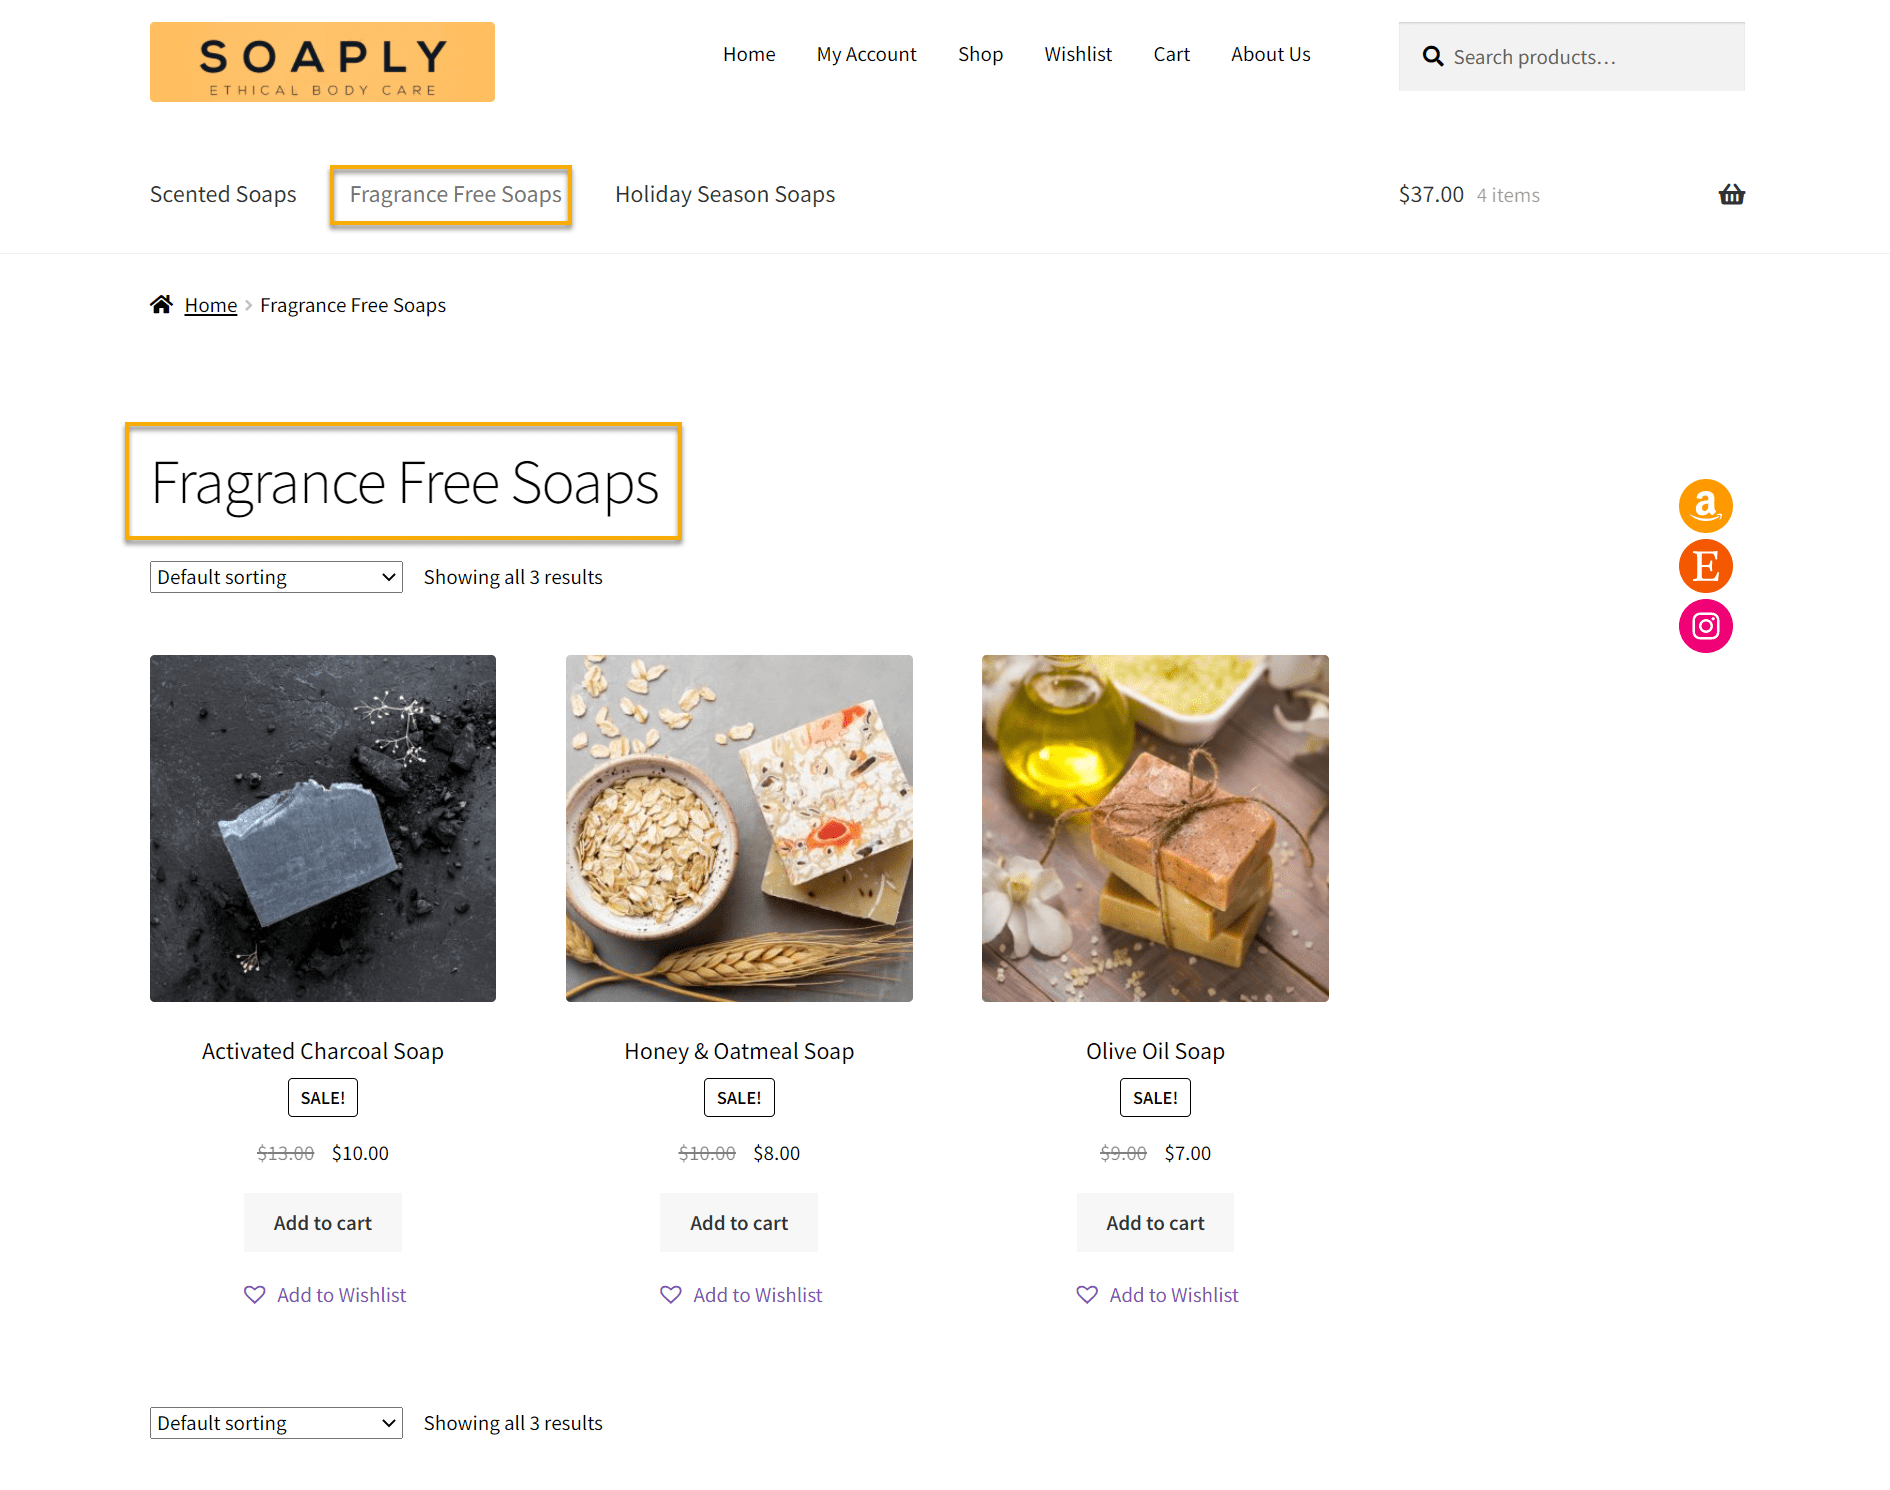
As far as the sorting options go, you can see that there is a default sorting bar on every product page that goes like this:
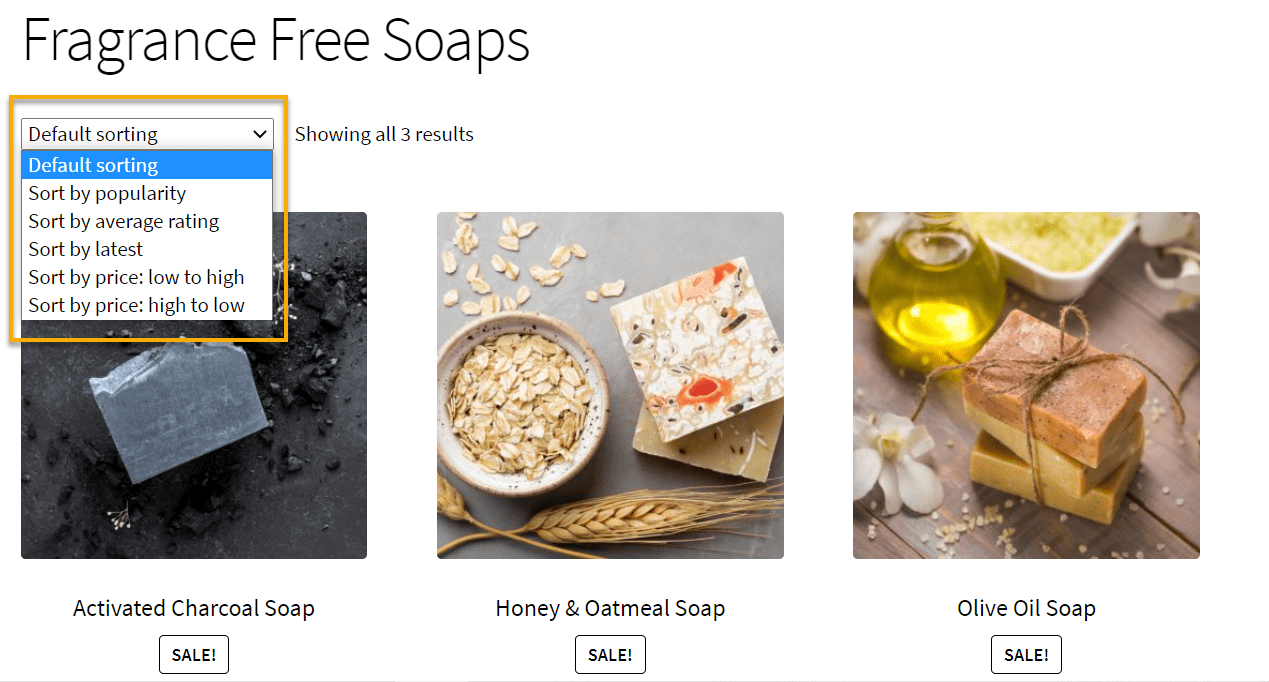
Sorting by product popularity, average customer rating, latest products, pricing from low to high and low.
The plugin can also display your merchandise without the slider, or you can add a single related product to your sidebar. Furthermore, you can exclude specific categories if you don’t want certain types of items to appear in your related products.
How to use this plugin:
After installing and activating the plugin, head to WooCommerce → Woo Related Products and adjust according to your preferences; see the screenshot below.
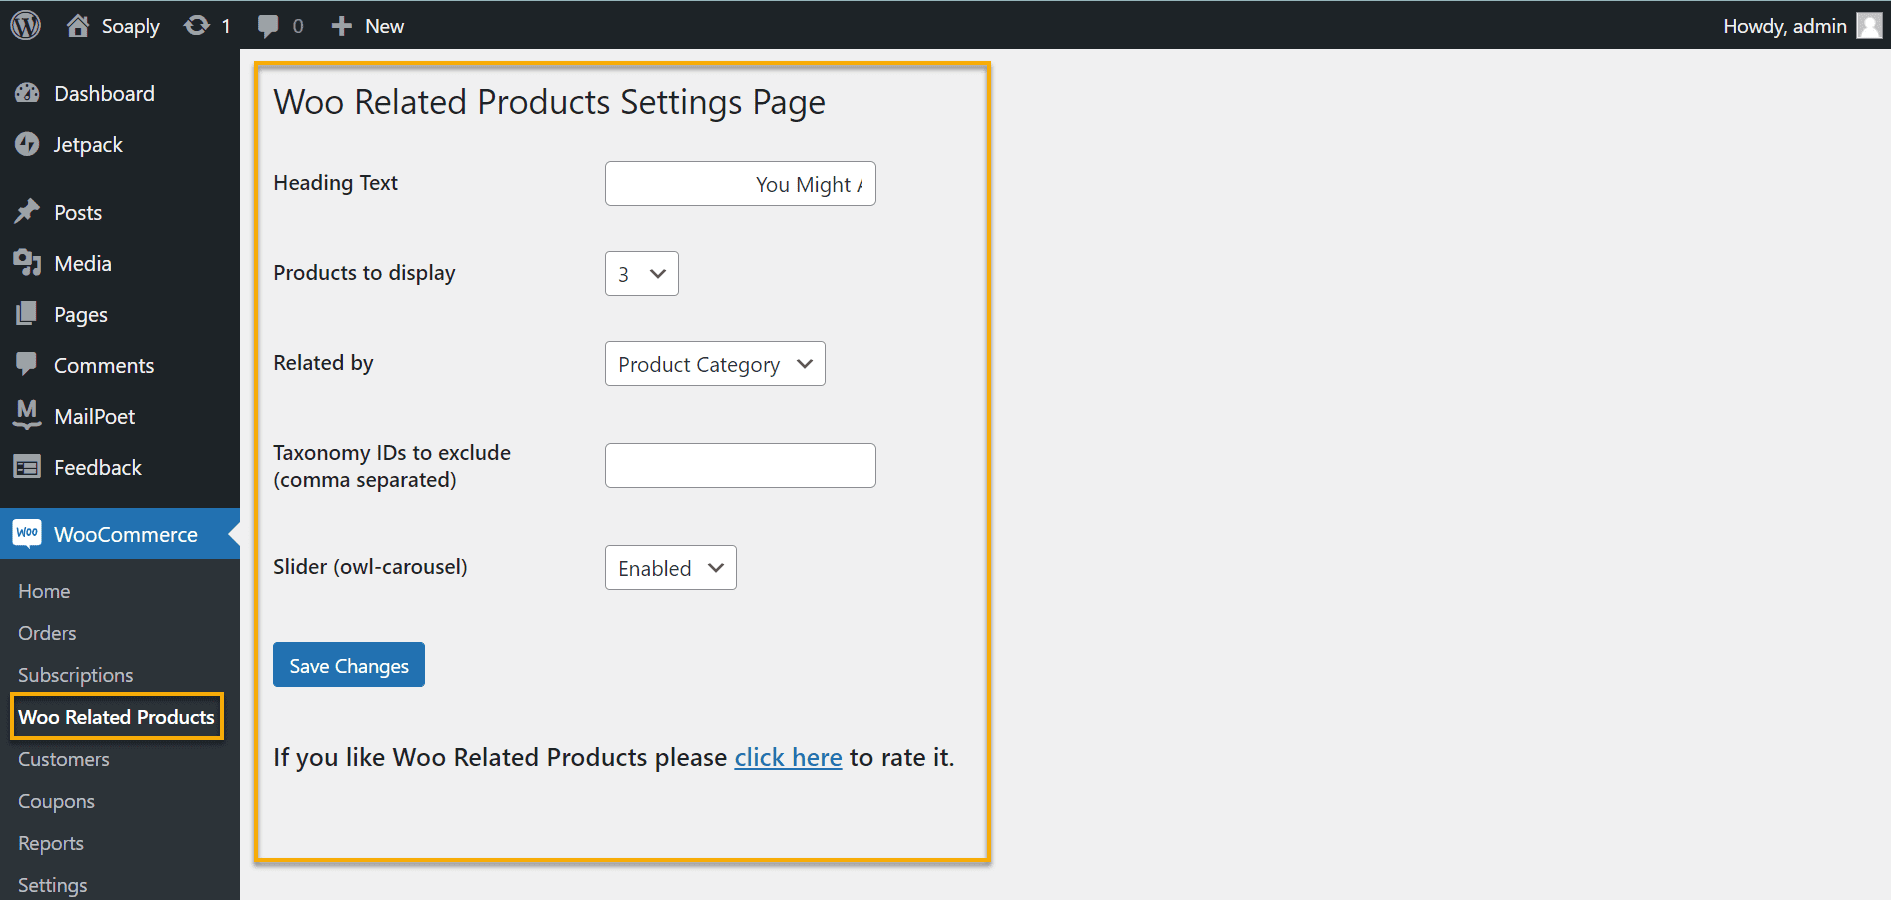
Remember to hit Save Changes before you exit the Customizer.
The one thing that a plugin does differently is set some ground rules when it comes to feature products as related products or products that one might like. For example, with Woo Related, you can choose whether or not you want to categorize products based on their tags or the categories you already have going on.
So, if you have two products that share the same tag, you will see them in the ‘related products’ section. For example, our oatmeal and olive oil soaps have the same tag, ‘fragrance-free,’ and if you click on either one, you will see the other one as a reference at the bottom of the page.
Ch. 7: Set Up Filtering and Sorting
When installing WooCommerce, you’ll notice a product sorting filter with standard classifications like popularity, average rating, latest, price, etc. This is a built-in feature of WooCommerce, as we’ve seen before. This feature enables your customers to quickly select products based on their preferences, add them to their cart, and check out from your store.
Head over to WooCommerce → Settings → Product Tab to enable the default WooCommerce product sorting. You can see the available default product sorting in the drop-down menu, which consists of different classifications such as price and popularity.
However, if you’d like to give your store a little extra flair, you can opt for the YITH WooCommerce AJAX Product Filter.
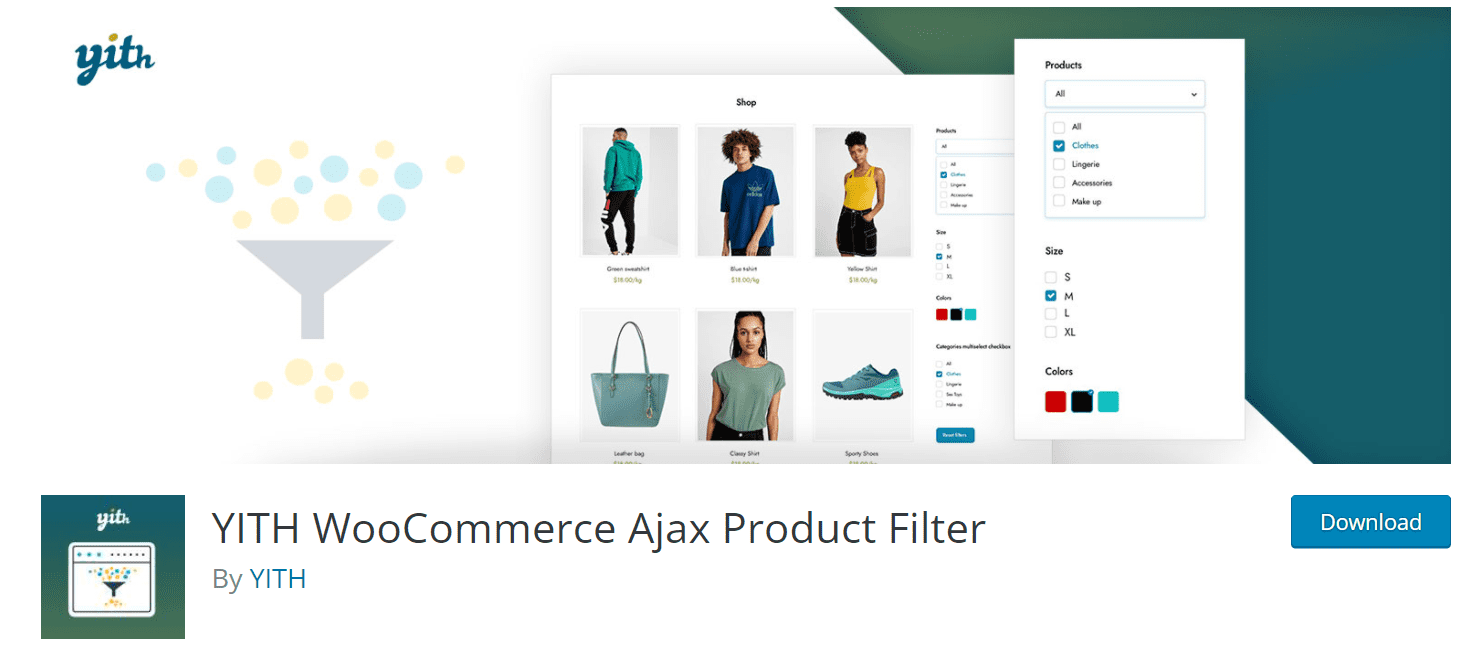
The plugin makes it easier for your customers to find the products they’re looking for while improving their overall user experience. YITH WooCommerce Ajax Product Filter allows your users to filter products based on their needs (category, size, color, brand, price, and more).
It is a simple and powerful tool to direct your customers to their ideal product, speed up the purchase process, and improve your online shop’s conversion rate.
Plugin features:
- Filter the results by product category.
- Filter results by tags.
- Filter product attributes.
- Select the order of the terms.
- Scroll-to-top option on mobile and desktop devices/ SEO options: Activate or deactivate the indexing of the generated URLs in search engines for the plugin’s filter operation.
How to use this plugin:
First, activate the plugin from your Dashboard, then head over to YITH.
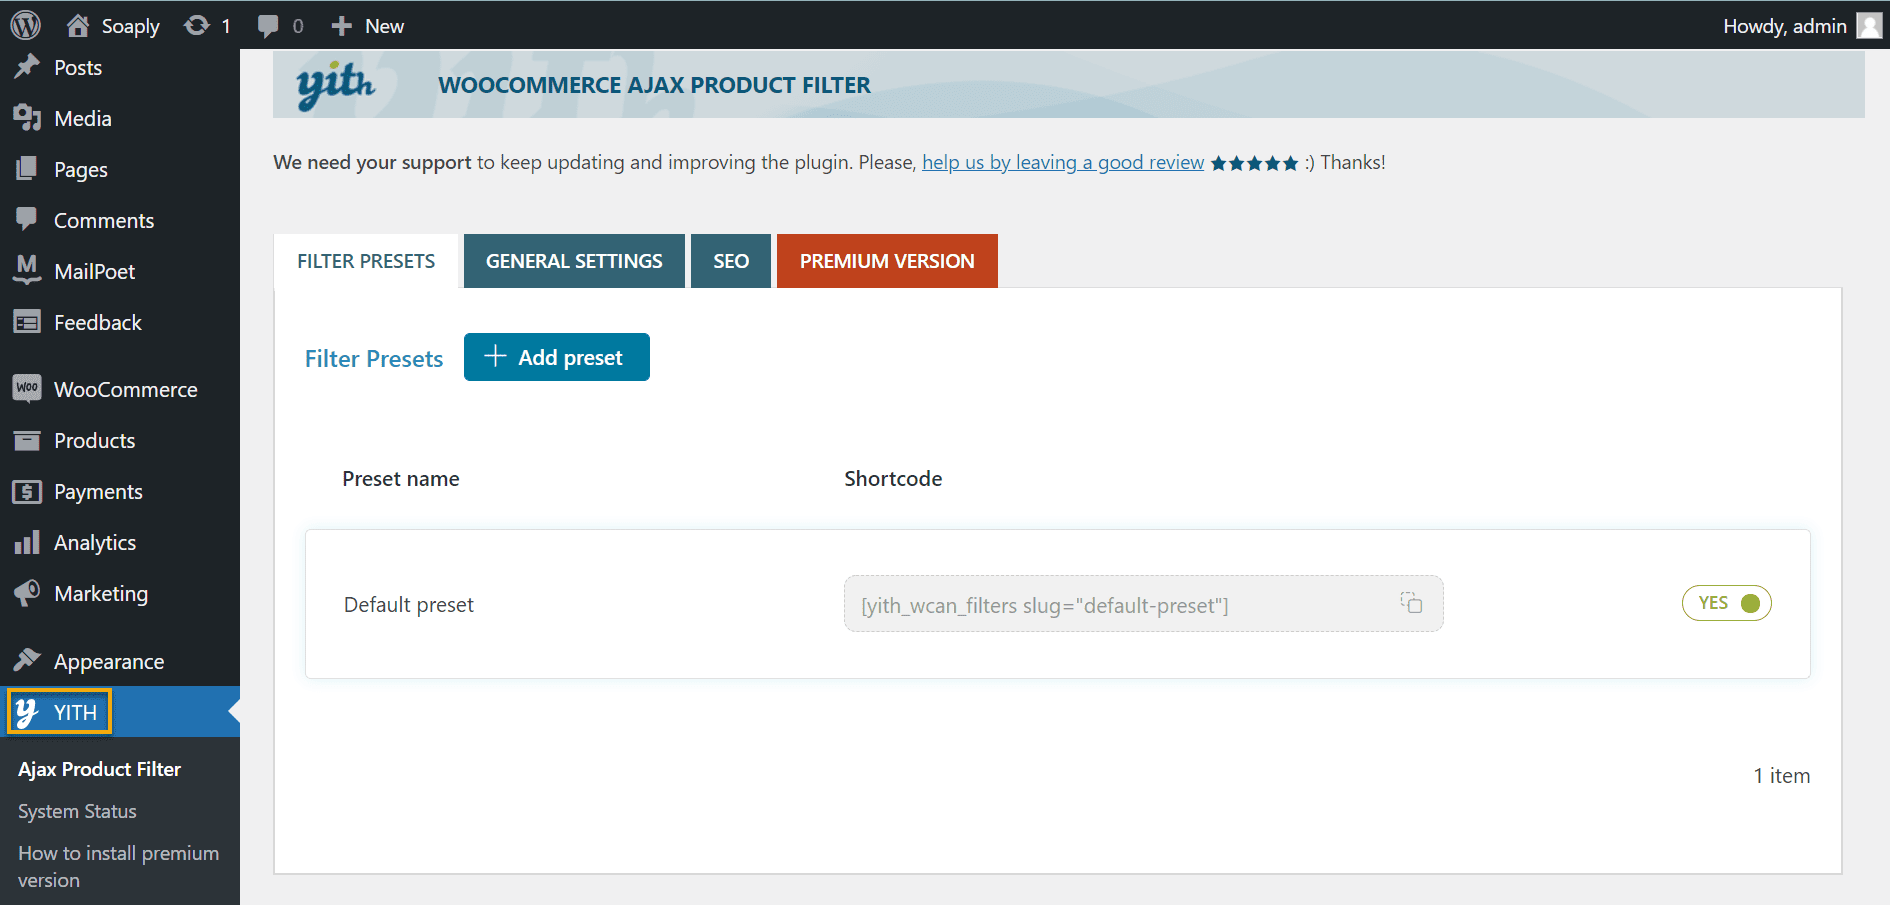
You will be able to create an unlimited number of groups of filters (labeled “presets”) using the plugin administration panel. You can use the widget, the shortcode, the Gutenberg block, or the Elementor widget to choose which filters to show and where this preset will appear for each preset.
One thing to remember: if you want to display your custom filters in the shop sidebar, you must use the built-in widget, and you will see the filters after a few clicks.
To configure the AJAX Product Filter Widget, go to Appearance → Widgets.
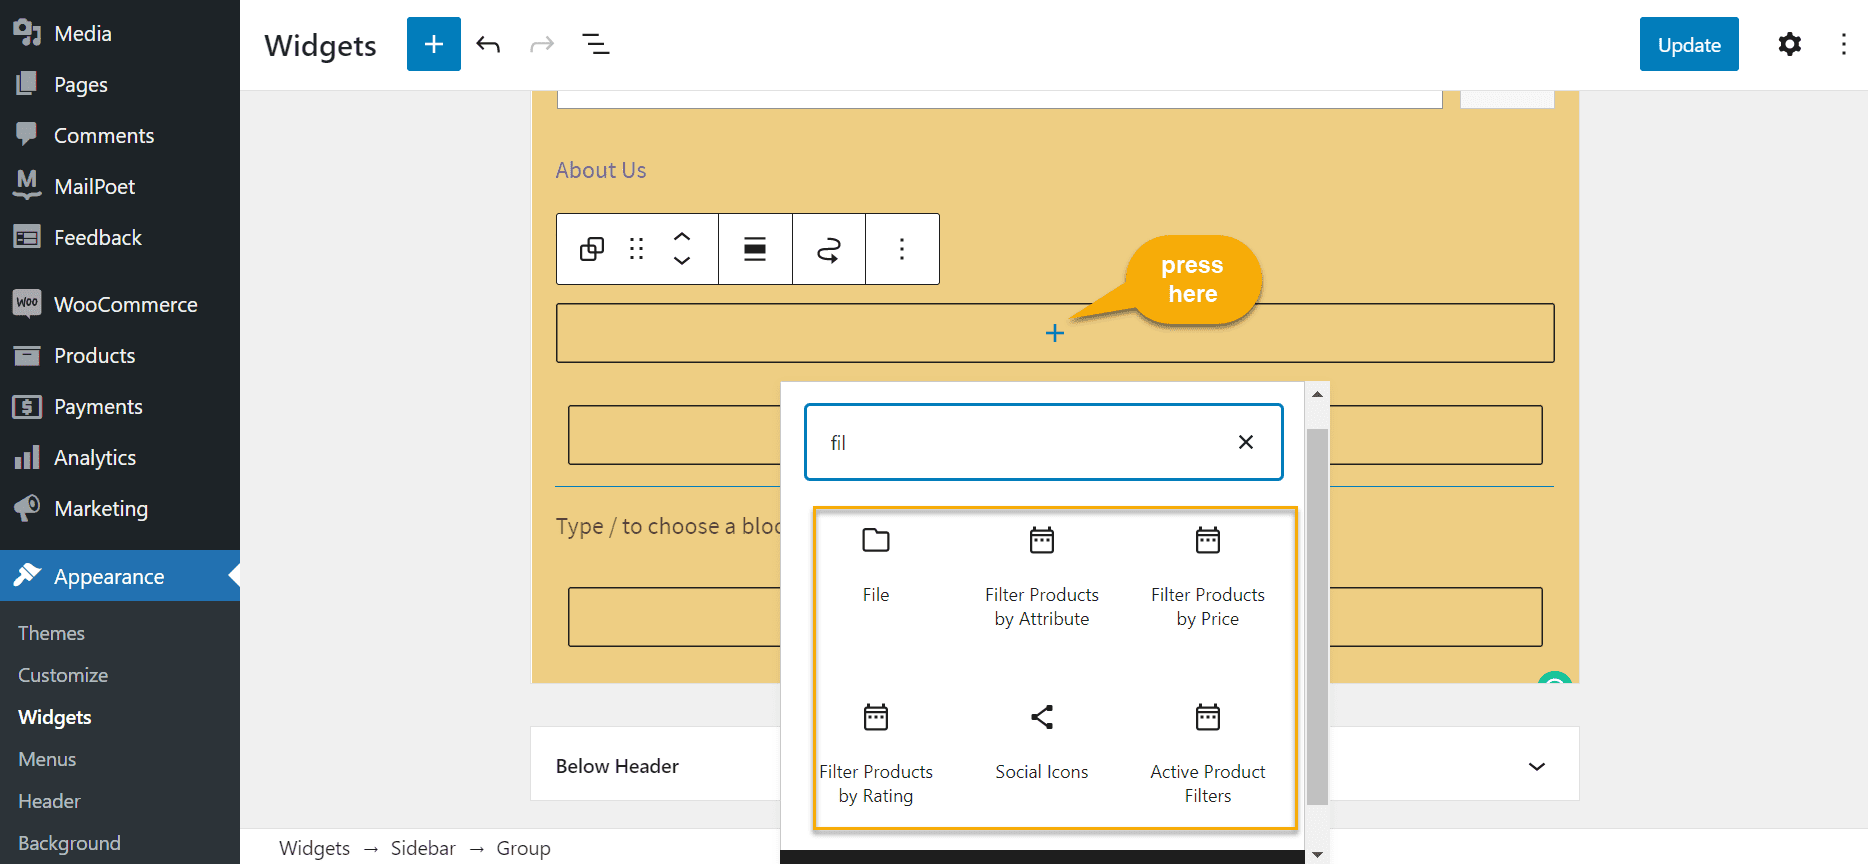
Here you can choose which filters you want to appear in the sidebar, where people can look up your products directly from the search bar. So, for example, if someone types in “fragrance-free,” they will only see the products from that specific category.
For example, let’s search for our lavender and bergamot soap, but without looking into the categories, instead typing it in the search bar.
So for starters, we’re going to head to our store’s main page and type in ‘refreshing soap’ into the search bar.
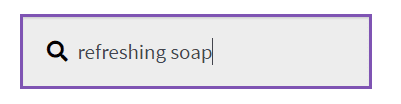
After hitting Enter, the first product that pops up is this one:
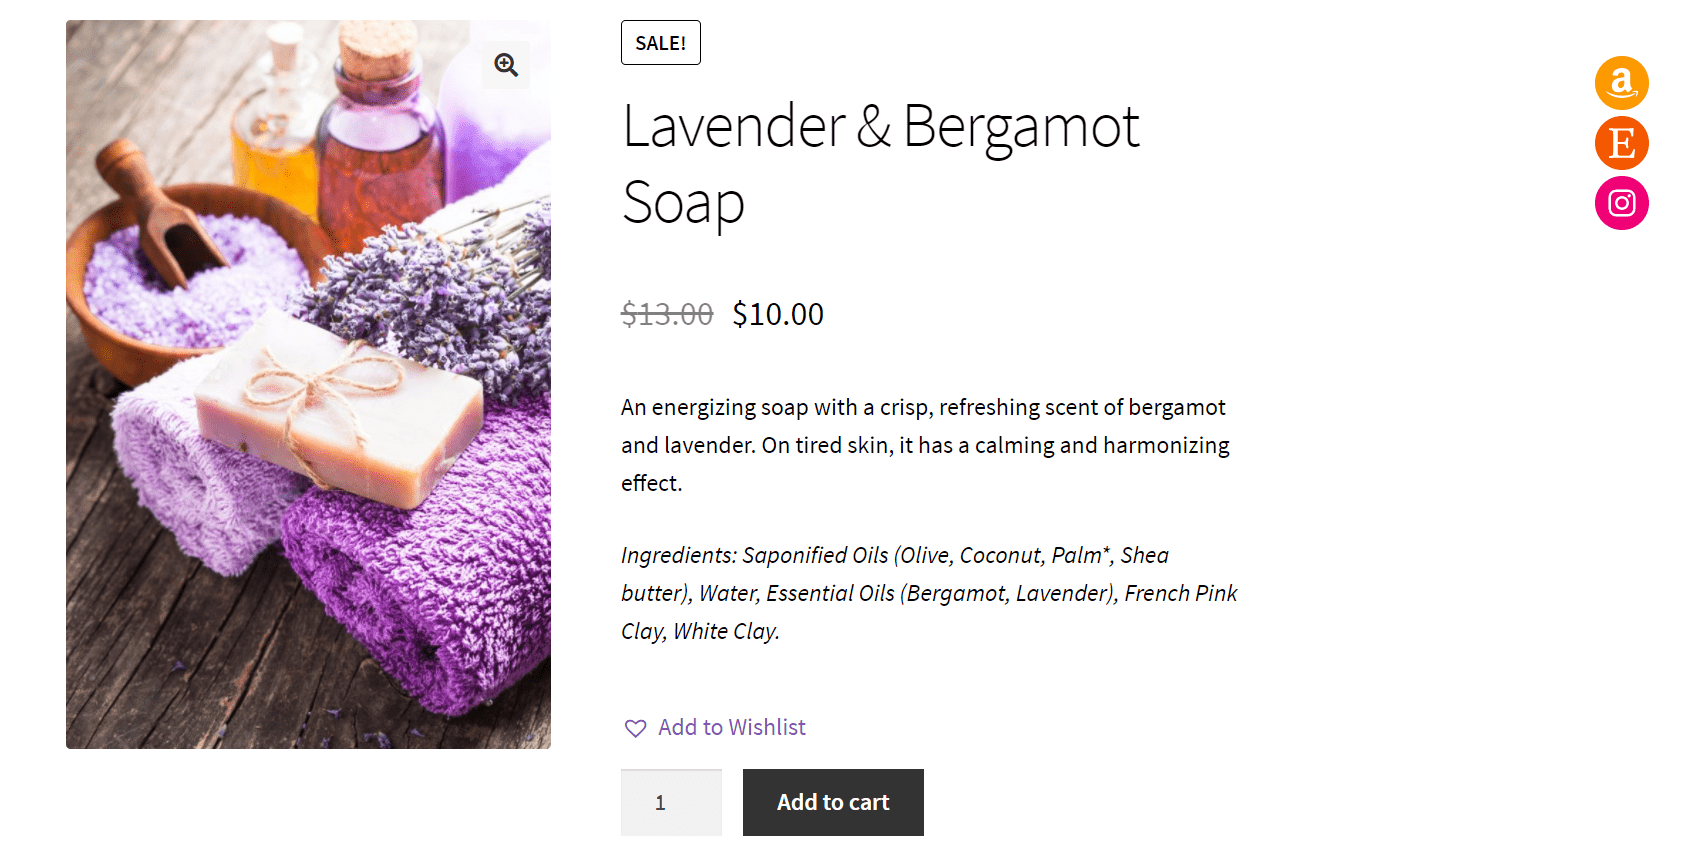
Surprise! Want to know why? Because this product’s tag features one labeled ‘refreshing soap.’

And by adding certain tags to each product, you will ensure that they belong to a category.
And now, because no online store will do the trick without this particular component: Wishlists.
Ch. 8: Set Up Wishlist

Like a piggy bank, a wishlist is something that people turn to when an impasse happens.
Aside from the obvious benefit of improving the customer’s shopping experience, wishlists can provide online retailers with much more profound, strategic value. For example, a wishlist allows customers to save items “for later” if they cannot commit to a purchase and find them quickly when they return to your store.
We’ll recommend using a plugin, such as TI WooCommerce Wishlist, for this specific part of your guide.

Plugin features:
- Select the Wishlist page and name.
- Remove the product from the wishlist automatically after adding it to the cart.
- Position of “Add to wishlist” button on product page and catalog.
- Shortcode for the “Add to wishlist” button to place it anywhere on the page.
- “Add to wishlist” Button or Link on the product page.
- Predefined icons for the “Add to Wishlist” button.
After installing and activating the plugin, the setup process will automatically begin.
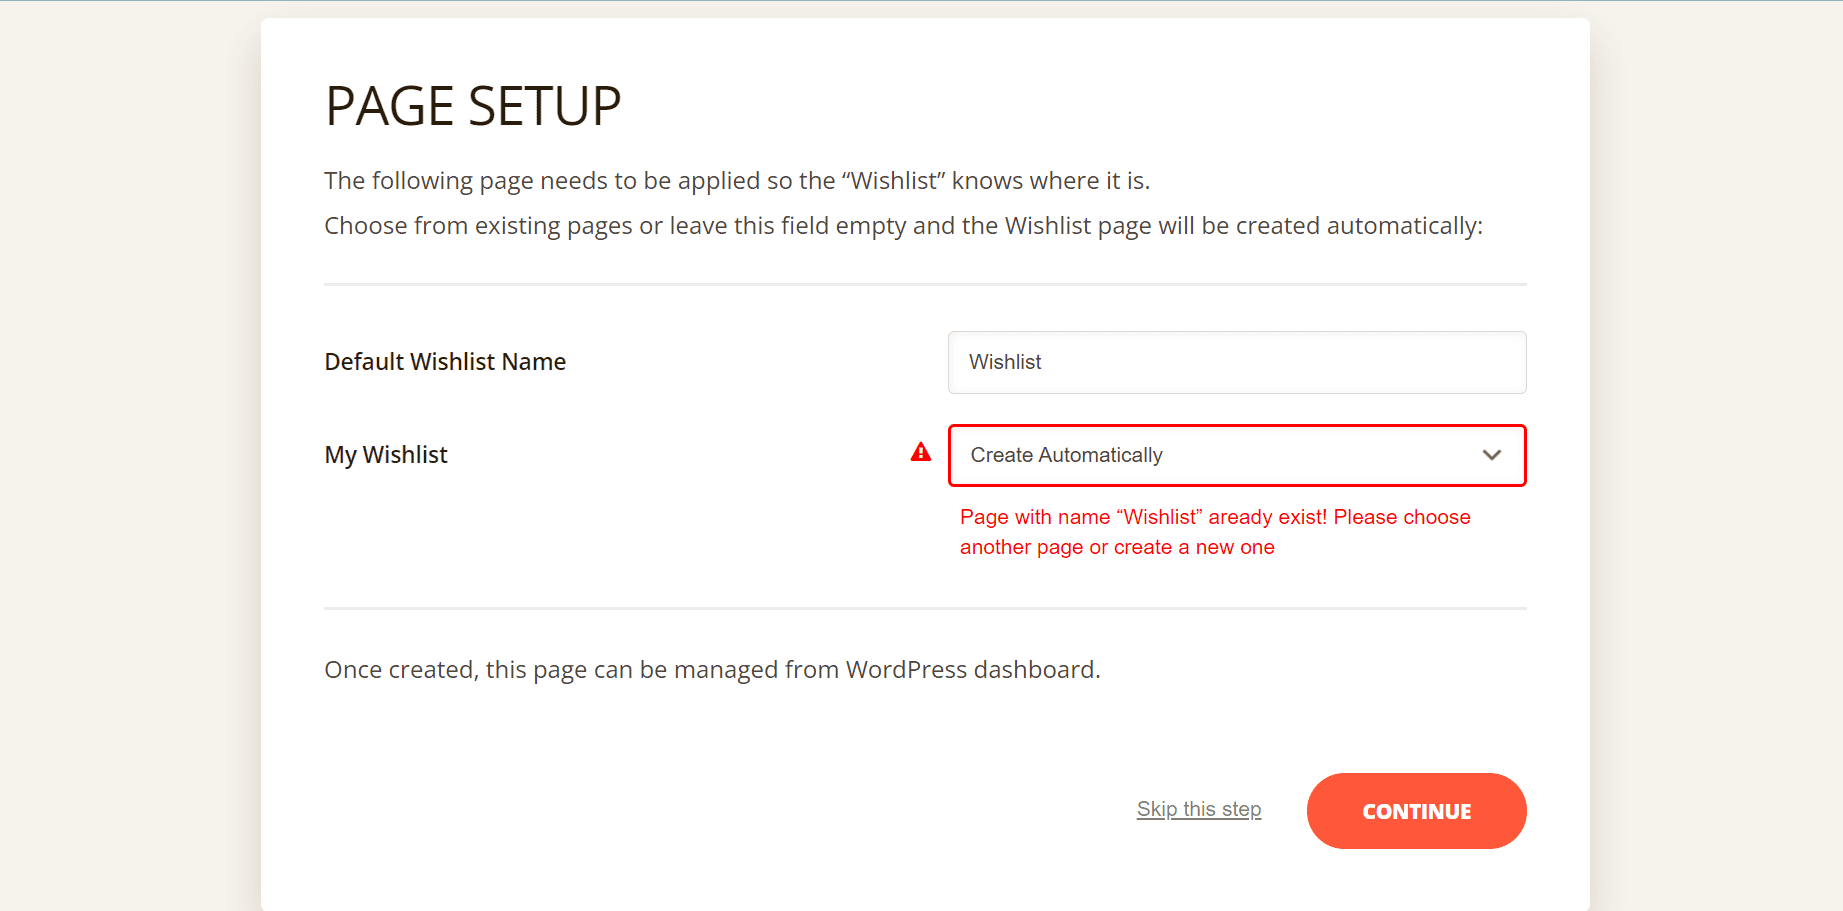
Here you can name your wishlist and choose the page you want to display your wishlist.
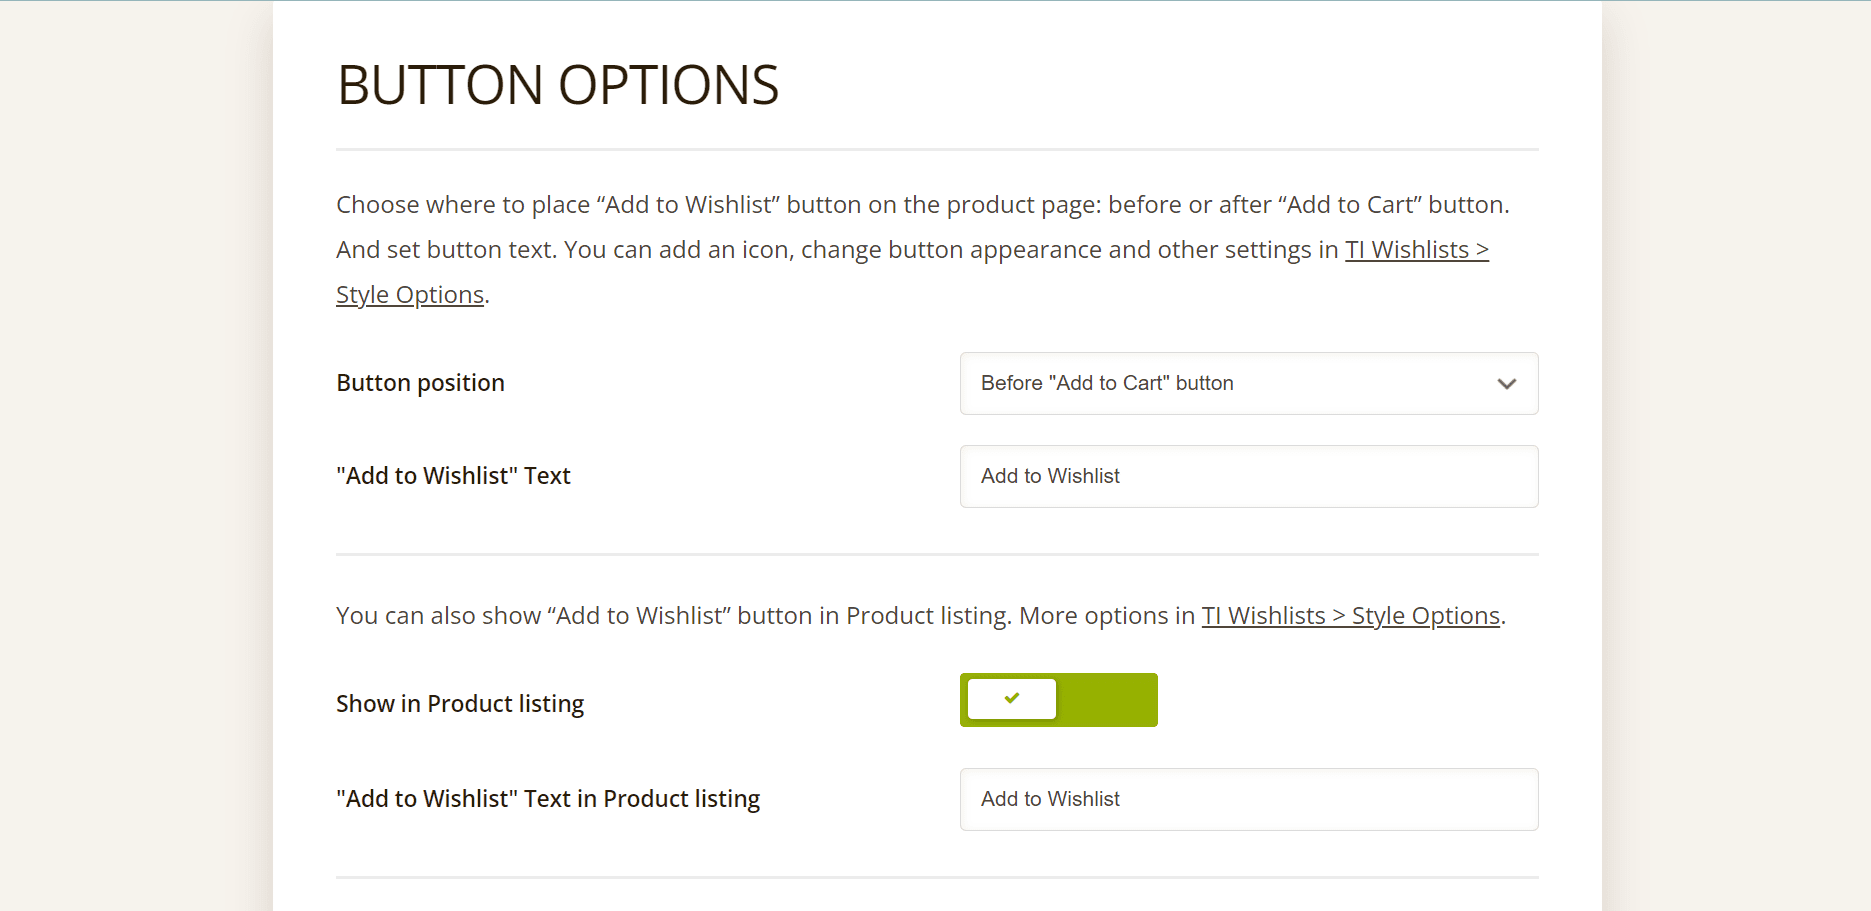
Next, choose whether you wish to display the wishlist icon before or after adding products to your cart.
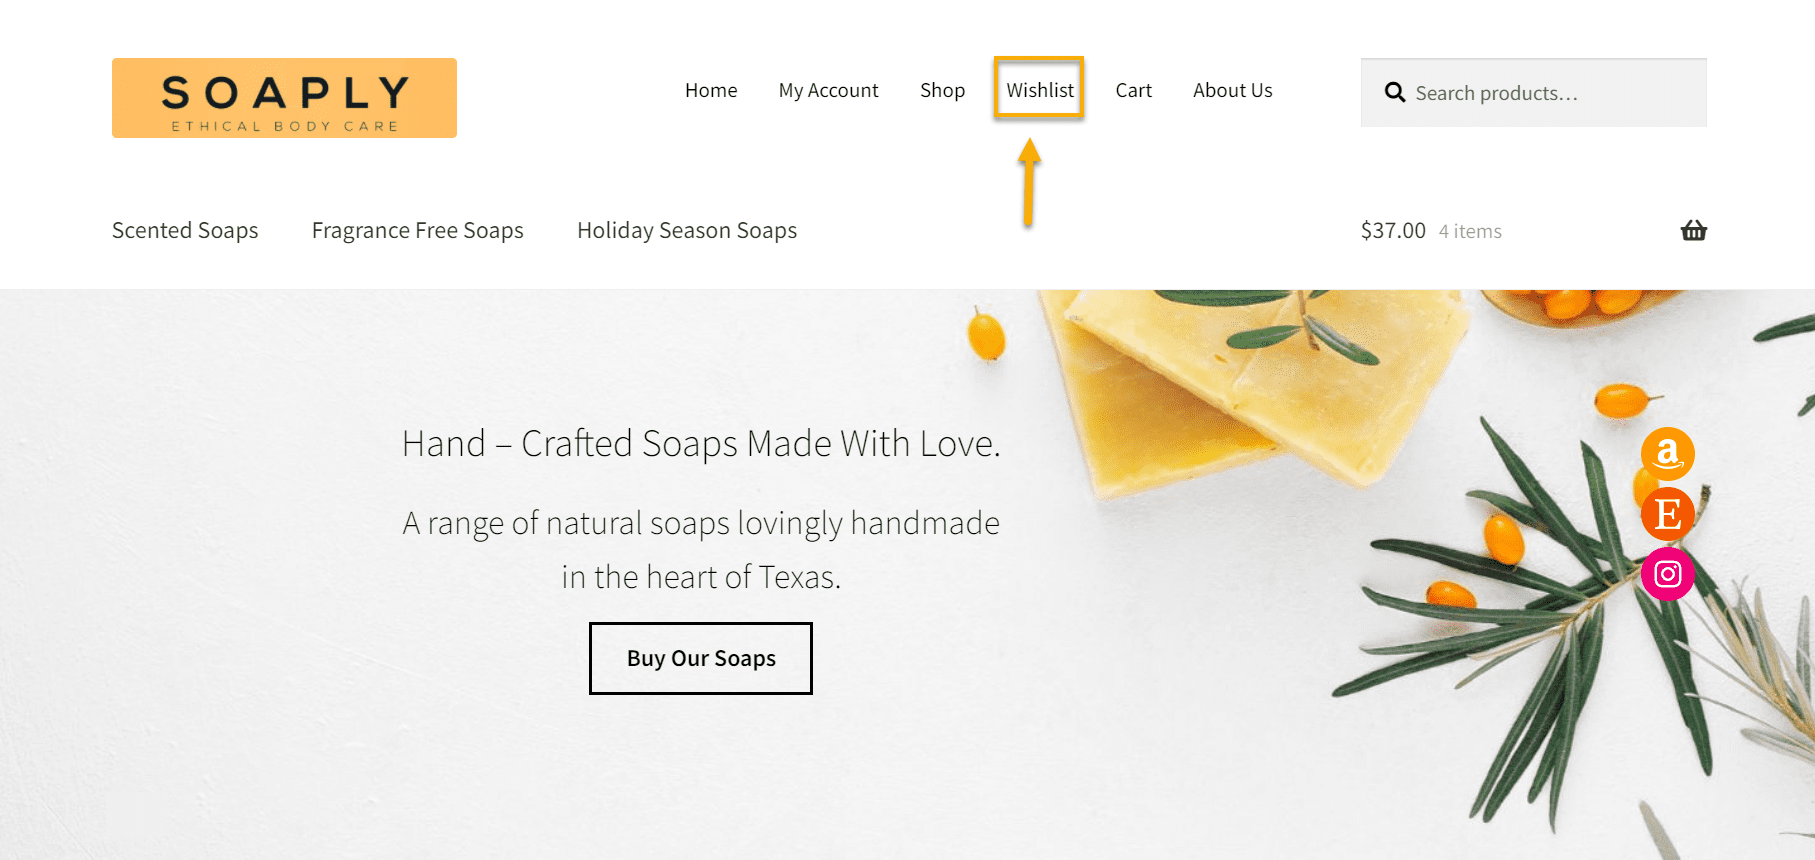
Once you set everything up, the wishlist will appear in the menu for a more significant user experience, and you will see the icon below every product your store has.
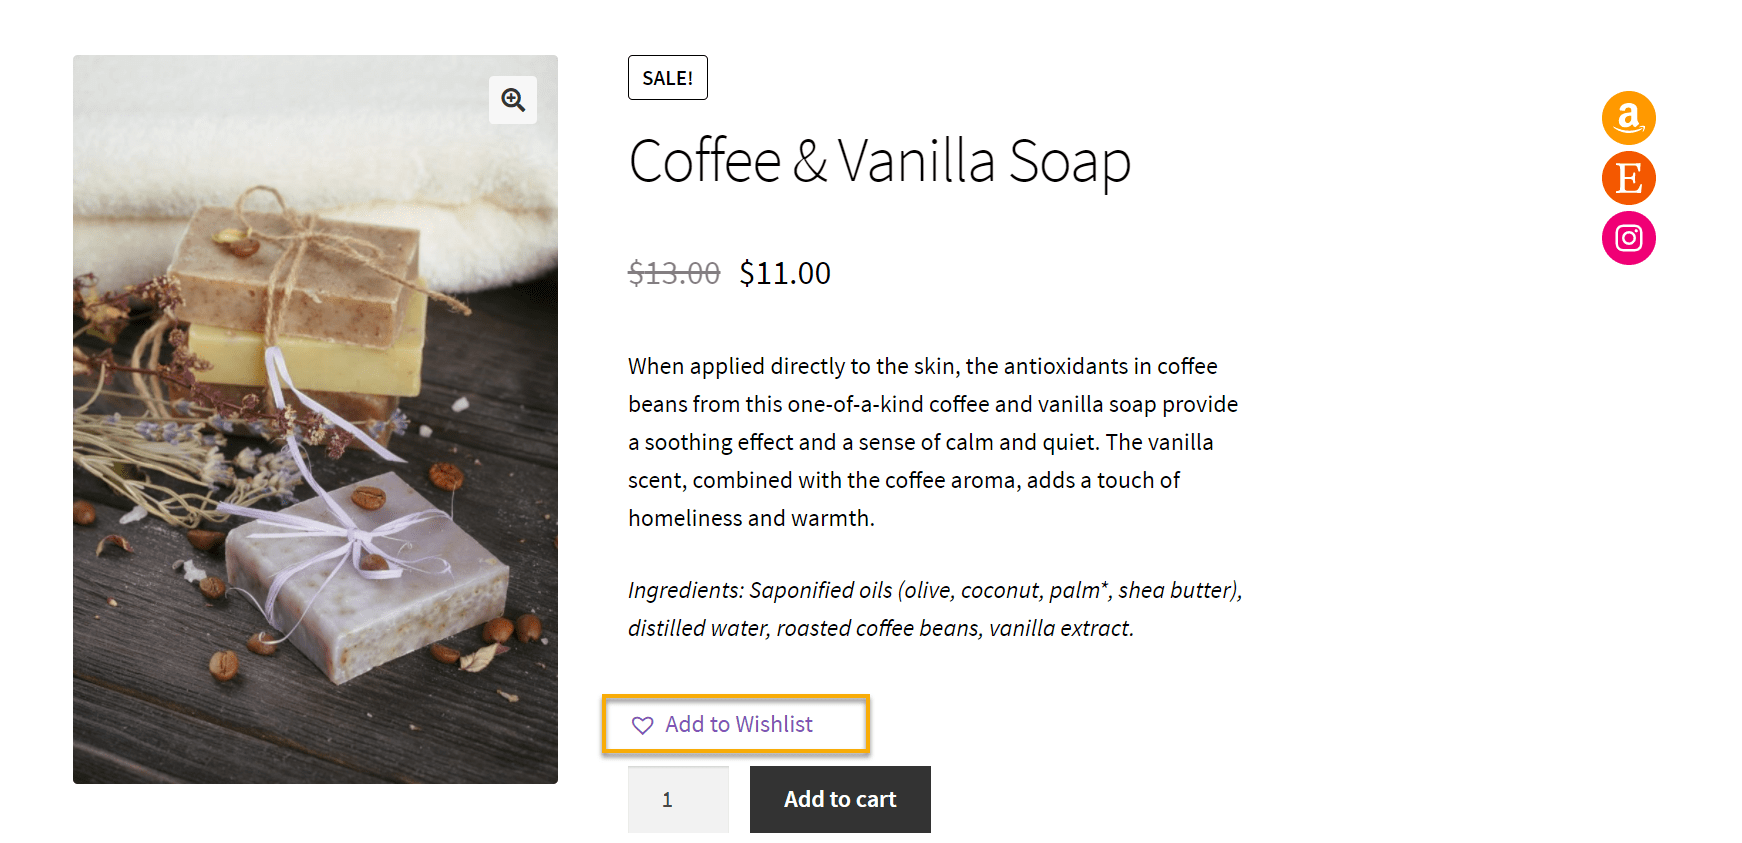
Lastly, if users want to check out the products they’ve added to their wishlist, they can easily click on the ‘Wishlist’ tab from the menu.

The good thing about this wish list is that it comes with an in-built Add to Cart button, which incentivizes the user to go ahead with the purchase.
And with that being said, we’ve reached the last piece of the puzzle: 👇
Ch. 9: Set Up Shipping & Payment
This is a crucial part of any eCommerce store. We need a smooth checkout flow, a good payment gateway, and a shipping process for income to happen.
A payment gateway is a web-based platform that connects your business to your bank, allowing you to accept and process payments. Your customers will be unable to complete the checkout process without it; for more information on the topic, head over to our article, where we discuss it in detail.
We will go with WooCommerce PayPal Payments for this element of our store.
This plugin is PayPal’s latest version and most straightforward payment processing method.
Plugin features:
- With a one-to-one connection to the PayPal service, you can complete your transaction faster.
- The PayPal Express checkout button can appear on the WooCommerce checkout page, the shopping cart page, or a single product page.
- Sell in over 200 markets and accept over 100 currencies.
- Recognize customer locations and provide country-specific local payment options.
How to use this plugin:
Install the plugin from your Dashboard, then navigate WooCommerce Settings and click the Payments tab.
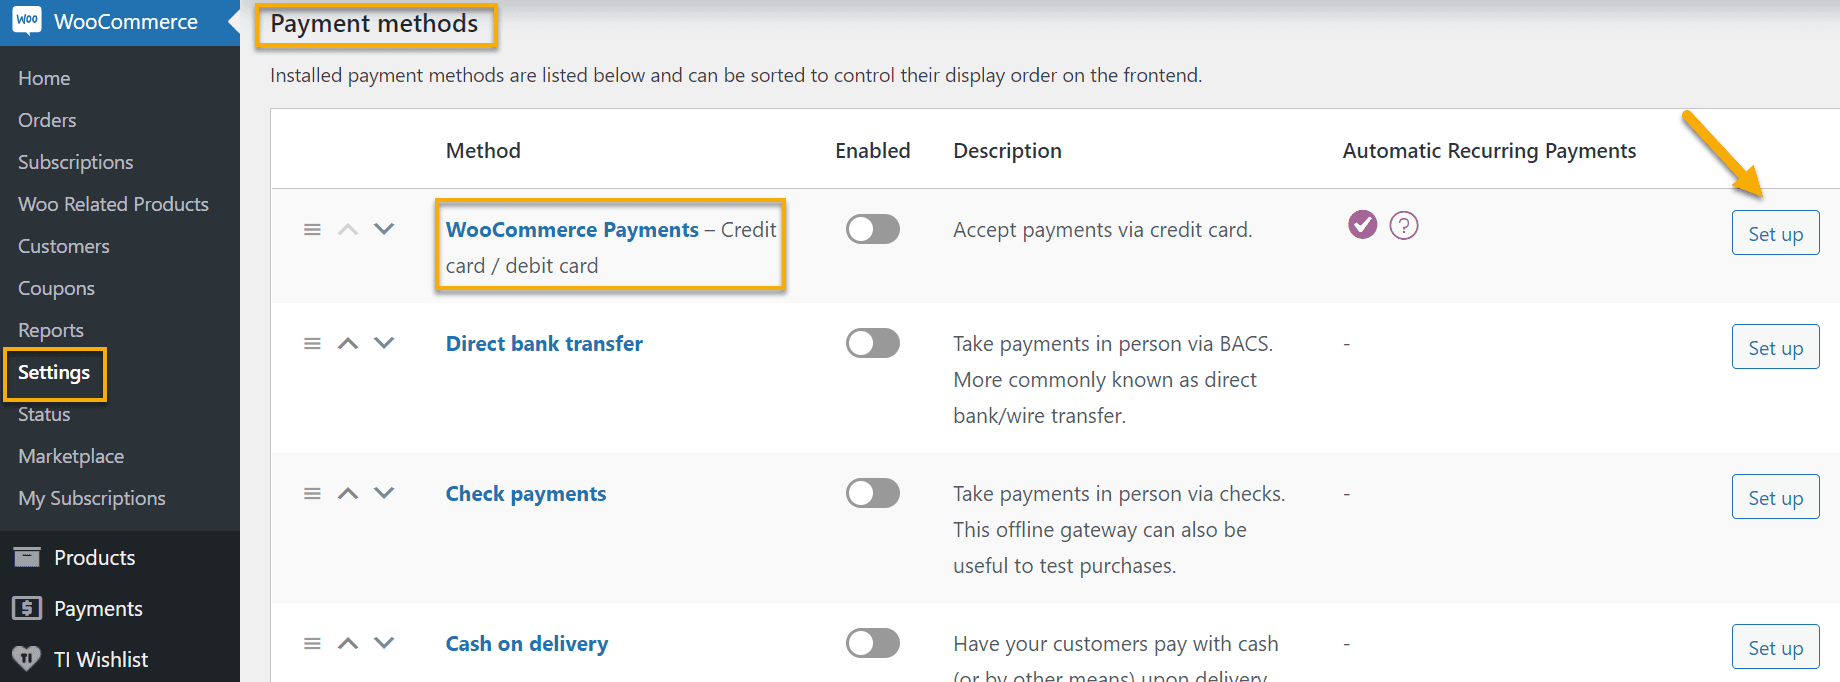
Hit Set up, and it will take you to the plugin’s configuration page.
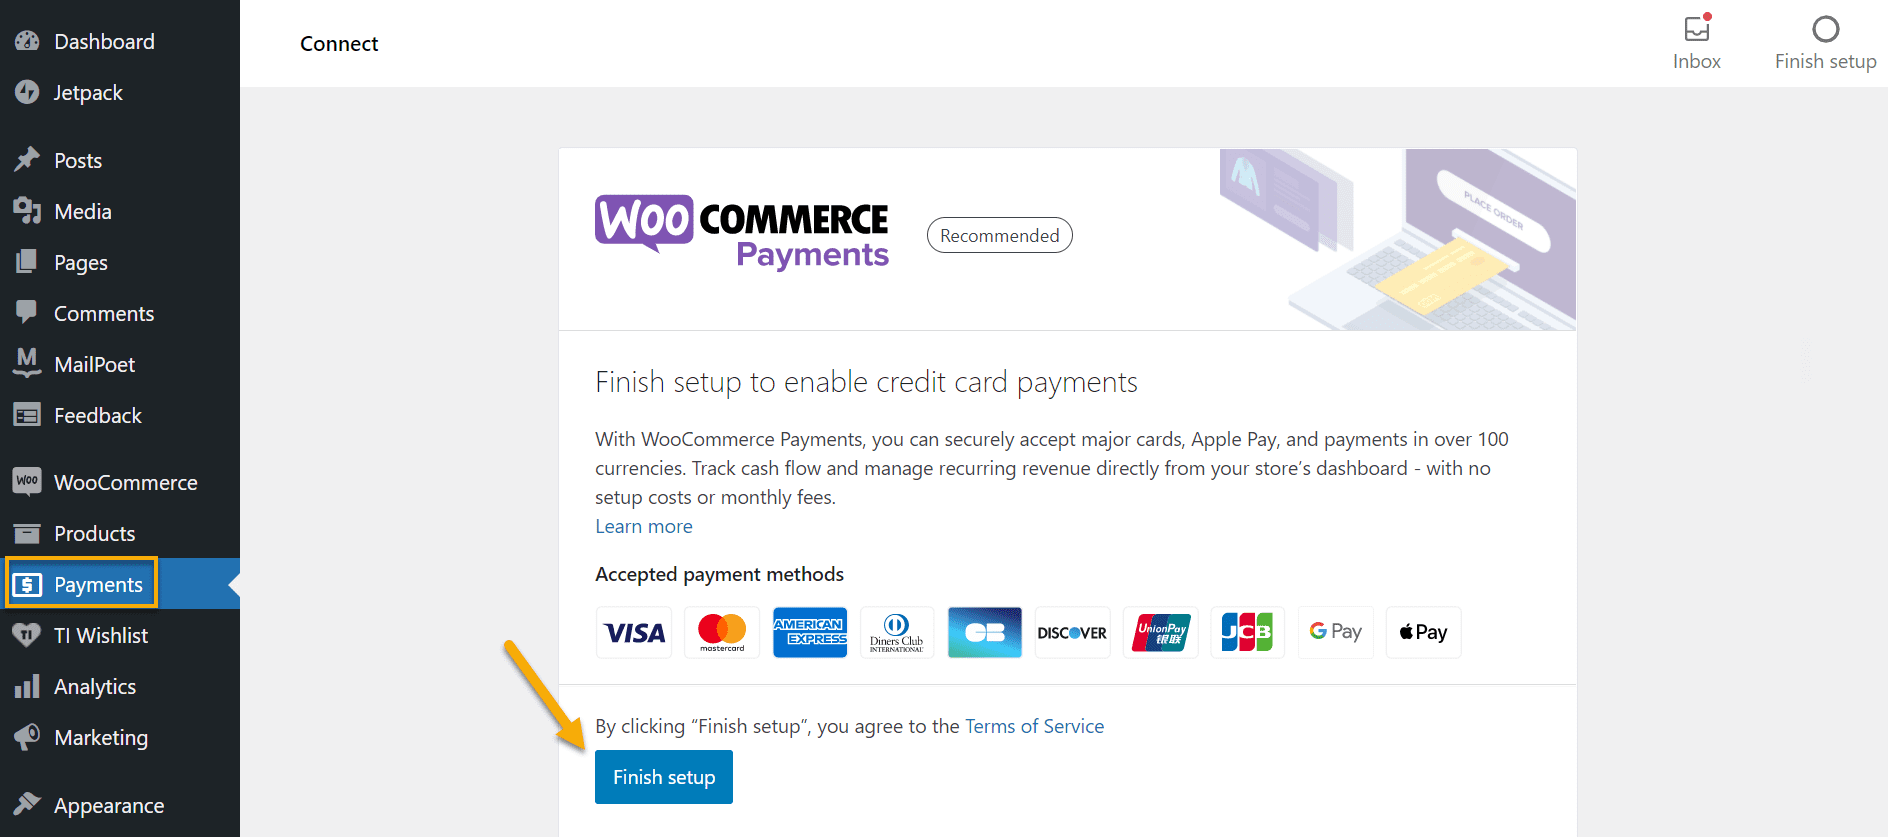
The last steps will require you to provide personal information such as your email address, phone number, social security number, store address, etc. Once this is all done, the WooCommerce PayPal Payment integration will be a success, and you will be able to accept payments securely.
Take a closer look at our checkout page.
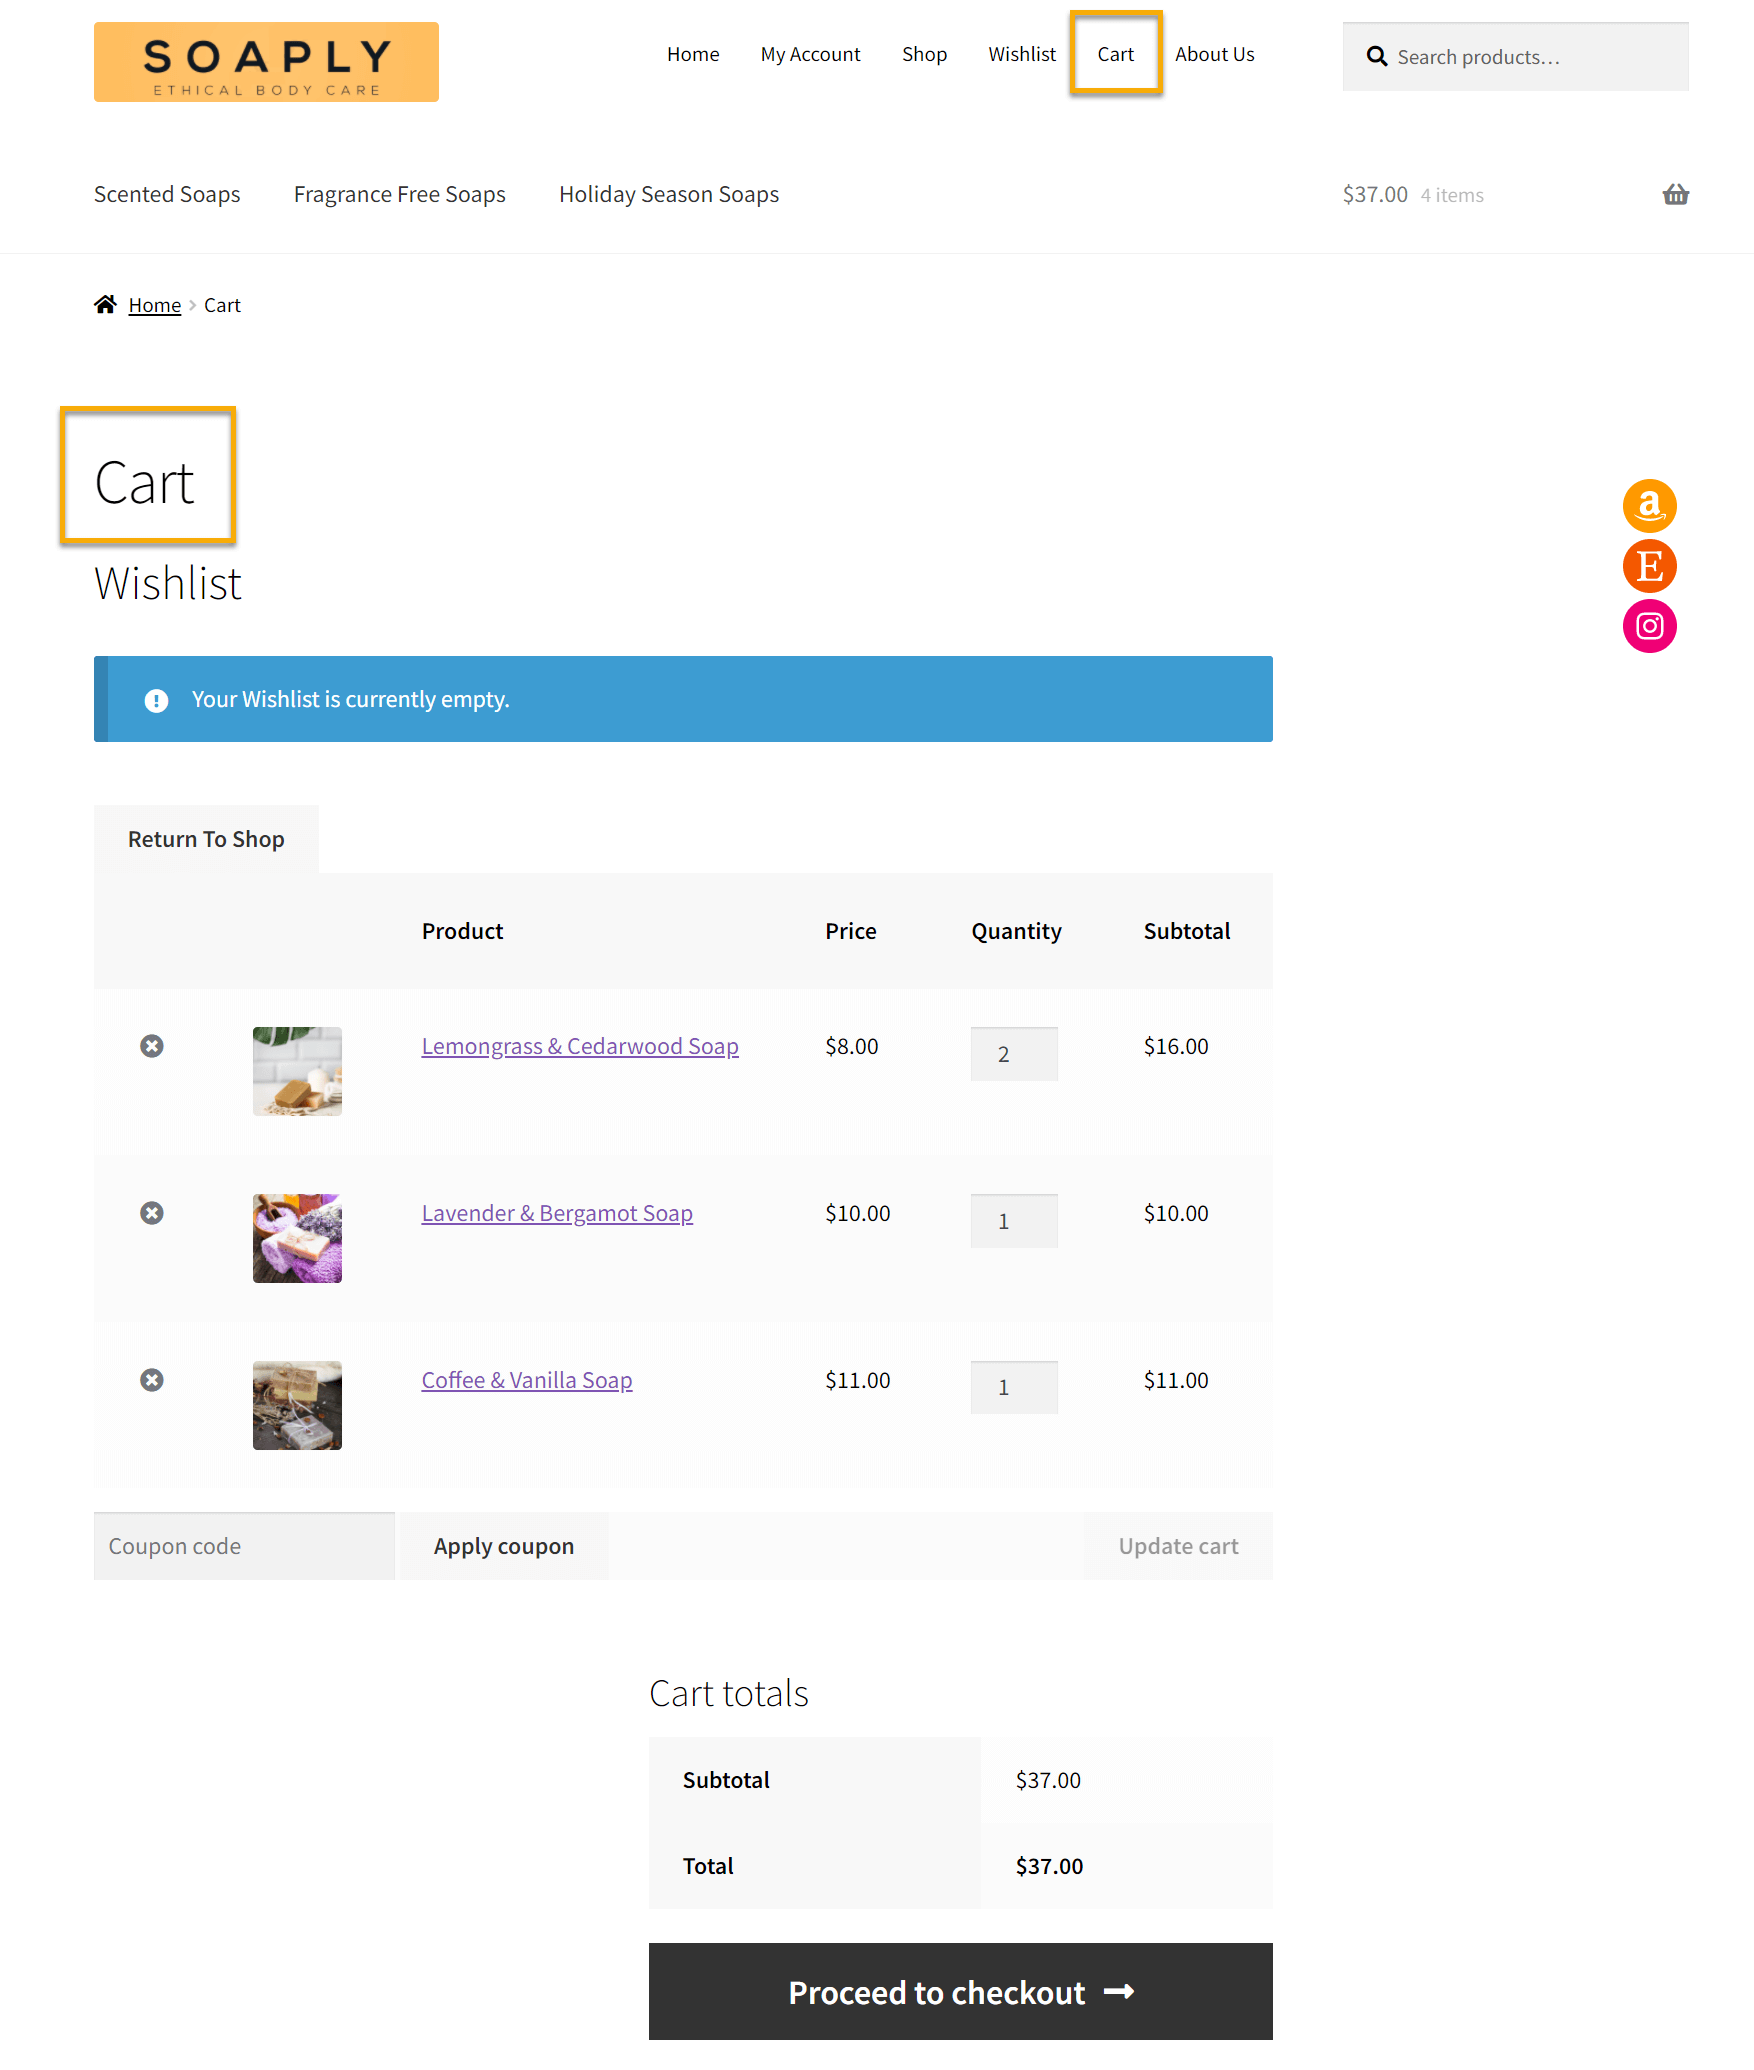
It features all the products that a customer has placed in the cart; it has a coupon code bar for a possible sale option, the cart totals, and the checkout button.
Now, if you hit Proceed to checkout, you will be taken to the checkout page, which looks like this:
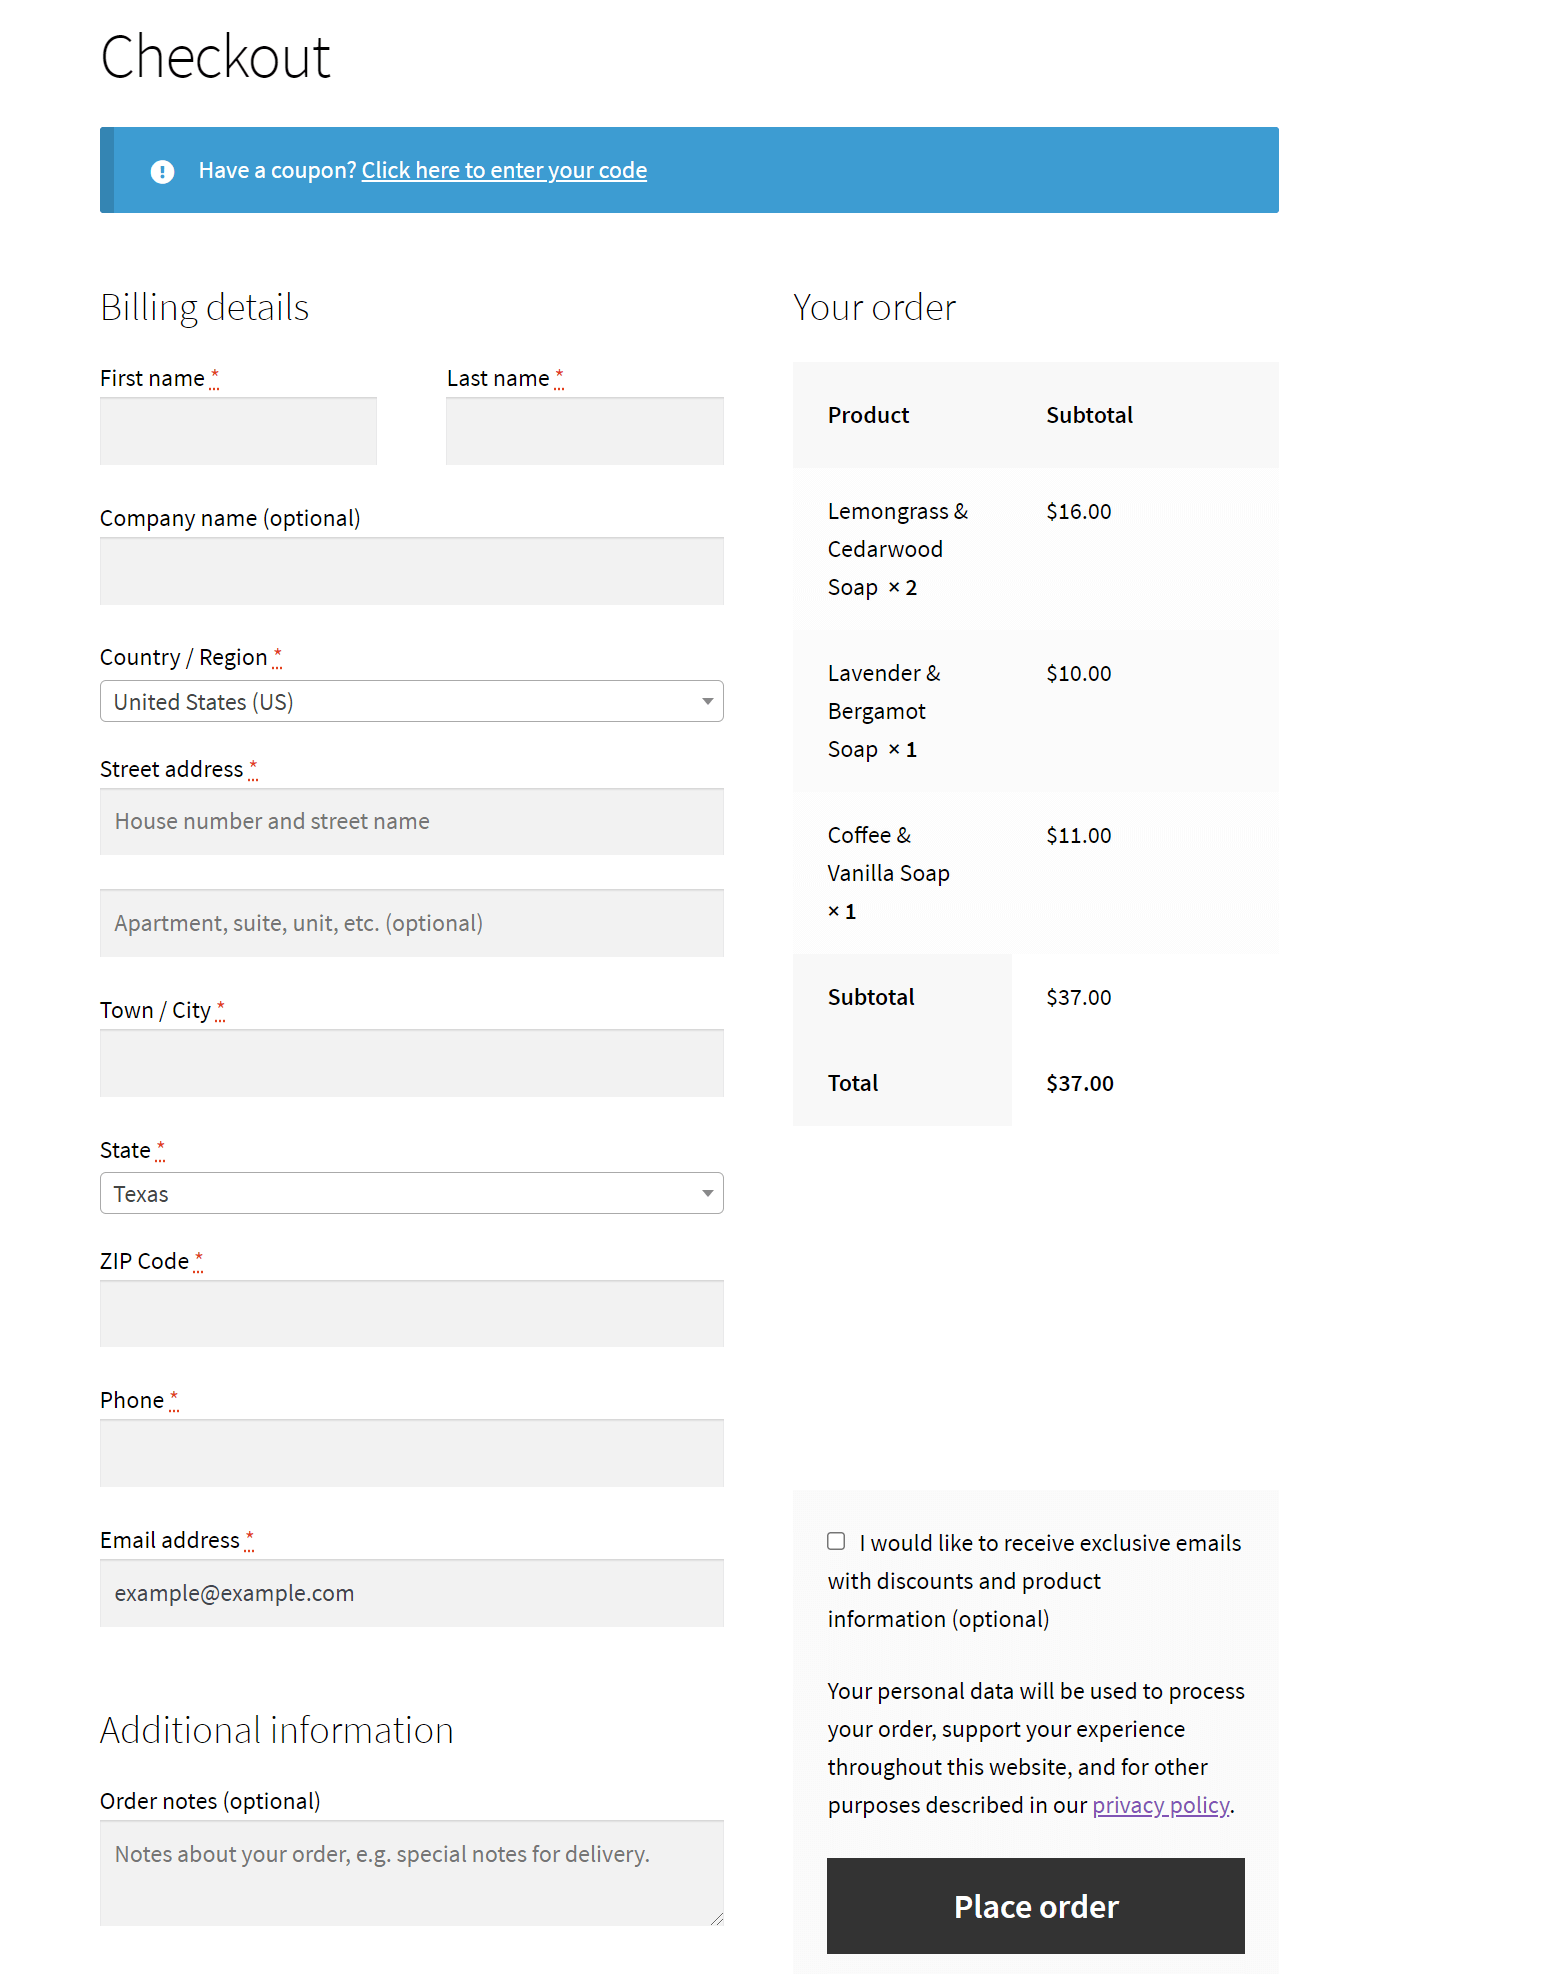
As you can see, it contains all the necessary billing information, such as an address, town, state, zip code, phone number, email address, and additional information for the delivery. In addition, one right sidebar features the total amount that needs to be paid, a personal data notice, and a checkbox that indicates exclusive discount emails for the client.
Nonetheless, cosmetics stores can provide user area/order management via user profiles created with ProfileGrid. These WooCommerce User Profiles allow users to display information from their WooCommerce carts on their Profile pages.
Now, it’s important to mention that before you go live with your shipping method, you should always give it a test just to avoid atrocities ;).
Payment Testing Survival Kit
We recommend you carefully review this pre-launch testing checklist before putting your store at risk.
- Test a product from each shipping class and the shipping zone you create. Are your rates correctly calculated on your Cart and Checkout pages?
- Experiment with different product combinations and cart sizes. Are discounts and free shipping being applied correctly?
- Complete the entire checkout process. Is everything in working order? Would you make any changes?
- Are tracking numbers attached to customer emails and available on account pages if you have tracking information set up?
If all of the above is ready to roll, you should start accepting orders and adequately selling your products.
Over to You
You’ve reached the final destination on the online store virtual train ride, and you should pat yourself on the back!
All we’ve mentioned above will make it easier for you to carve your way into today’s marketplace and try to stand out. However, there is always room for improvement and learning.
We hope our guide has lent you a helping hand. Now, are you ready to go on air with your store?

Gabriella is a Digital Content Writer and Marketer with a zeal for all things WordPress. When she’s not researching and drafting the upcoming articles, you can find her in the open air exploring the outdoors with her dog.


Comments are closed